
A group of projects can be gathered and made available for clients by adding them to a product. This product will later be associated with a subscription to client(s), which is secured by an API Consumer Key.
This section gives descriptions of the properties available in the Products section. Refer to the Adding Products, Clients and Client Subscriptions section for step by step instructions on how to add a product.
In the New API Product dialog box that appears on clicking the Add 
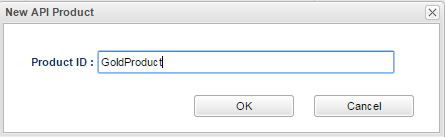
Figure 1: Dialog box to add product with a Product ID
Provide the following details under the Configuration tab to configure the product.
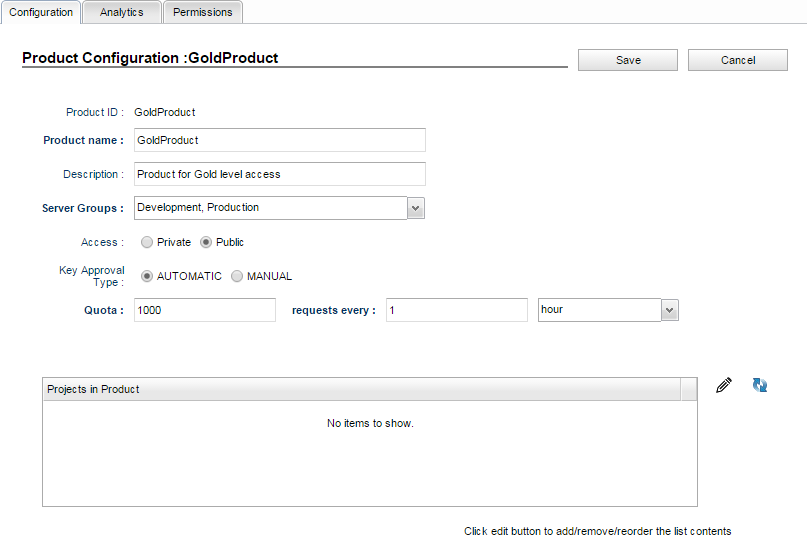
Figure 2: Product Configuration attributes
|
Attribute |
Description |
|---|---|
|
Product name |
Provide a name for the product that helps identifying the behavior of the product. |
|
Description |
Provide a brief description of the product. |
|
Server Groups |
Choose Server Groups from the options in the drop-down list. Please refer to the Creating a Server Group for Project Deployments section in the Quick Start page to add an Environment. |
|
Access |
Select the Private or Public option depending on the nature of access required. The products which are made publicly accessible will be made available for subscription in the Developer portal. |
|
Key Approval |
The Key Approval can be made automatic or manual.
|
|
Quota |
Provide the values that set a limit of requests that can be processed for the product. Provide a number and select the minute/hour/day/month from the drop-down list. |
Click the Edit 
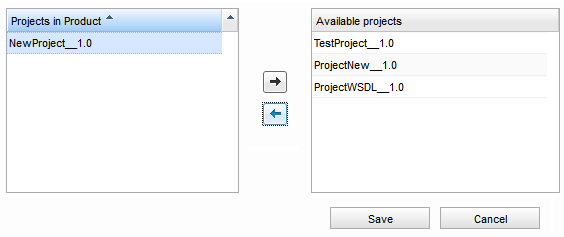
Figure 3: Editor to add existing projects to the product
Use CTRL/SHIFT to select more projects and then click the left arrow to move them all at once.
Click the Save button to apply the changes after adding project(s) to a product (clicking Cancel at this point discards the changes).
The new product gets added with the choice of project(s) and the preferred environment(s).
-
After saving the product, to edit the properties of the product, make the required changes in the configuration panel and then click Save again.
-
To remove a product completely, select the product under the Products tab in the left navigation panel and click the Remove
