Adding new Enterprise servers enable to maintain separate servers for different environments such as Development, Testing and Production.
Adding a new Enterprise Server
To add a new server, perform the following actions in Server Explorer view:
-
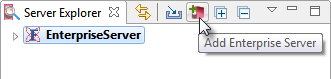
Click Add Enterprise Server icon

In the images provided in this page, it's been logged into EnterpriseServer, while a new server can be added without logging into any servers also.
-
In the Enterprise Server Name dialog box, replace the default name 'EnterpriseServer_1' to a logical name (Eg: TestingServer) that represents the purpose of the new server. Click OK.

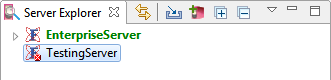
Wait for a few seconds for the new server to appear in the Server Explorer panel.
-
The small red cross on the newly added server indicates that the server is not configured
-
The previously existing server appears in green font representing the active server.
Configuring the newly added Enterprise Server
To configure the newly added server, perform the following actions:
-
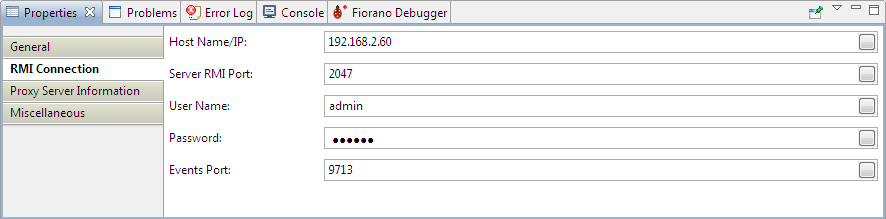
Click the newly added server and go to RMI Connection tab in the Properties panel.
-
Provide the host name or IP address of the new server and its password (default is 'passwd'). Now the red cross gets disappeared and Login/Logout options in the right-click menu of the node gets active.
Change the Port numbers if required
-
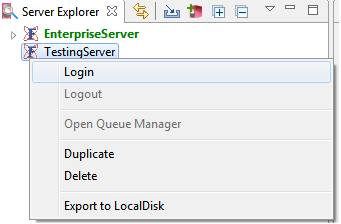
Right-click the node and click Login.
-
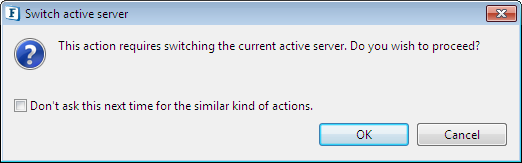
In case a server is presently running, Switch Active Server dialog box pops up prompting to switch server; Click OK.
-
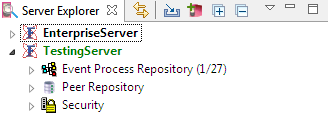
The new server font colour turns green and the sub nodes appear on expanding the new server node.
-
To switch between servers, refer the Working With Multiple Servers And Perspectives section.
-
To Export/Import an already configured server, refer the Exporting and Importing Servers section.
Deleting a Server
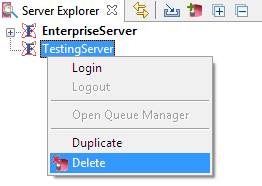
To remove a server from Server Explorer, log out from the server, right-click the node and select Delete.