
After every step illustrated below, ensure clicking the Save icon; else the changes won't be saved.
Creating an API Project
Refer the Manage API Projects section to create an API Project. Click the Details icon of the project under the Actions column to open it.

Creating a Monetization Limit Check policy
-
Click the Policies tab on the left navigation panel of the API Projects screen.
-
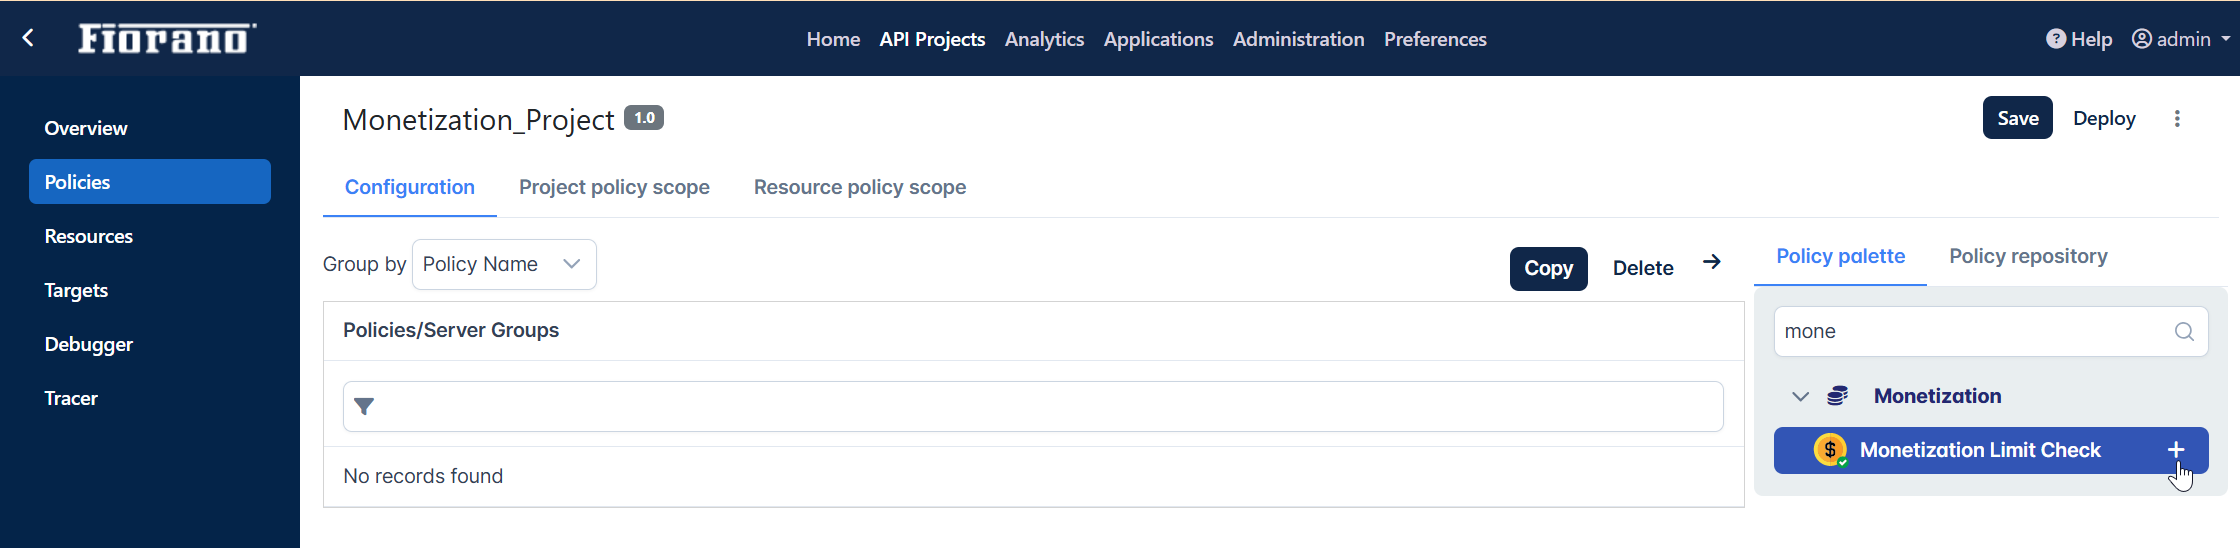
In the Policy palette, select the Monetization Limit Check policy.
-
Provide a name for the policy and click Add.
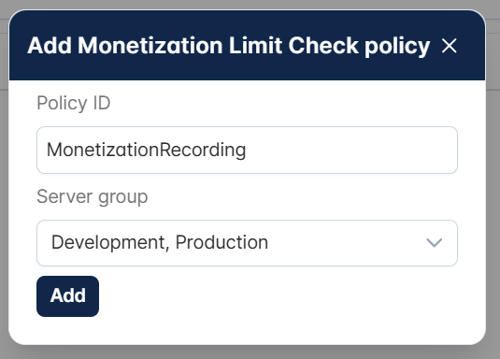
Refer to the Adding a Policy the Monetization Limit Check policy section to understand the policy configuration.
-
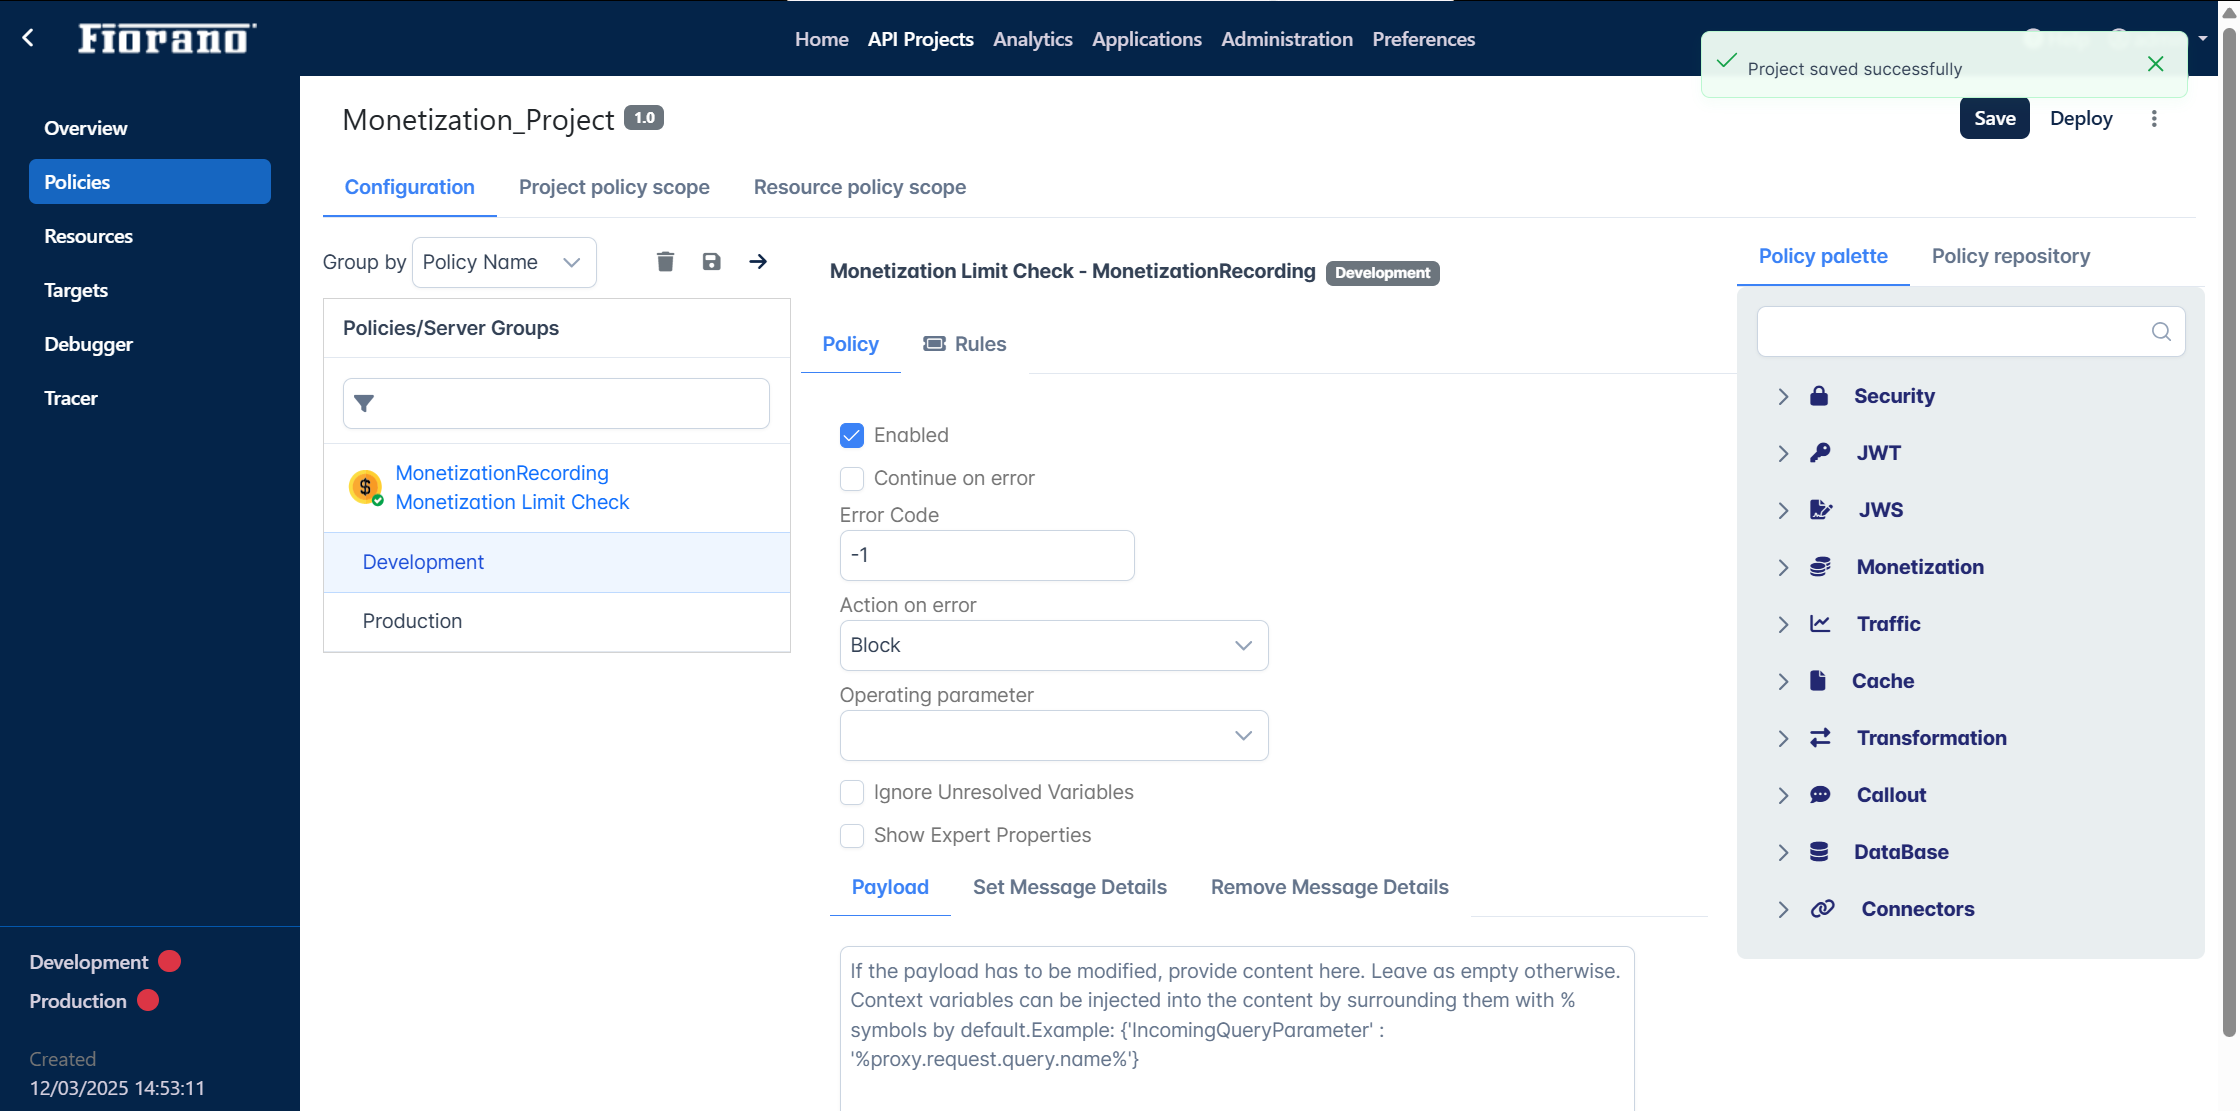
Click the environment in which the configuration needs to be set, ensure that the Enabled option is selected, and click the Save icon to save the policy.
Adding the policy to the Project Level Policies repository
The policy added to the project will be available in the Project policy scope tab, which can be used on the project-level.
-
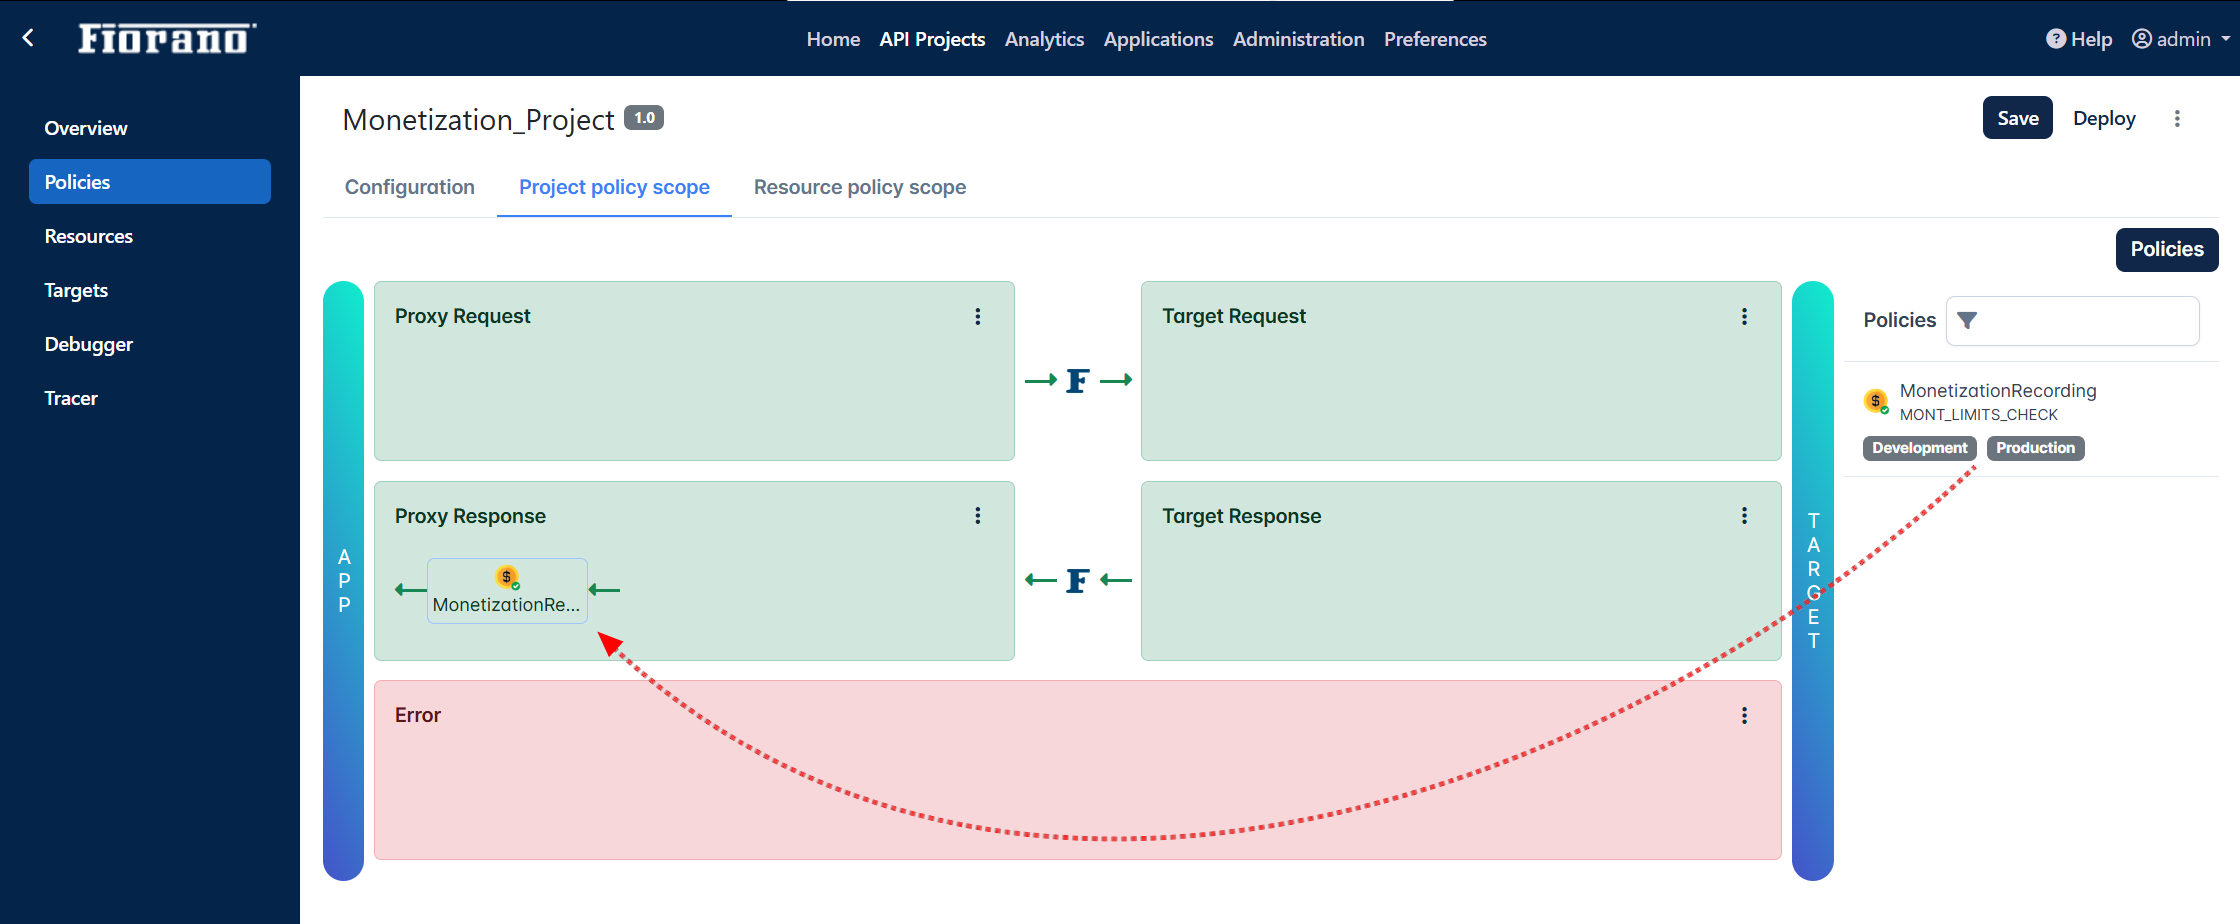
Go to the Project policy scope tab and click the Policies button.
-
Drag the Monetization limit check policy to the Proxy Response scope.
-
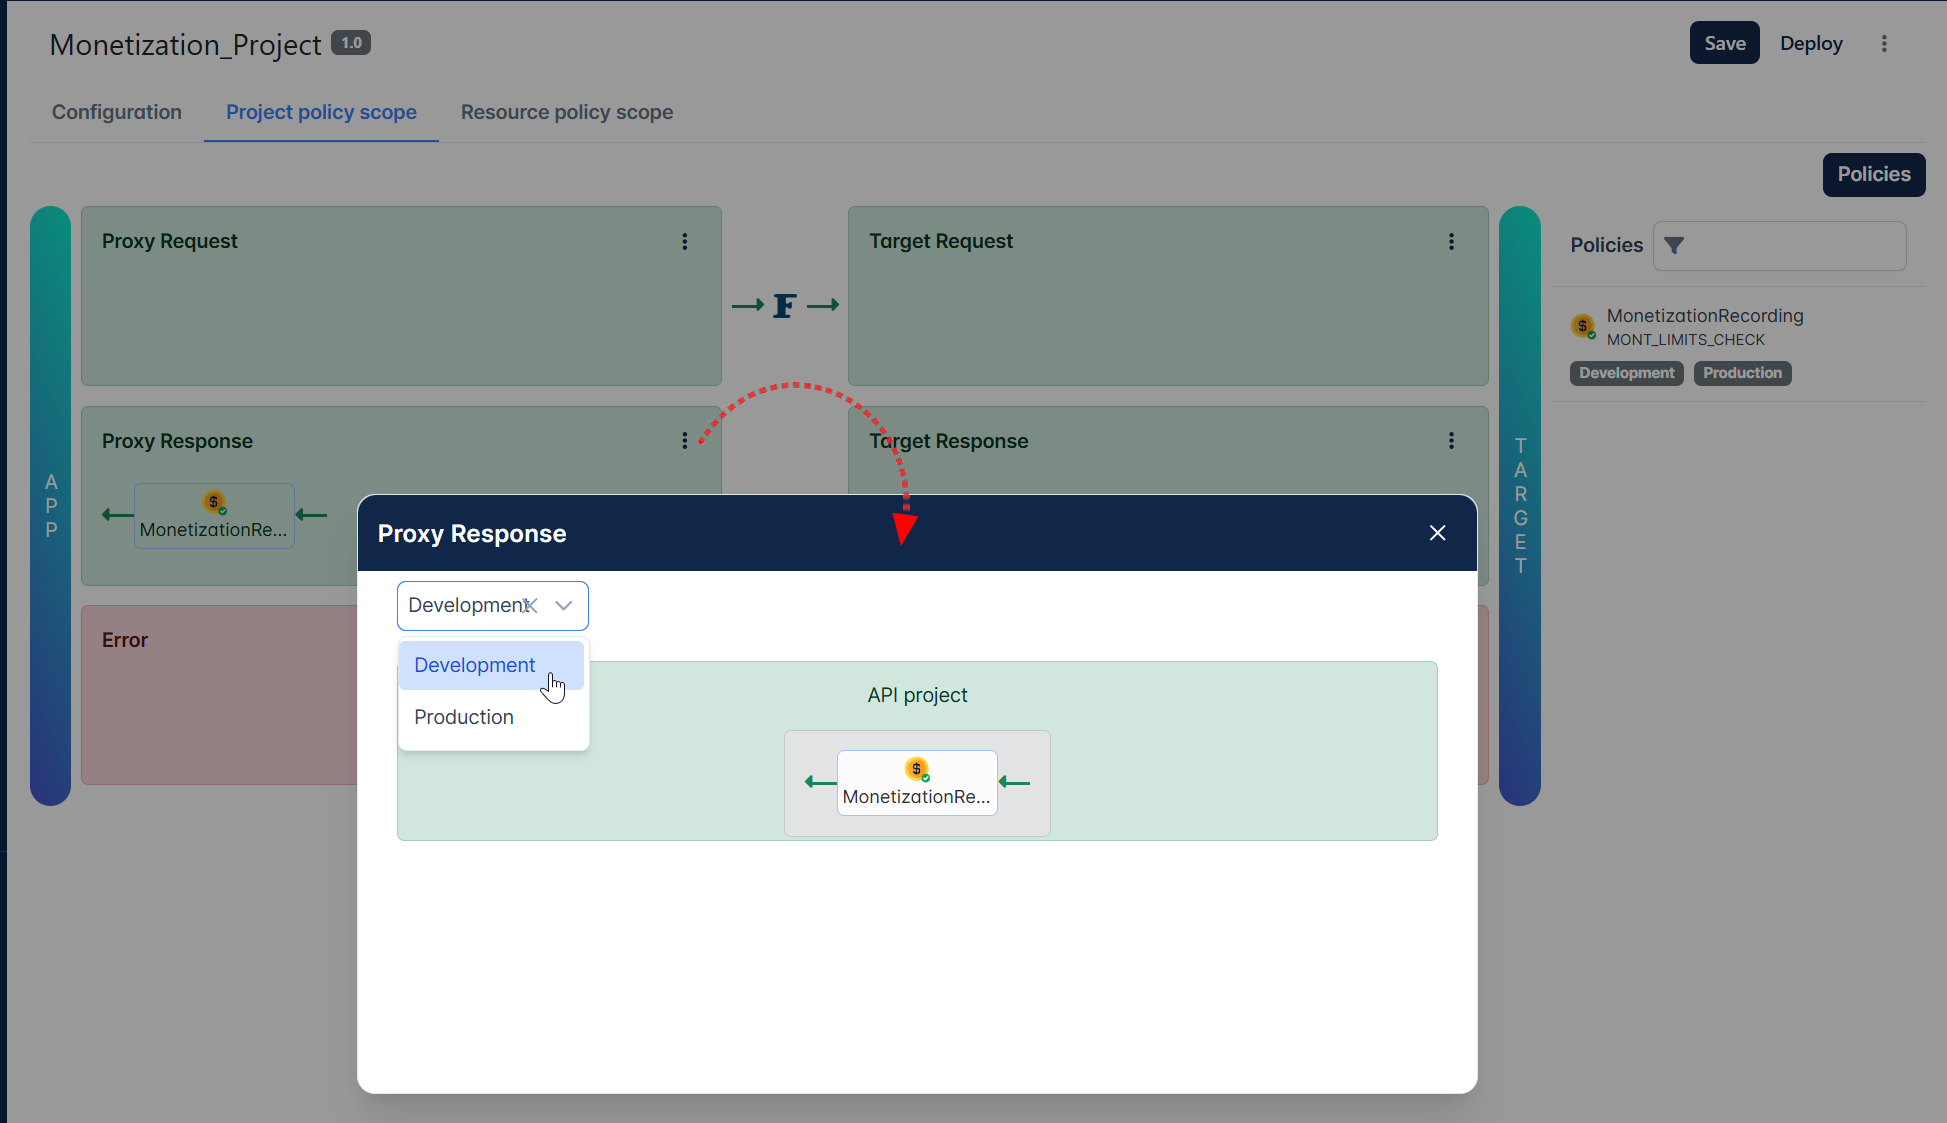
Click the More actions icon ontheProxy response scope and select the server group.
-
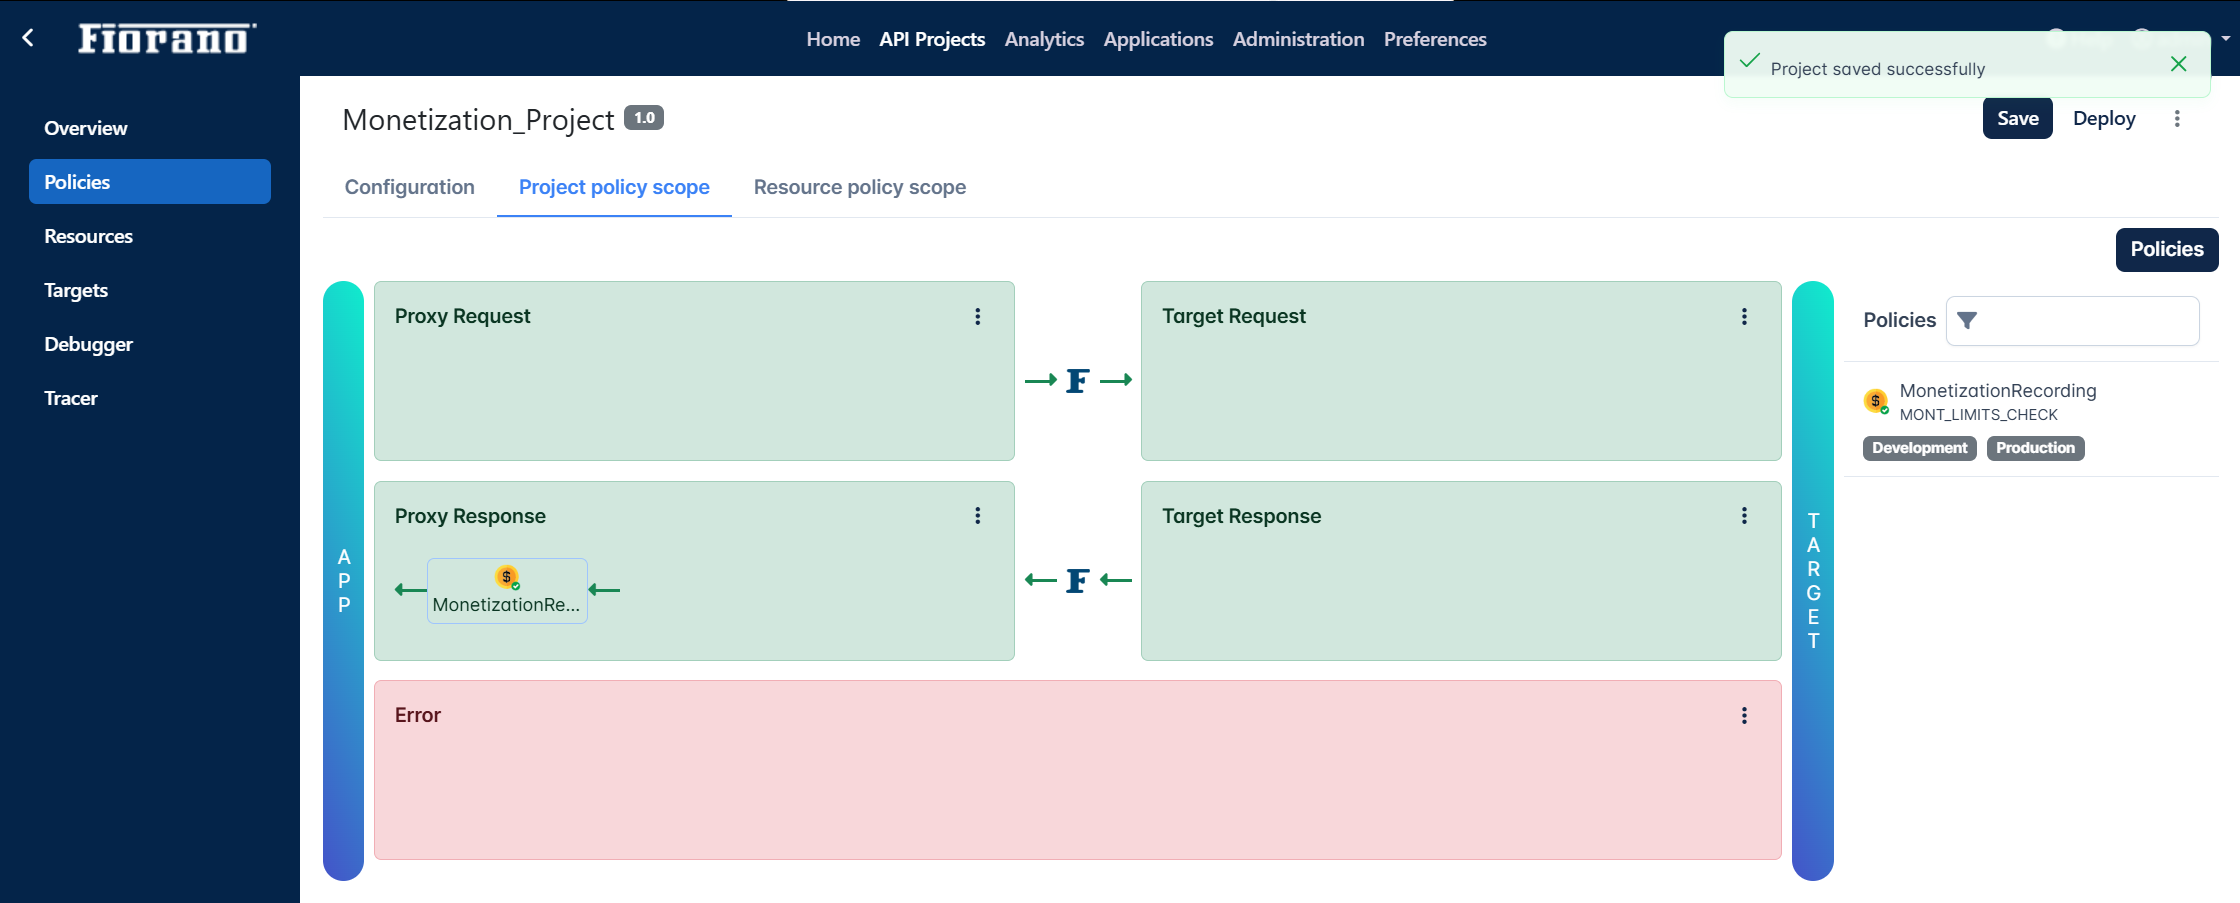
Click Save to apply the changes.
Creating a product and adding to the Monetization Project
-
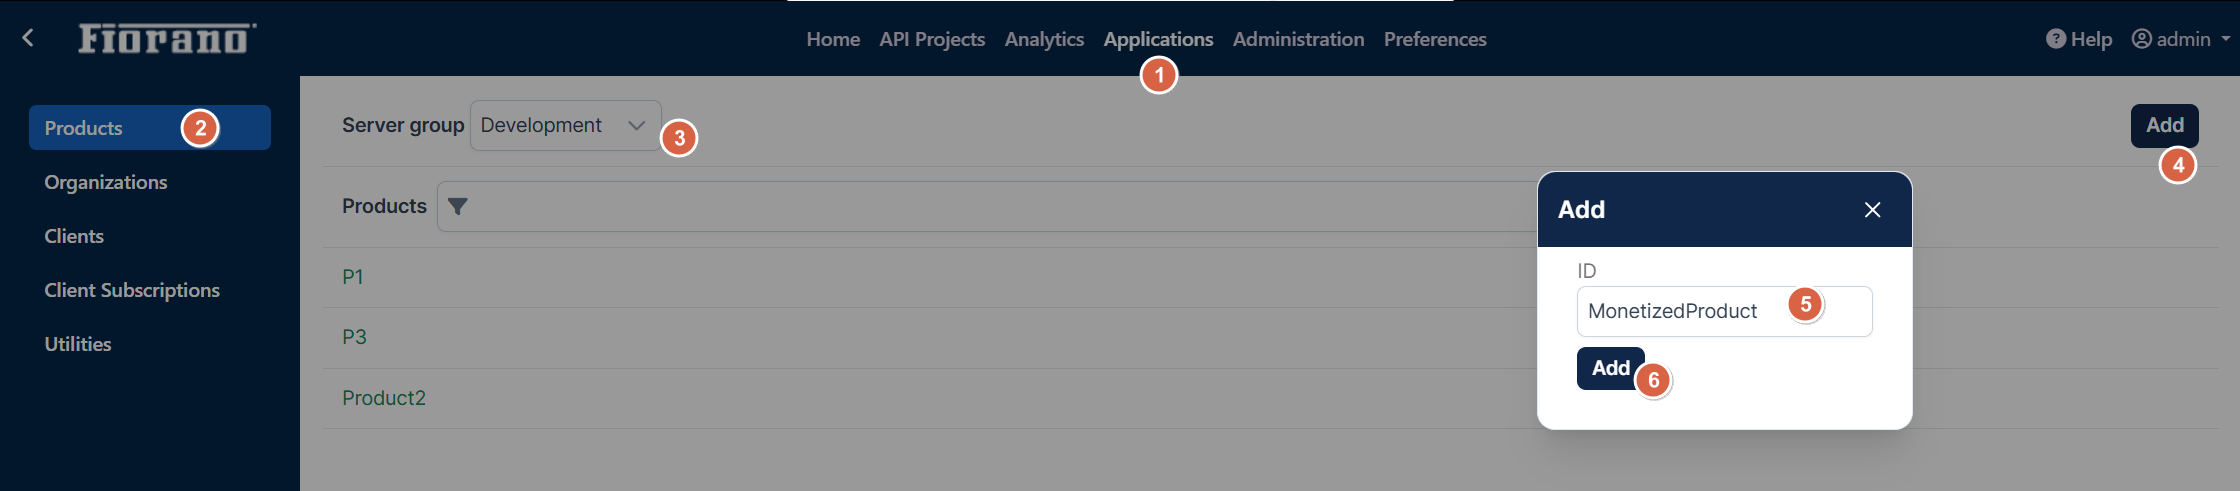
Go to Applications > Products.
-
Select the server group and click the Add button to add a new API Product
-
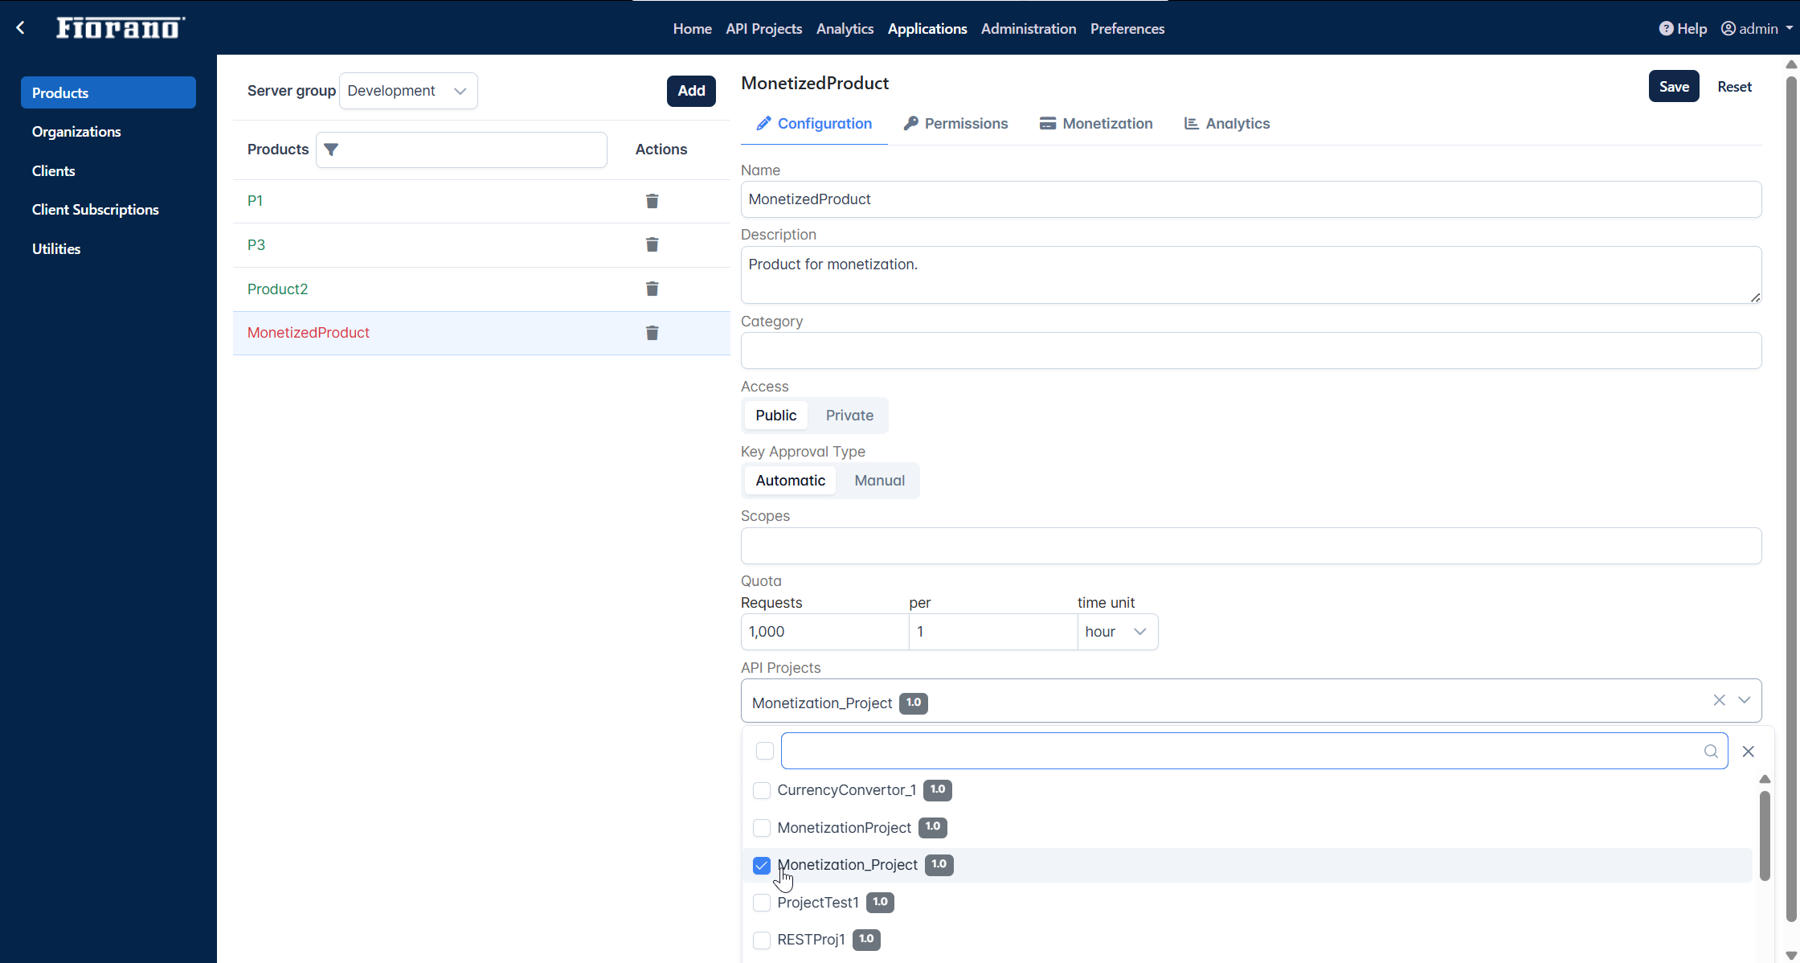
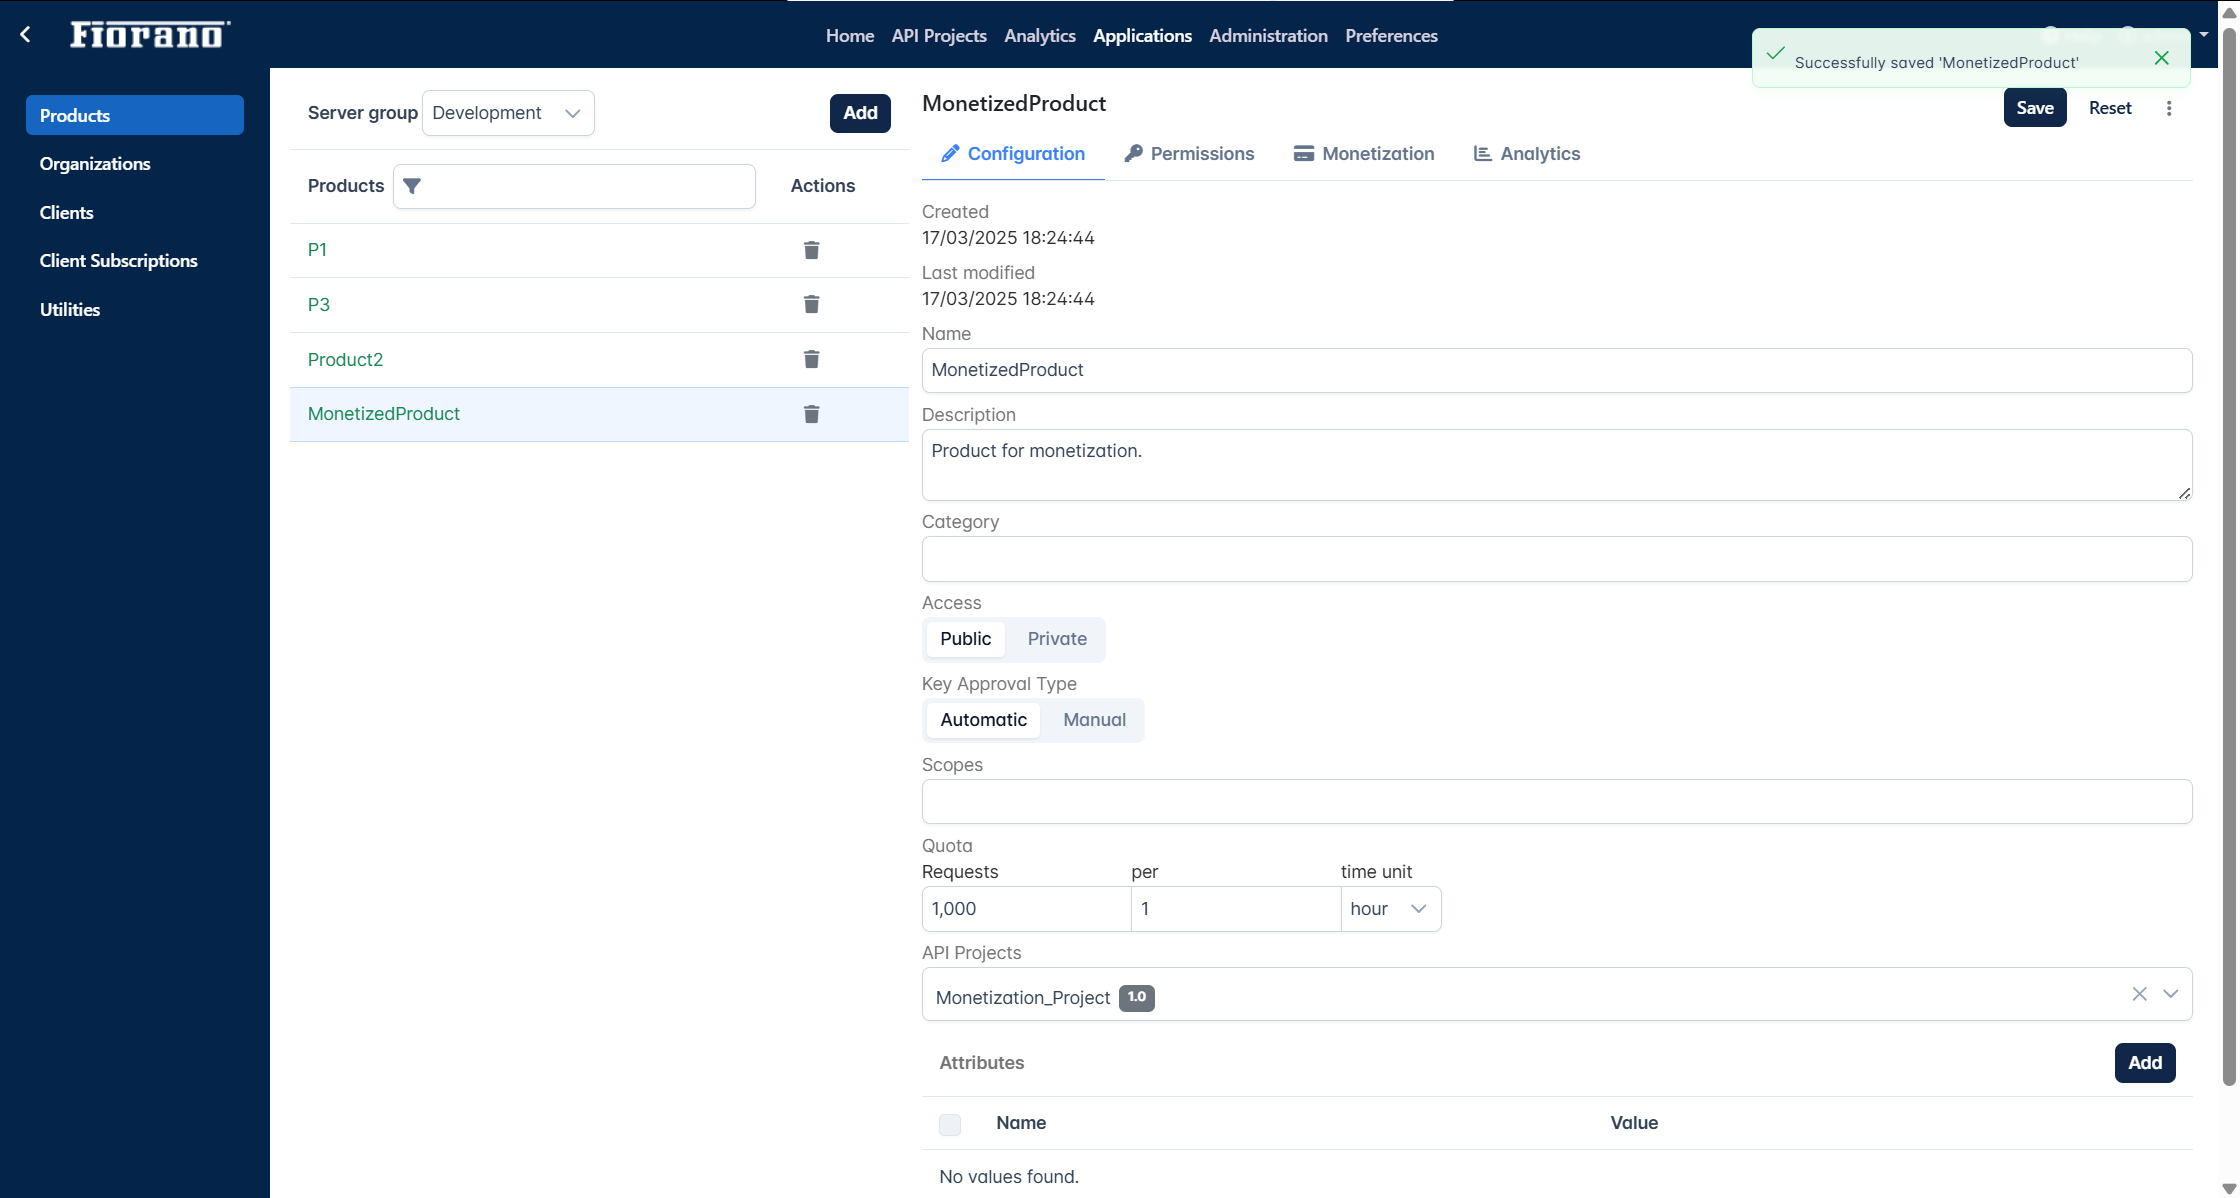
Provide a name and other values as per requirement. Click the API Projects drop-down and select the project created at the beginning of this section.
-
Click the Save button to save the product configuration.
Configuring Monetization
Go to the Monetization tab and perform the actions in the section below.
Adding Product rate plans
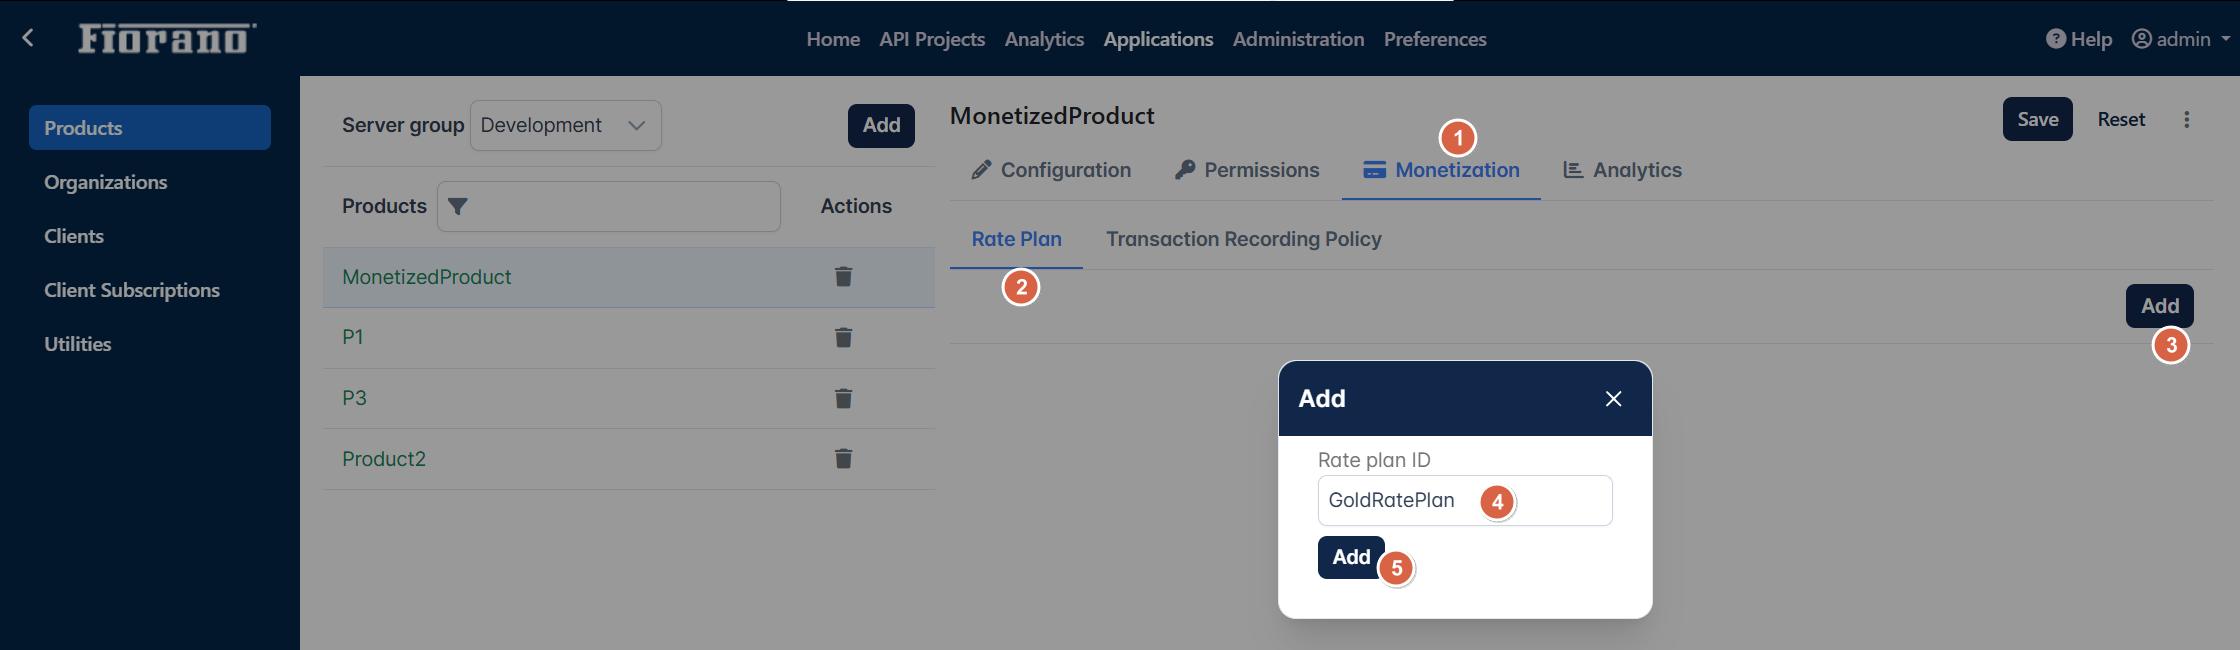
In the Rate Plan tab under the Monetization panel,
-
Click the Add icon and add a Rate Plan ID. Click OK.
-
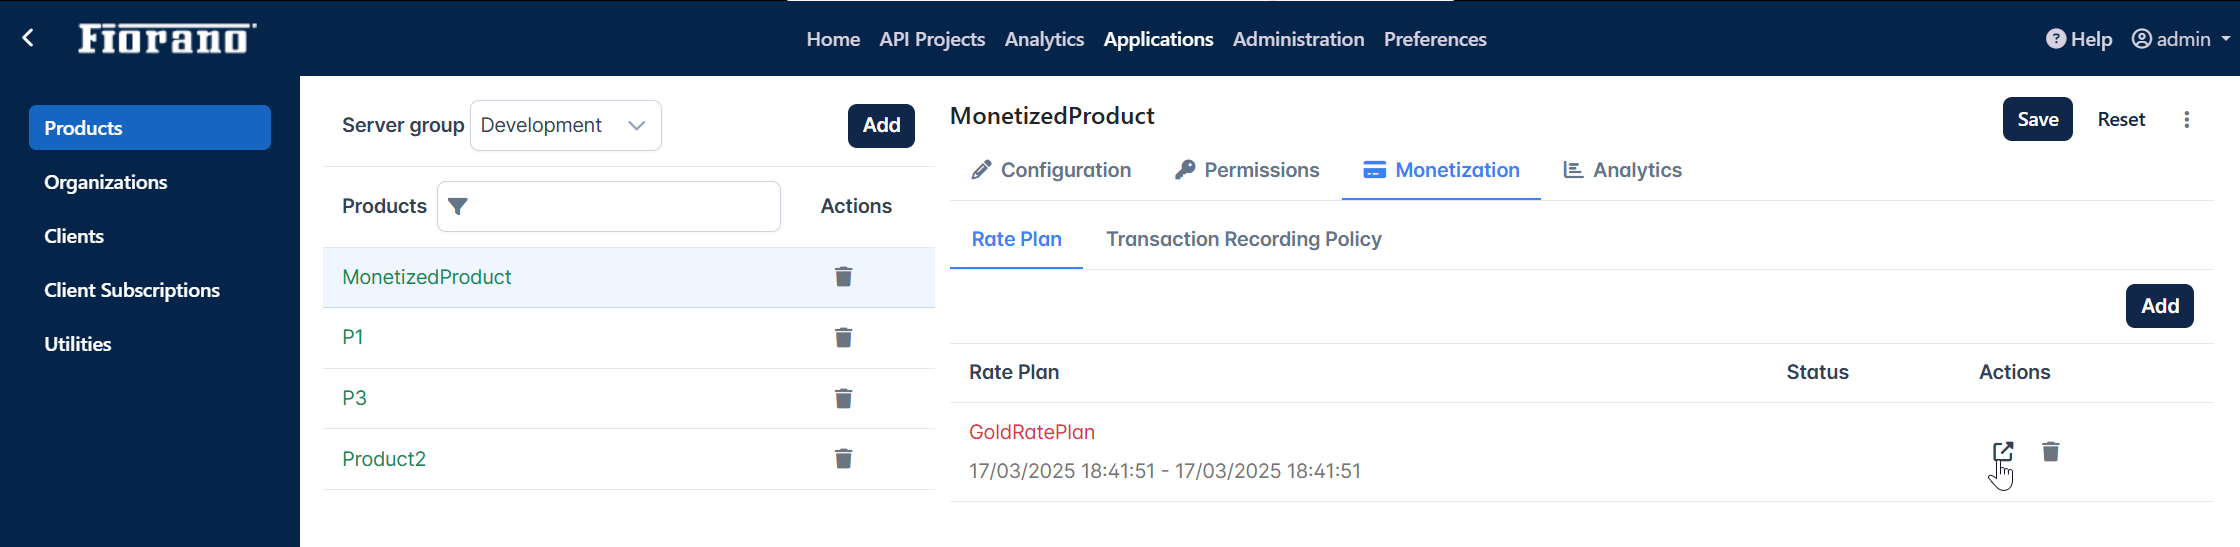
Click the Details icon under the Actions column of the newly added Rate plan.
Standard Rate Plan
In the Standard rate plan, only the provider and the user are involved and hence the developer does not get revenue.
Only the Ratecard revenue model is valid for the Standard rate plan.
-
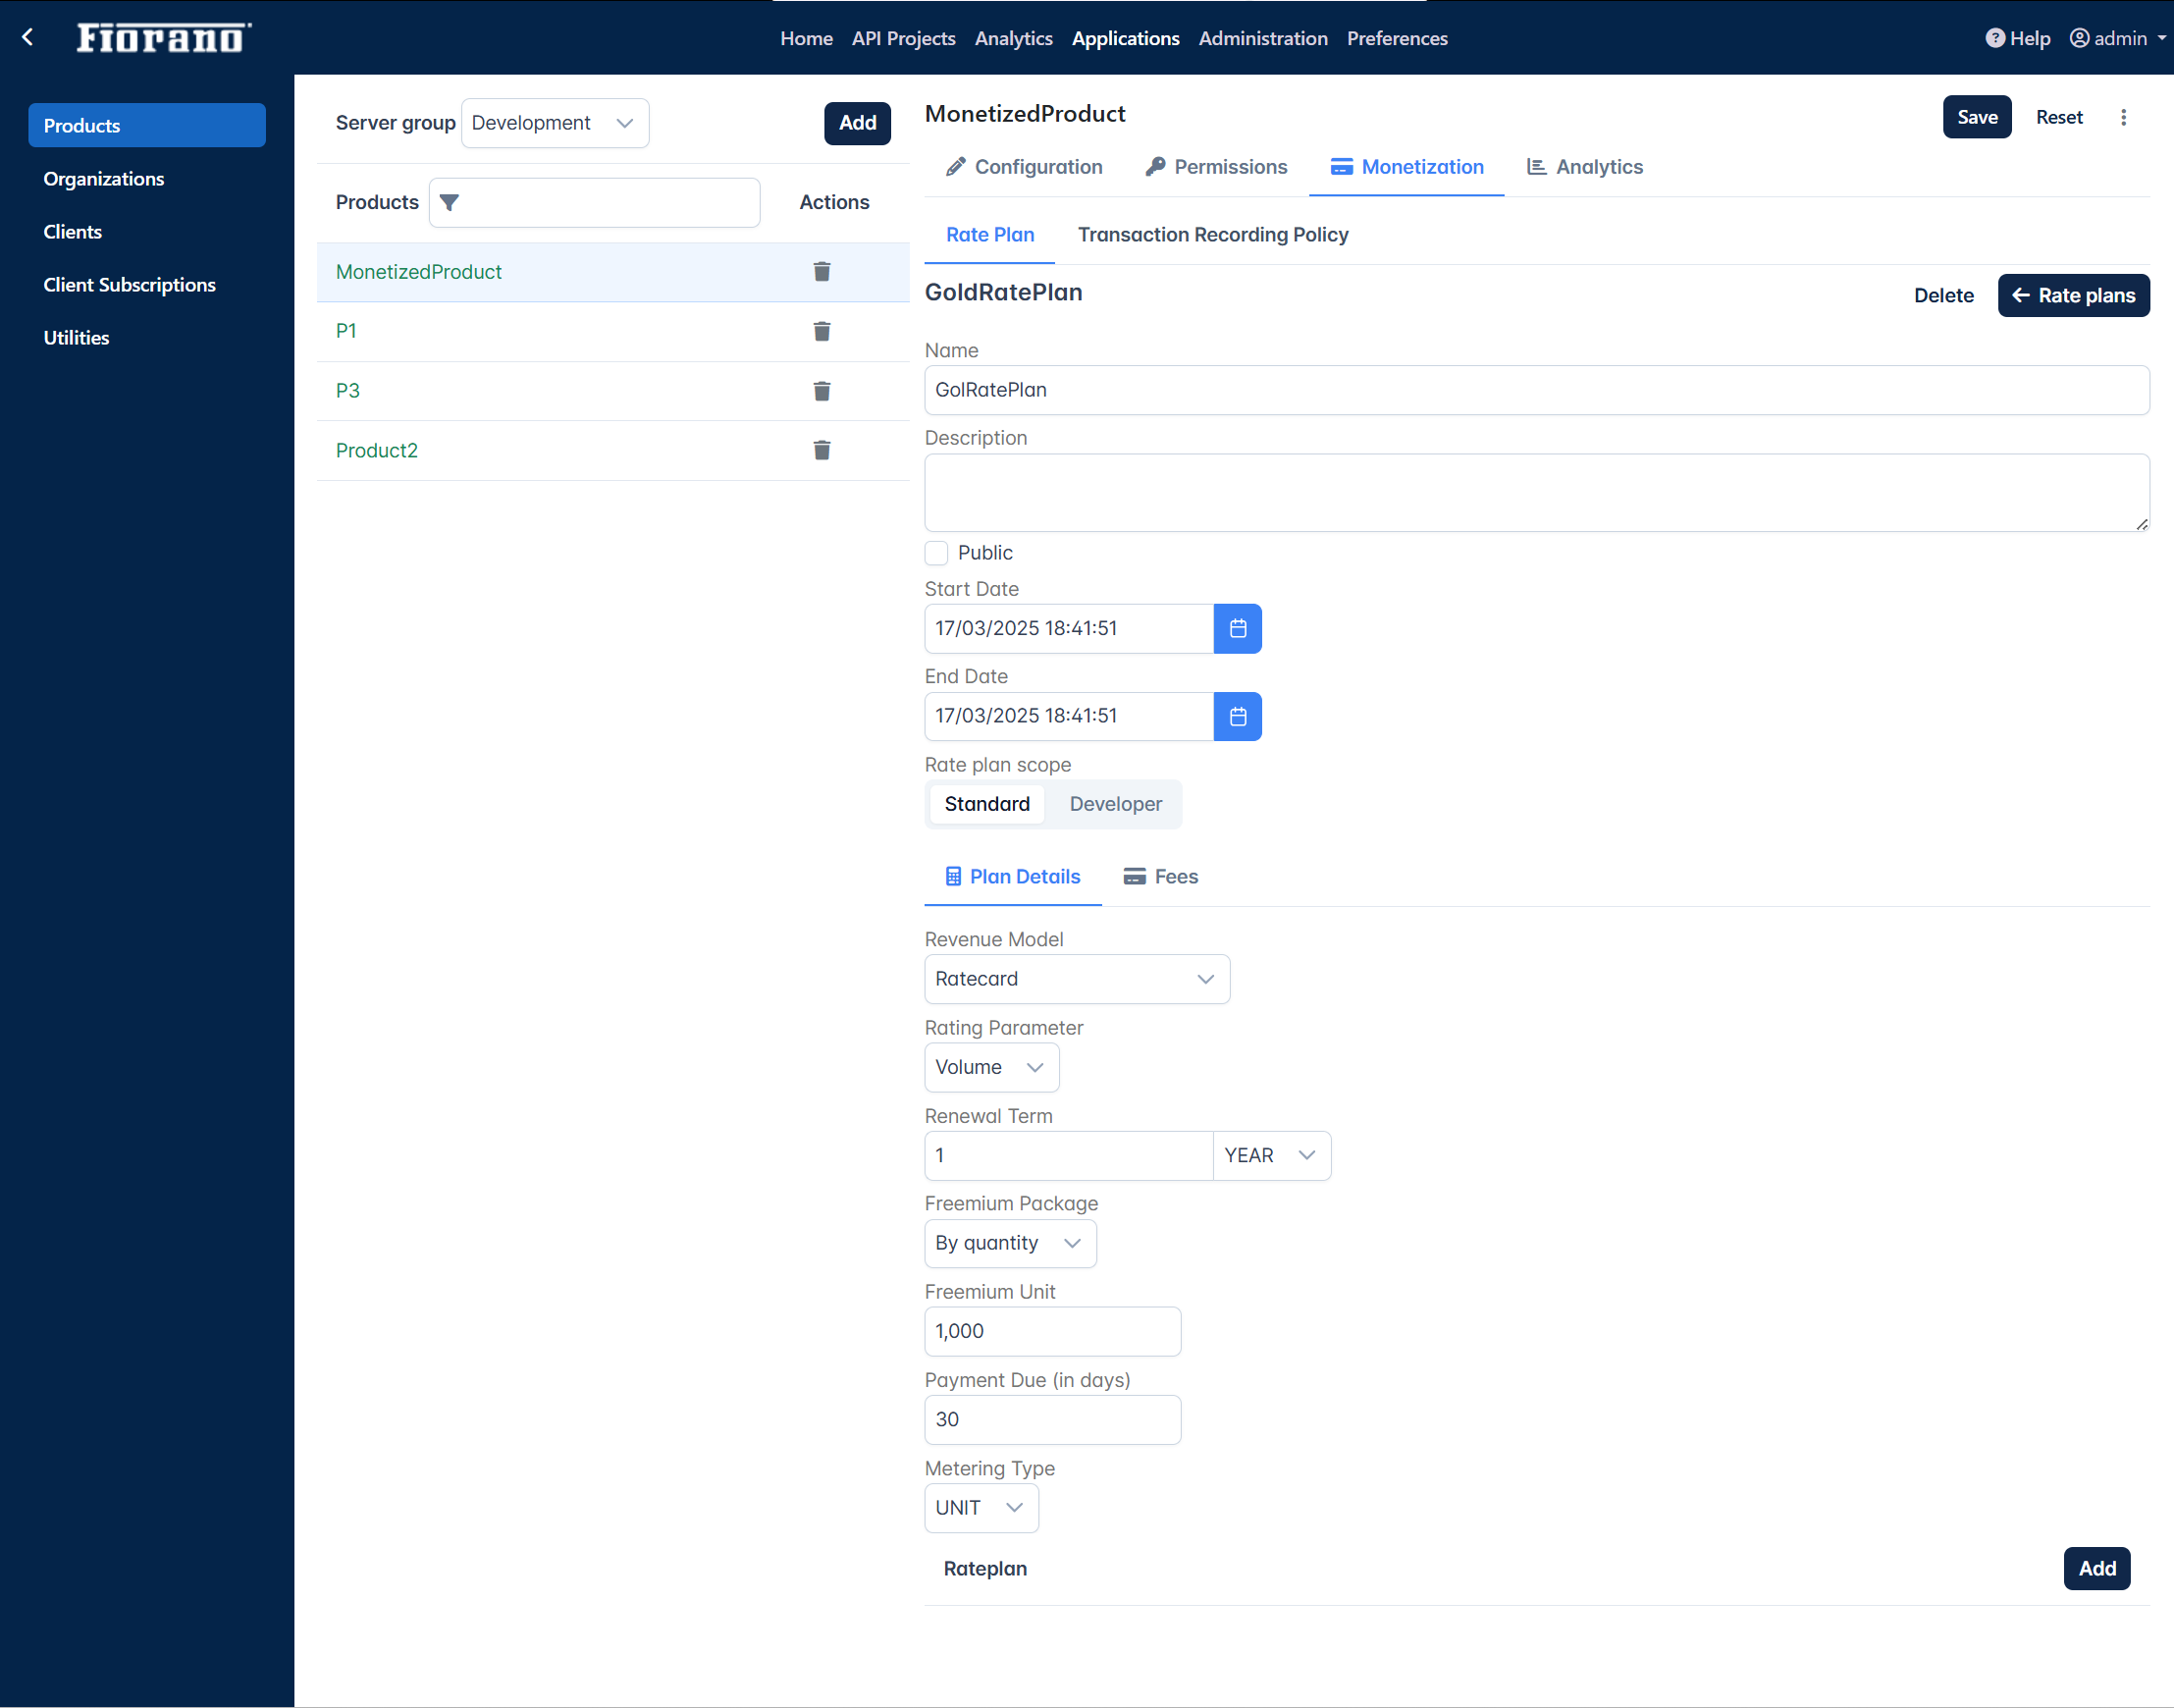
Under the Rate plan Configuration section, provide a unique name, and click the Rate plan scope drop-down and select "Standard".
-
In the Plan Details tab, select the options below:
-
Revenue Model: Ratecard.
-
Rating Parameter: Choose from the options "Volume" and "Custom Variable".
If CUSTOM VARIABLE is selected, please specify the variable/parameter to be used for charging the user. For CUSTOM VARIABLE, the parameter specified has to be added to the custom attributes section in the transaction recording policy.
-
Metering Type: Choose from the options UNIT, STAIR STEP, and VOLUME, and specify the "Duration", "Renewal Term" and the "Payment Due" details.
-
Freemium Package: Specify if it is applicable; else select "No".
-
-
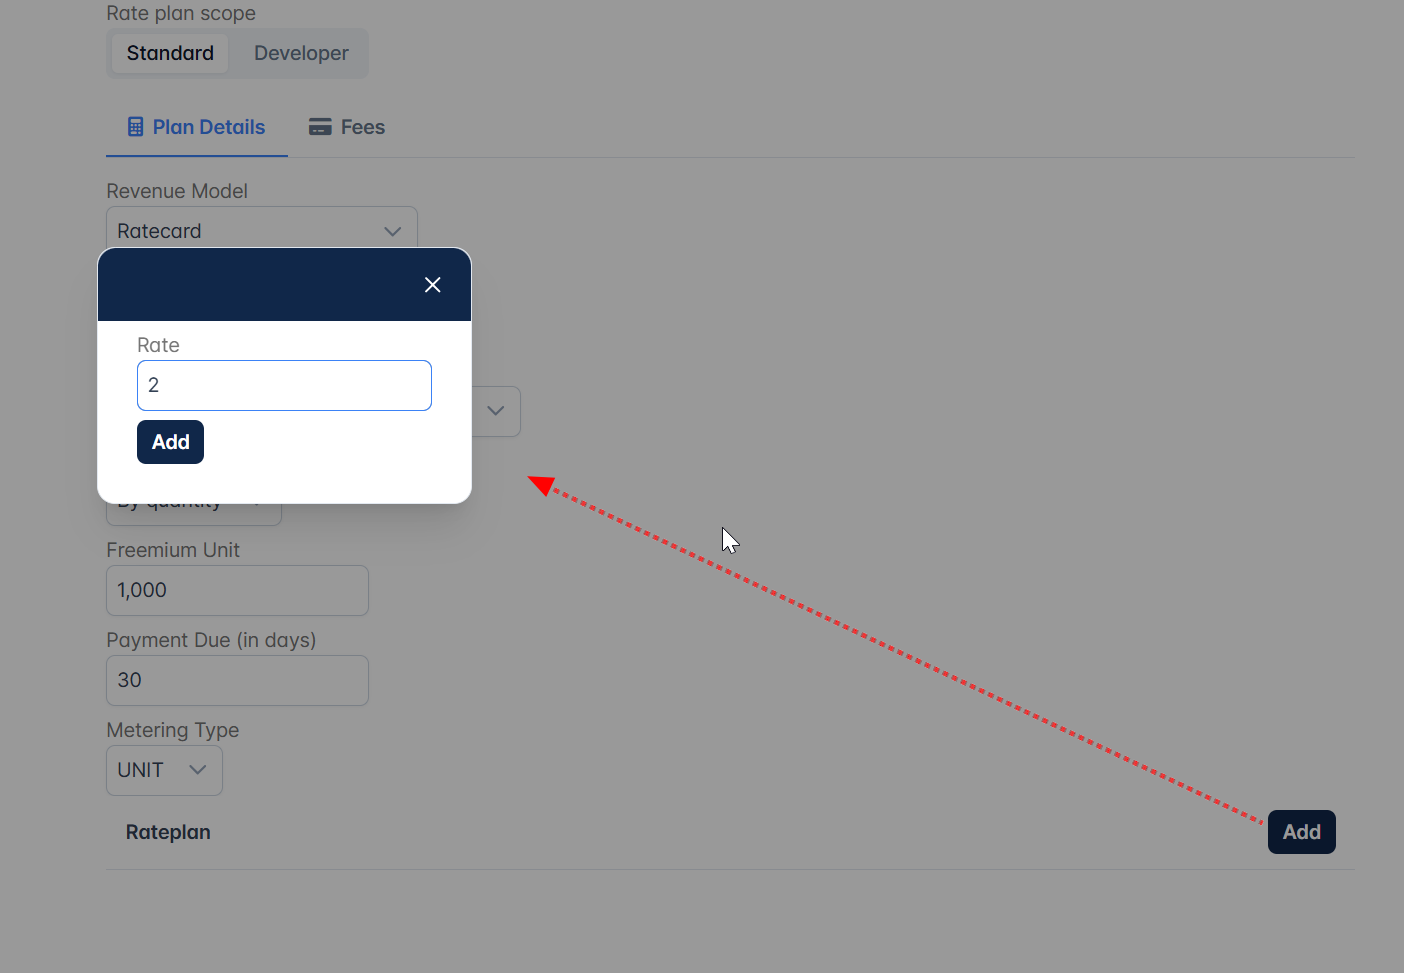
Under the Rate Plan Rates section, click the Add button to add the Rate for transactions depending on the "Metering Type".
-
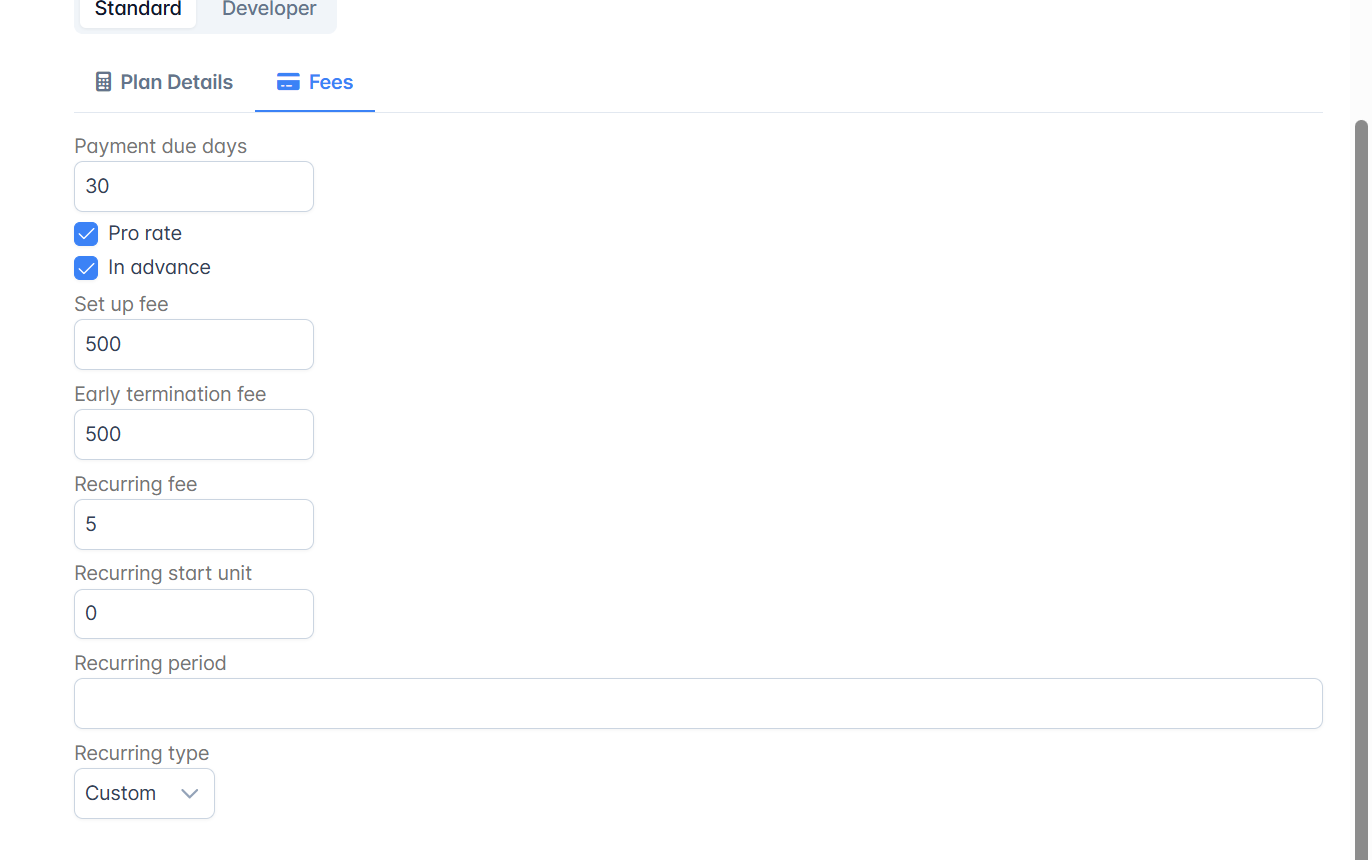
Go to the Fees tab next to the Plan Details tab and enter fee details.
-
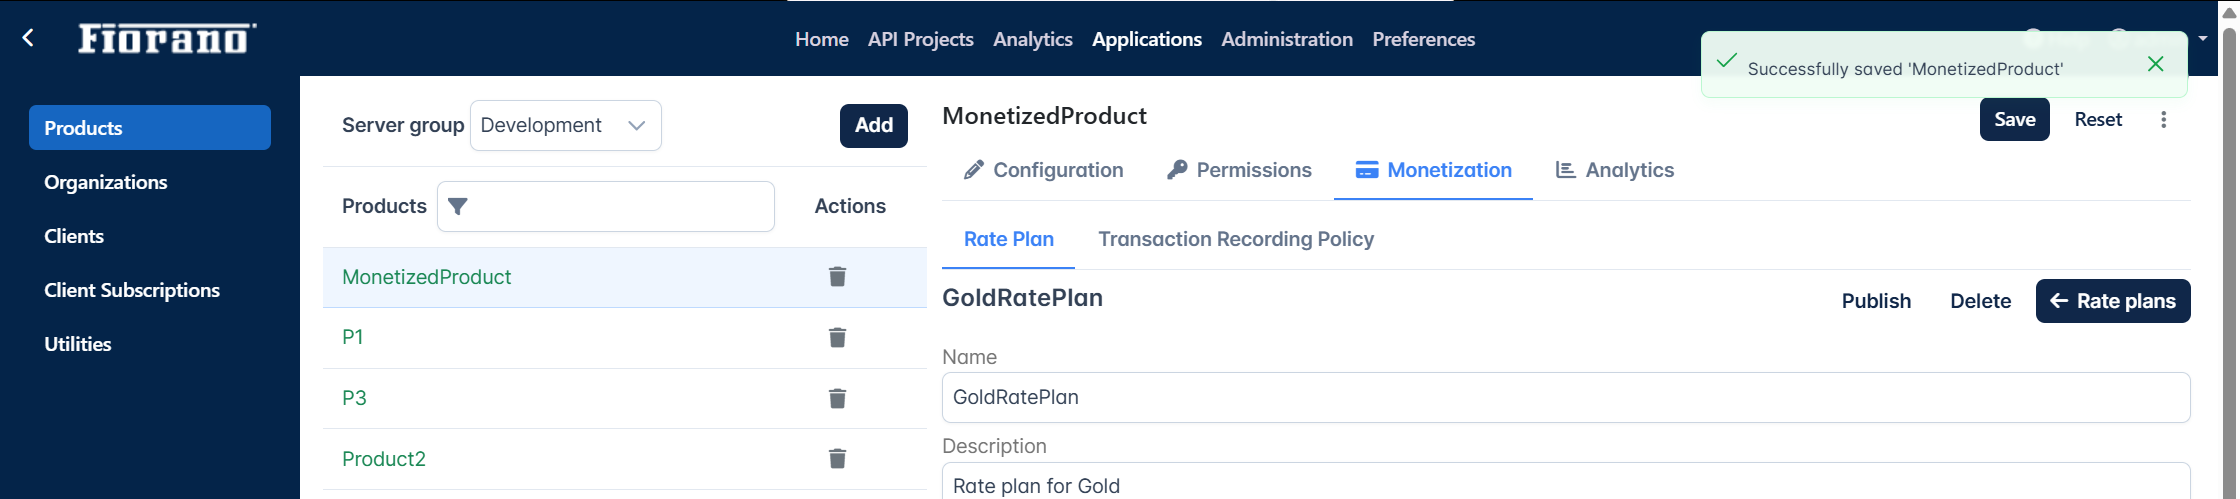
Click the Save icon to save the product.
Adding a Transaction Recording Policy
-
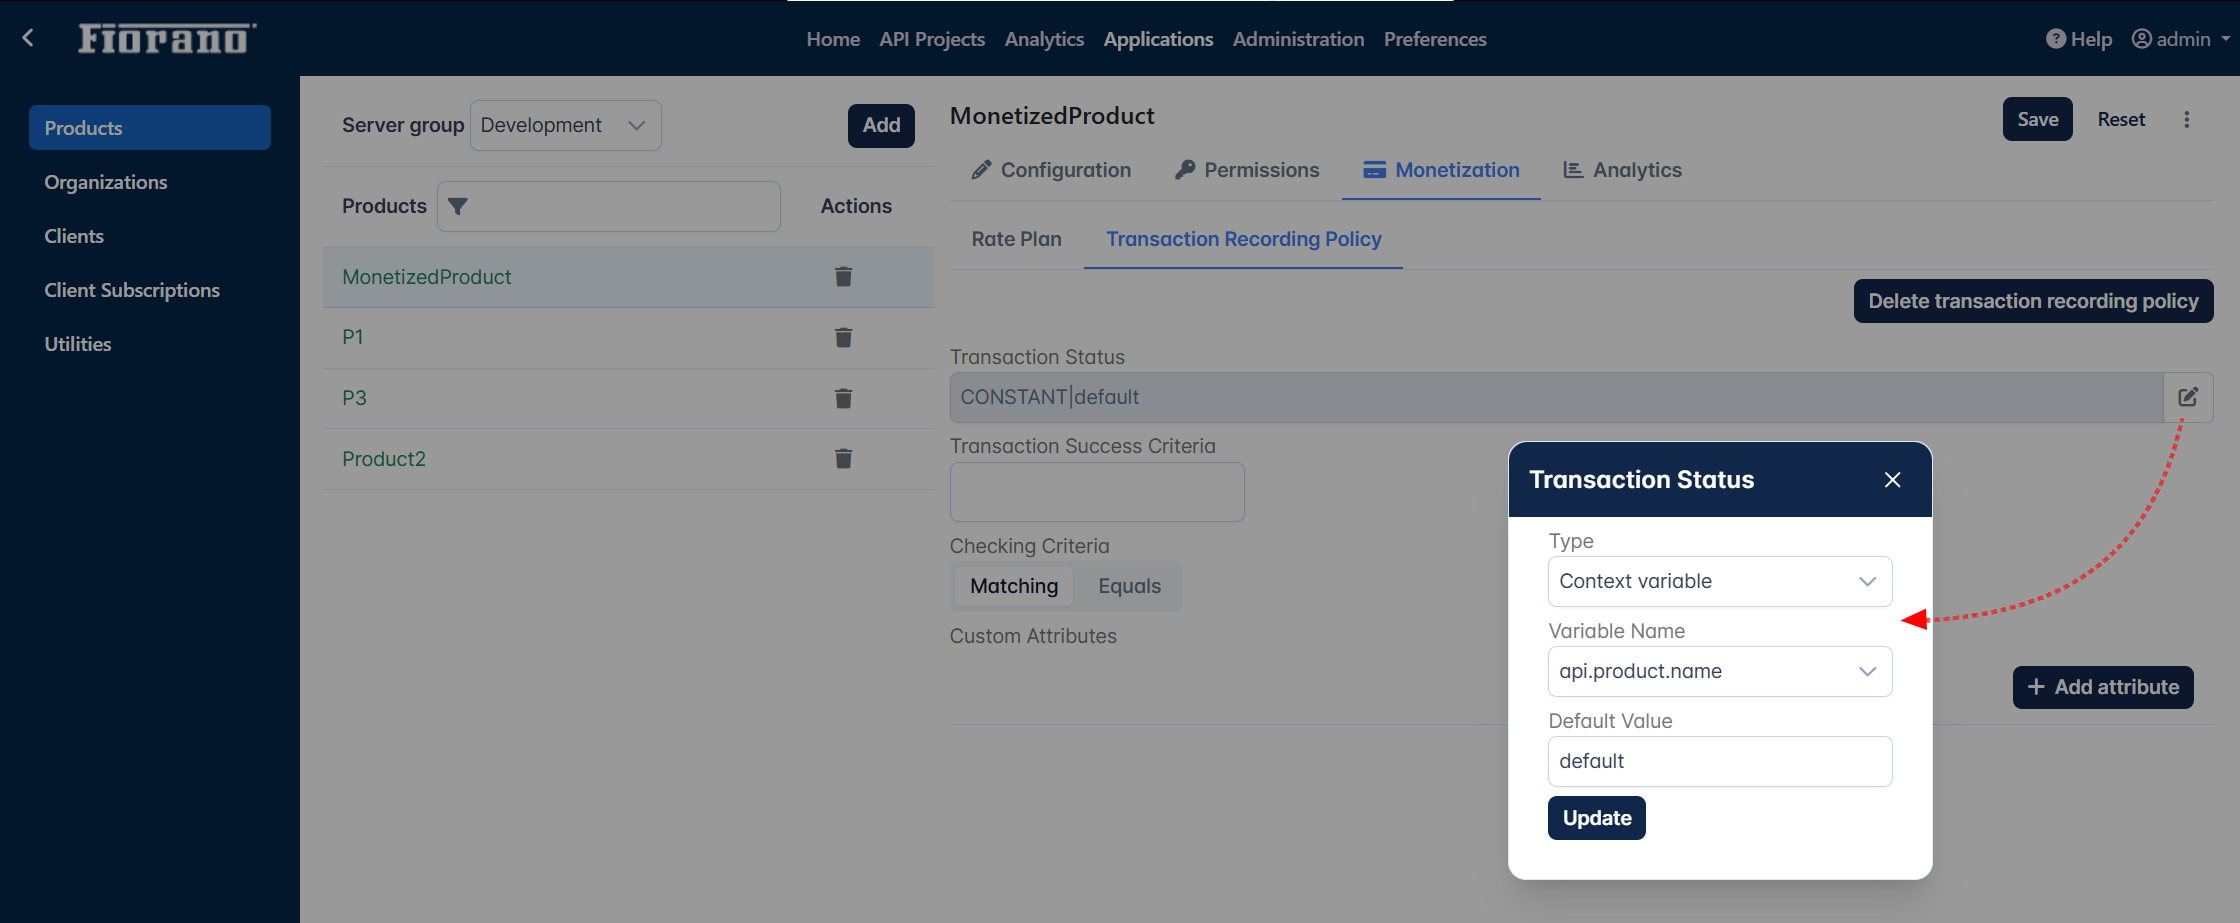
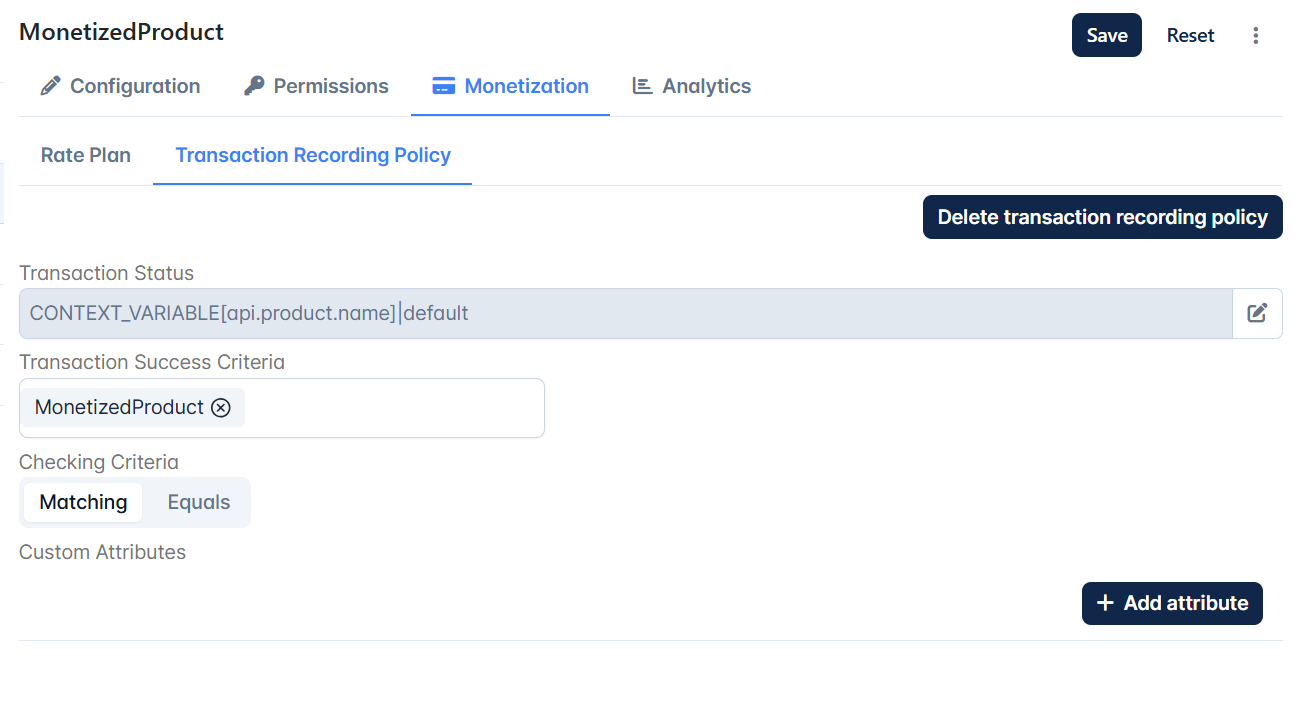
Go to the Transaction Recording Policy tab next to the Rate Plan tab and click the Add transaction recording policy button.

-
In the Transaction Status dialog box, add the parameters to be checked to the context variables and click Update.
-
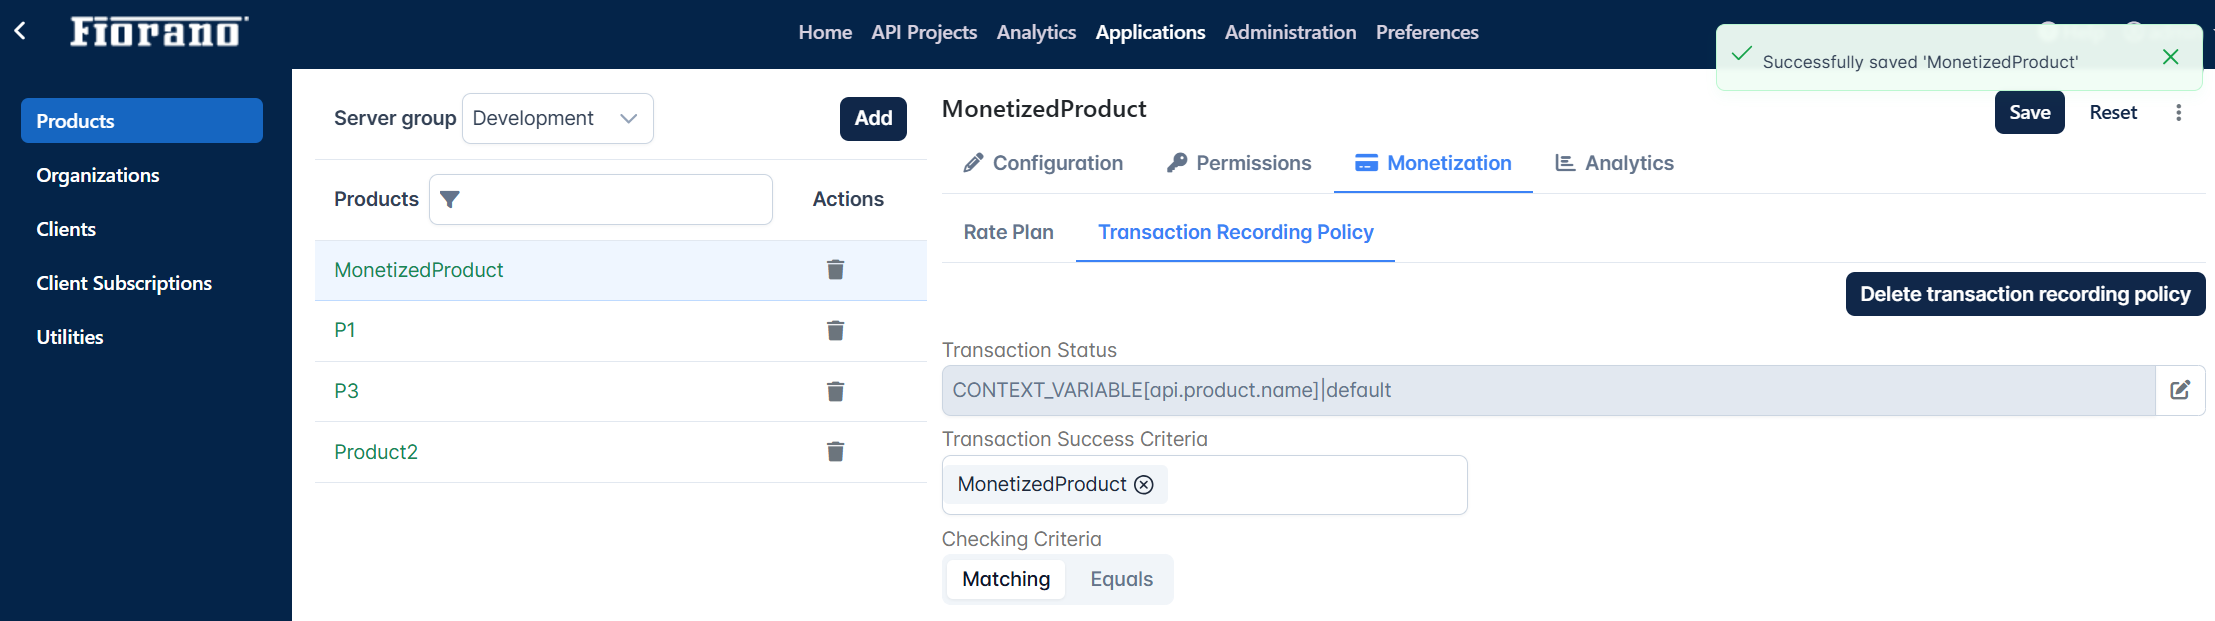
Provide the success criteria and the value of the Transaction Status parameter. Select Checking Criteria as "EQUALS" or "MATCHING" depending on the requirement.
-
In the Custom attributes panel, add the attributes that need to be monitored for invoice generation.
Use this option if some attribute has to be added to the rating parameter while using custom variables.
-
Click Save to save the configuration
Creating Client
-
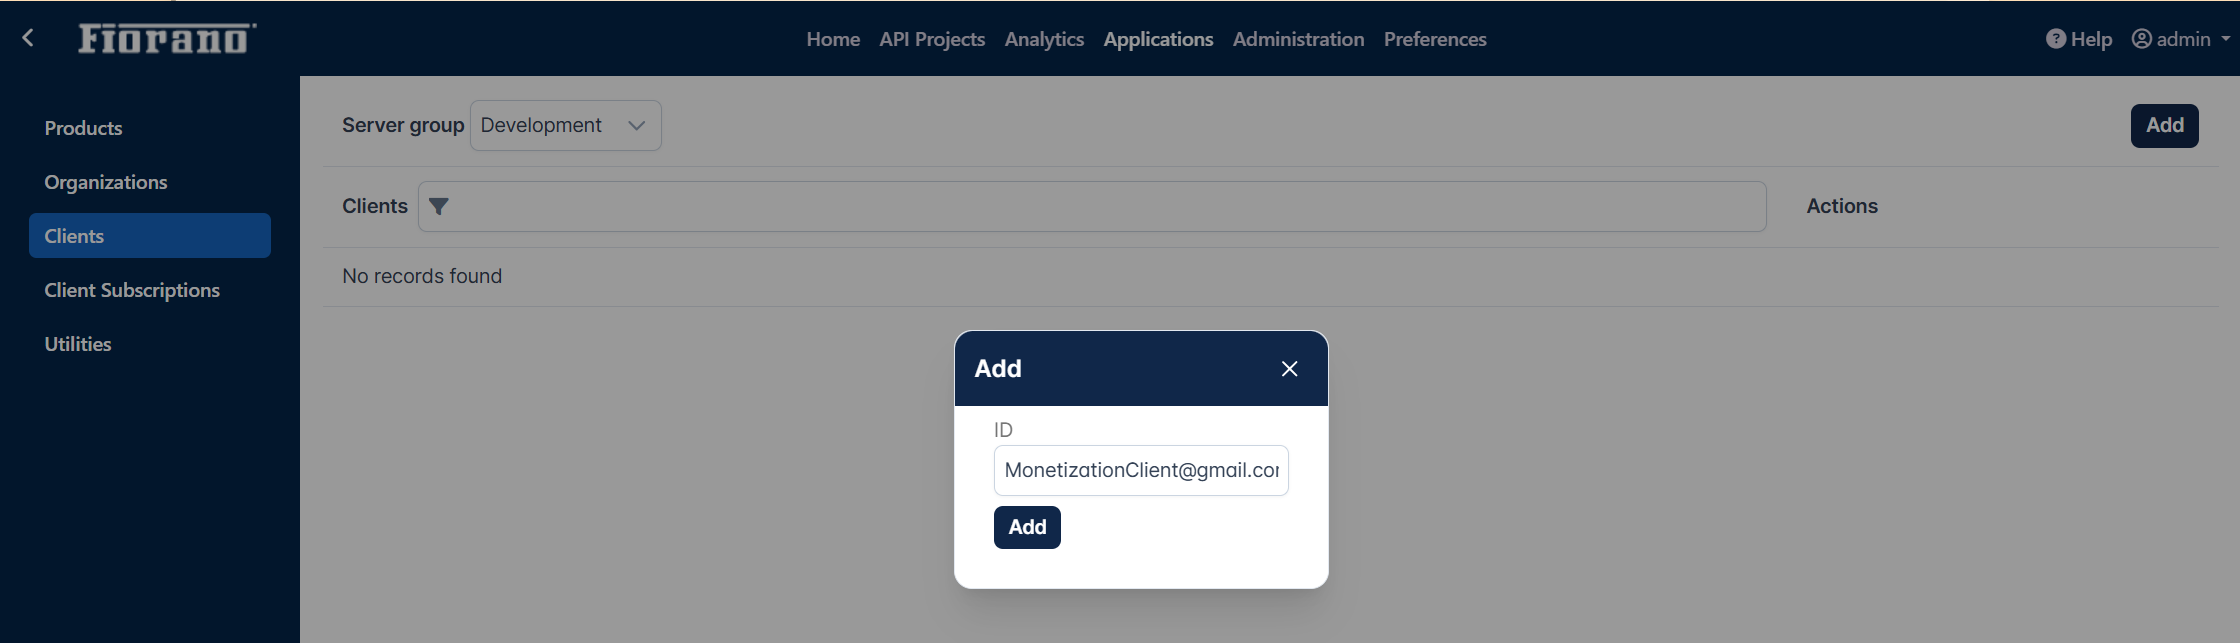
Click the Clients icon on the left pane in the Applications page, click the Add button, and provide a valid email ID.
-
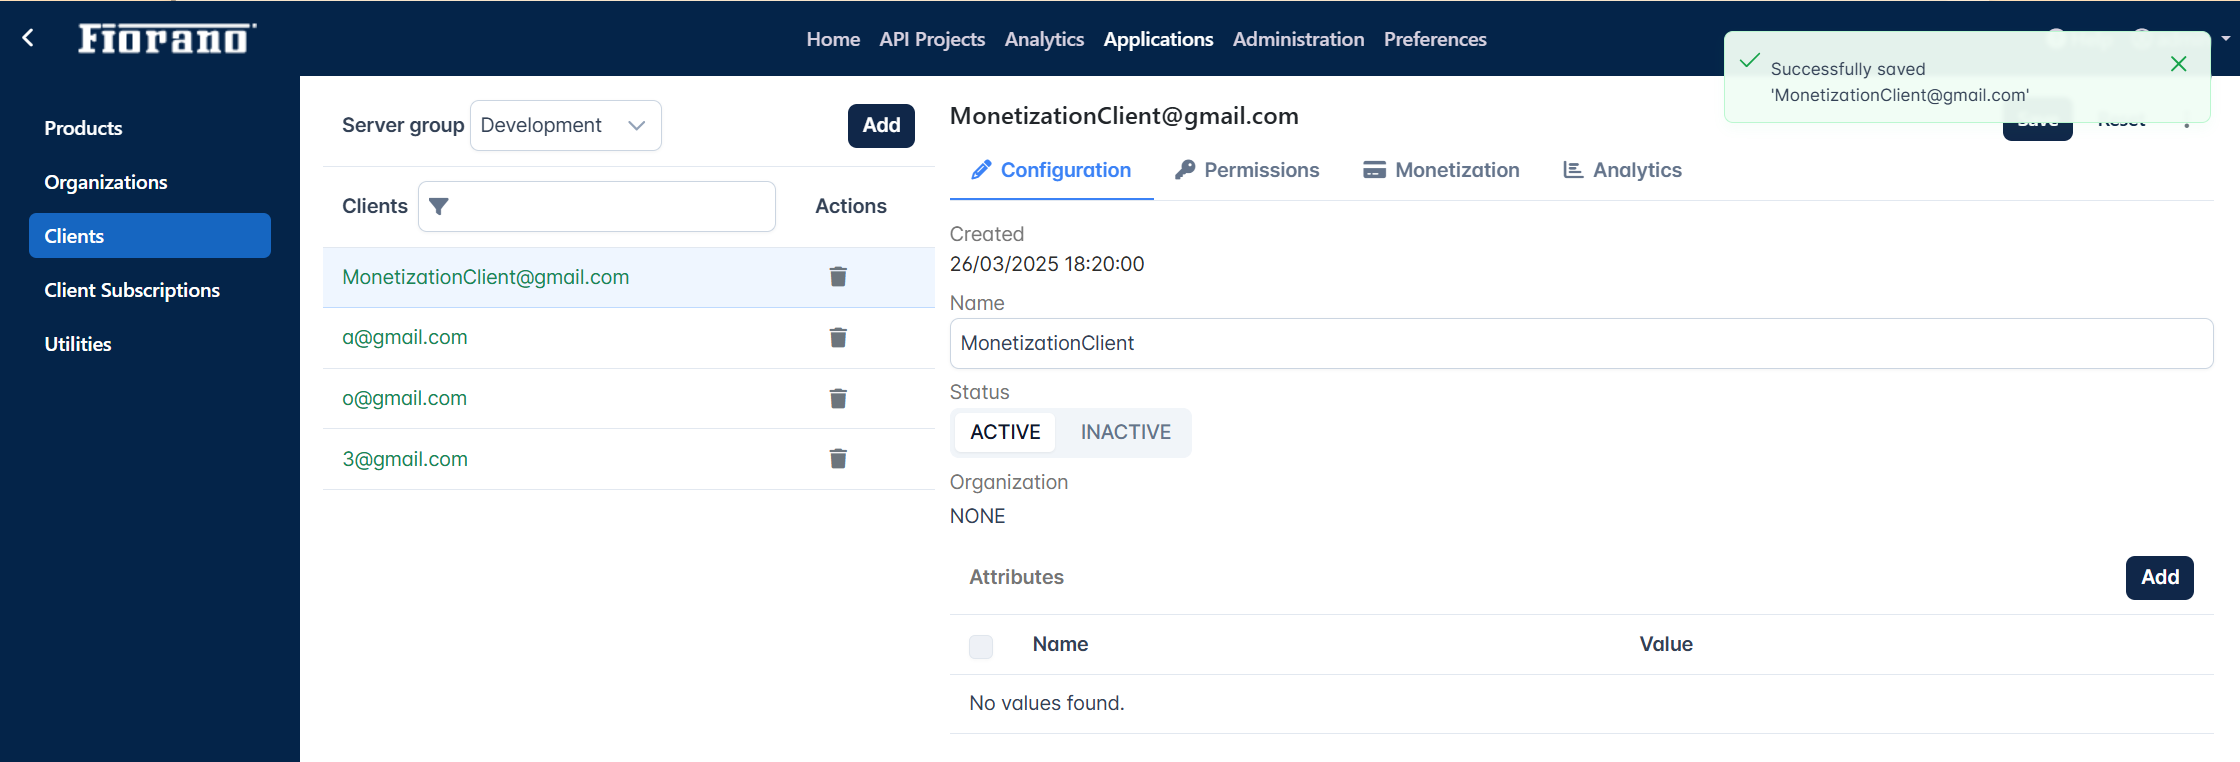
Specify configuration details and click the Save button to save the client details.
Creating Client Subscriptions with the Monetization product
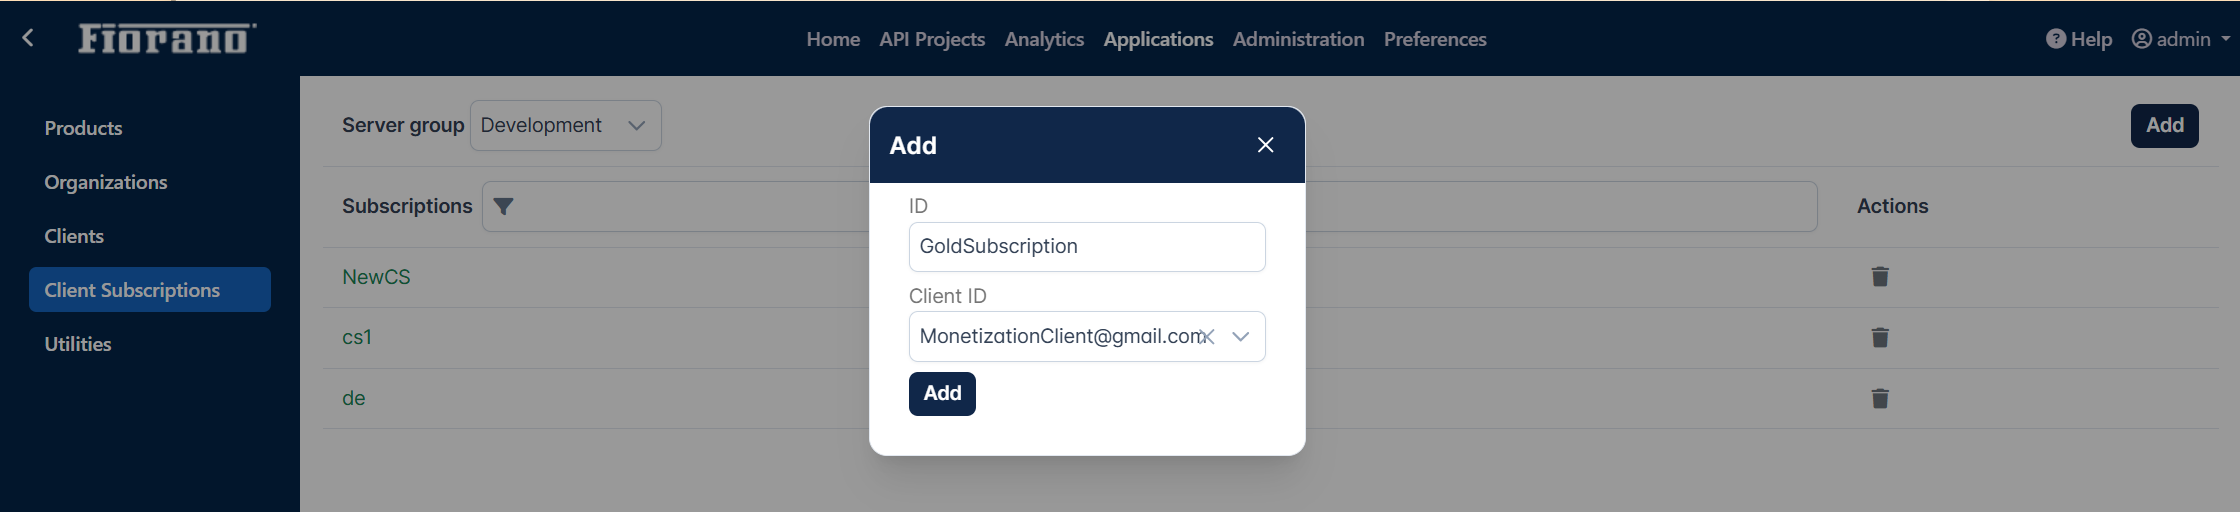
Click the Client Subscriptions icon present below the Clients icon and perform the following actions:
-
create a new client subscription by choosing the client added above.
-
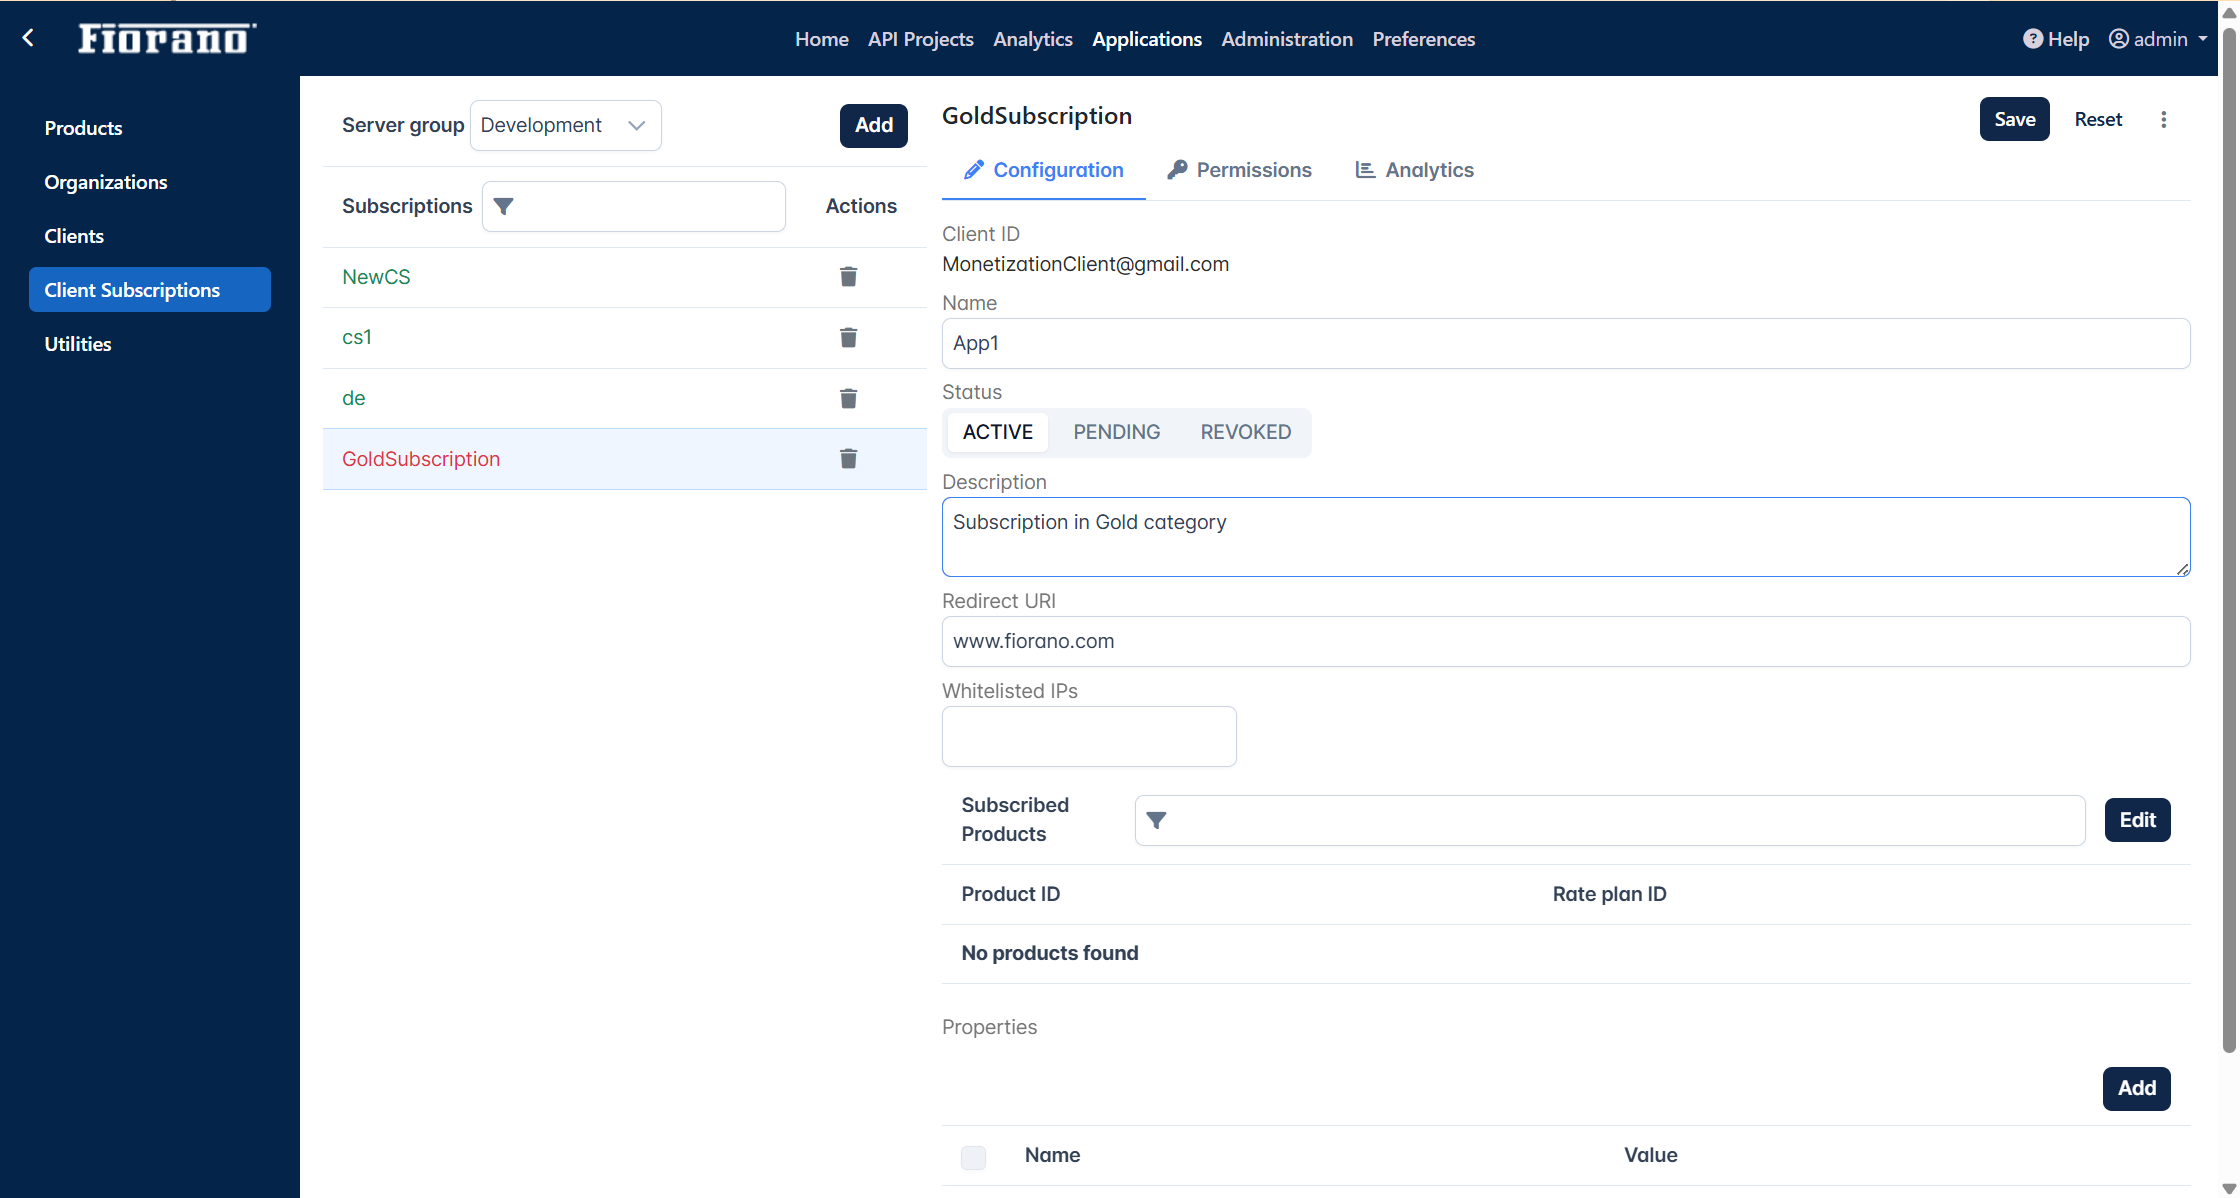
Provide the subscription details and click the Edit button in the Subscribed Products property.
-
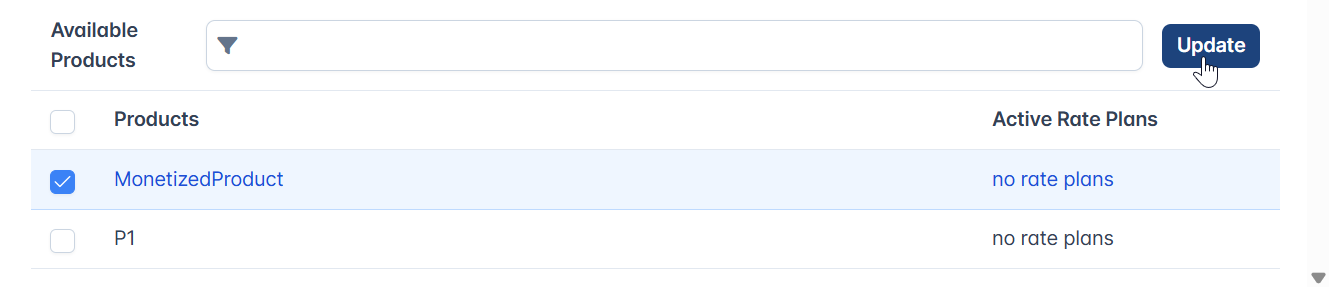
Select the products and the rate plans associated with the product.
-
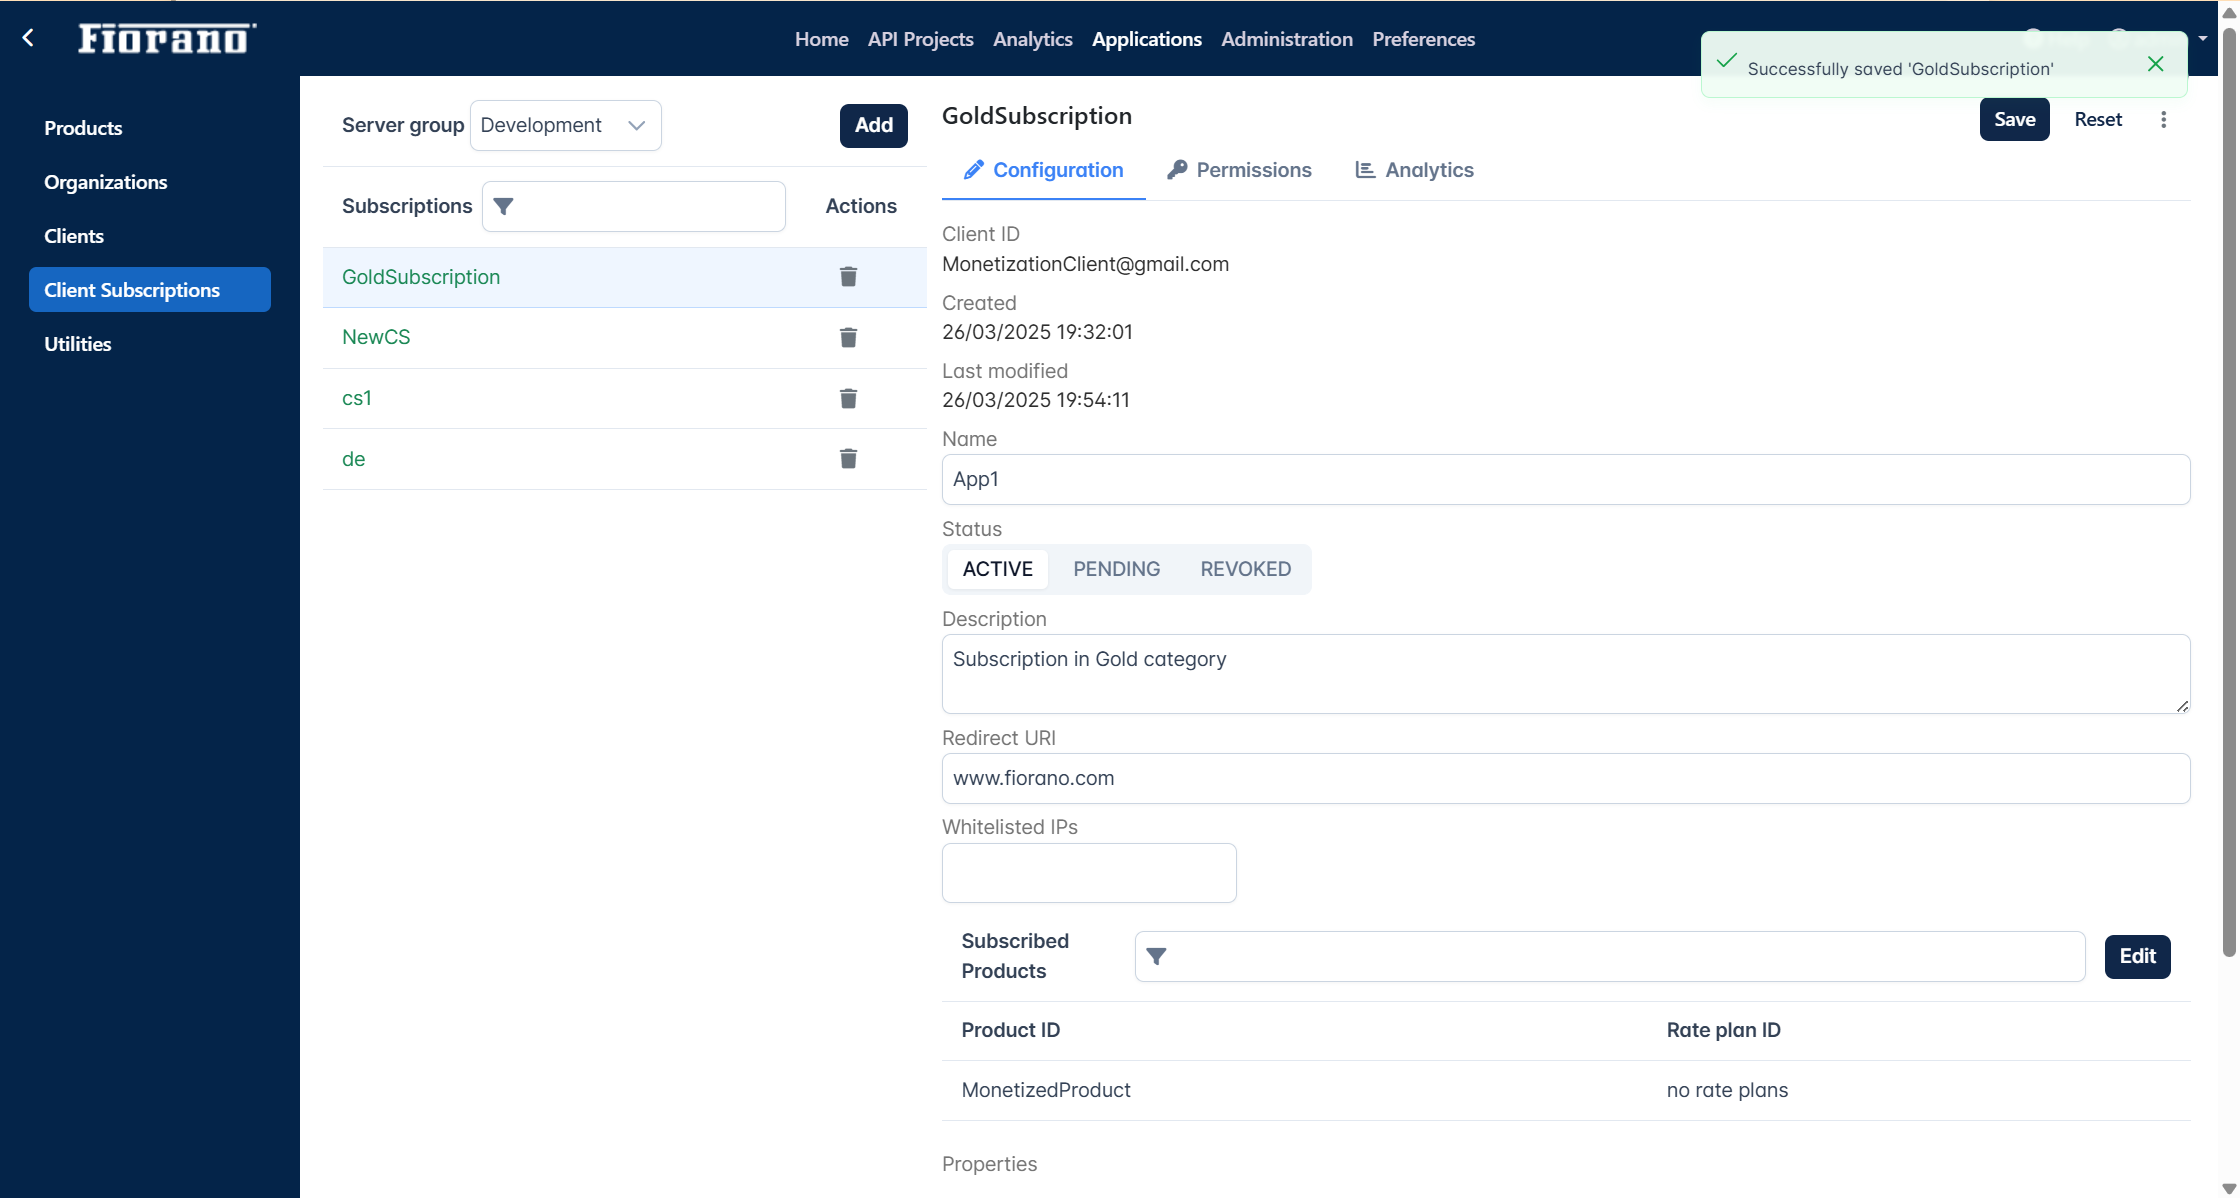
Click the Save icon to save the Client Subscription
1. Subscribed Products in client-subscription cannot be changed after adding the product and setting the rate plans. Client subscriptions should not be edited if it is already being used.
2. Individual rate plans should not be changed after publishing the rate plan. Only the end date of a published rate plan can be changed (only if it was previously left as null).
Verifying Monetization Setup
To verify whether monetization is enabled, the rate plan ID is set correctly and the limit was successfully executed, perform the following actions in the Analytics page.
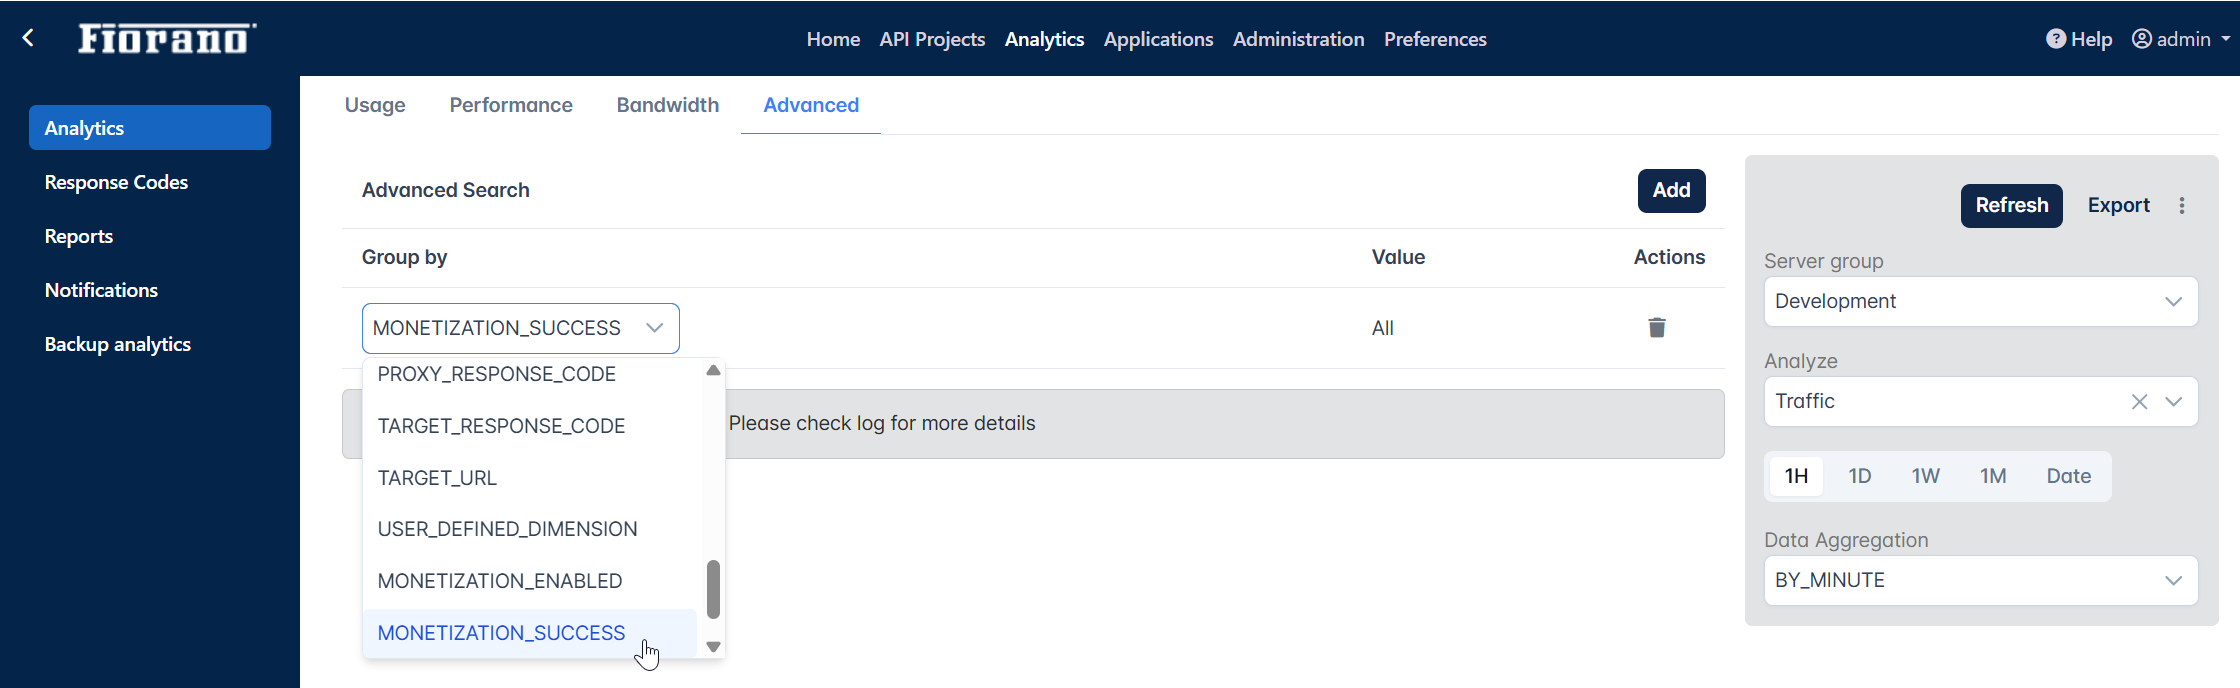
Go to the Advanced tab in the Analytics screen. Click the Add button and select any of the options below from the Group by drop-down:
-
MONETIZATION_ENABLED: To verify whether Monetization is enabled or not.
-
MONETIZATION_SUCCESS: To verify whether the Monetization Limit Check is applied correctly or not.
-
API_APPLICATION_RATEPLAN_ID: To verify whether the rate plan ID is set correctly or not.
Select other filtering options such as Server Group, Date, metrics etc. as per requirement.
The green color in the graph represents successful completion of the above tasks and the blue represents failure.
Click the Refresh button after changing the Group by options above to retrieve the respective graphs.