Customization options in the Administrator Portal
The Developer Portal Administrator provides a range of customization options, allowing administrators to tailor the portal’s appearance, functionality, and user experience. These options include theme customization, access controls, API configurations, branding elements, and workflow settings to align with organizational needs.
A major step in activating the developer to sign in to a developer portal is performed in this admin portal. Refer to the Changing the status of the developer section to see how it is done.
Logging into the administrator portal
To log into the administrator dashboard:
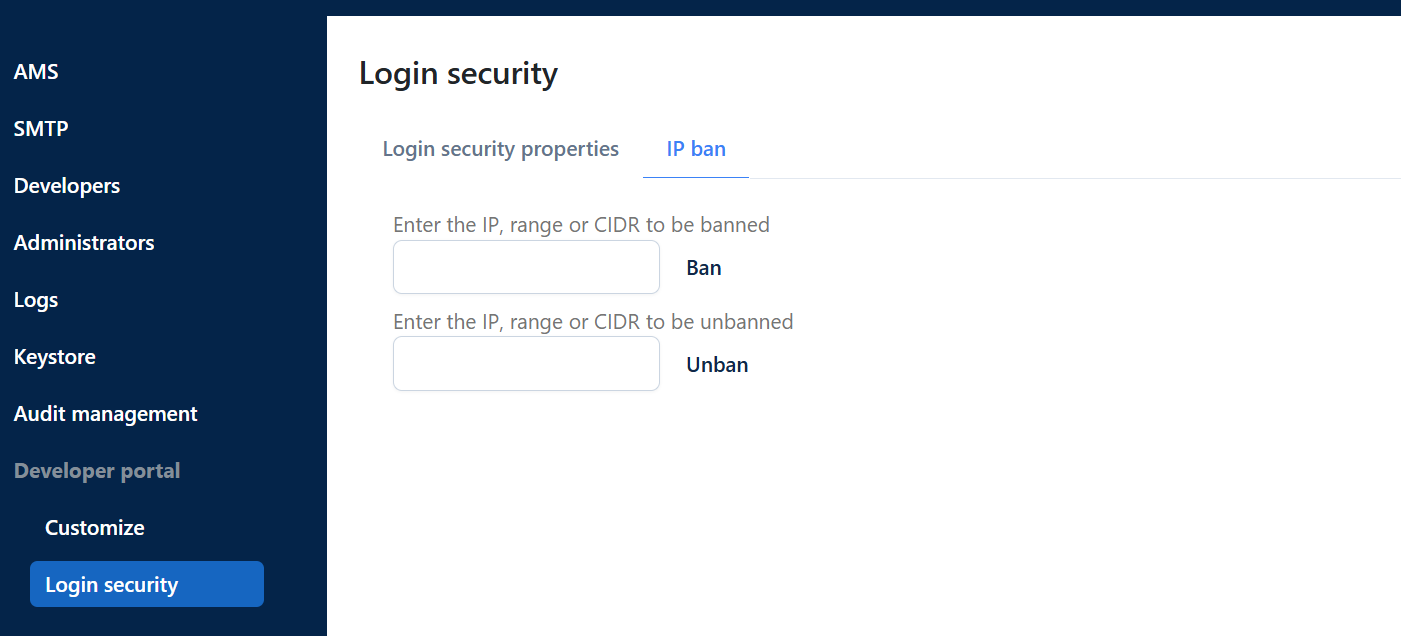
Navigate to the URL of the Developer Portal admin login page:
CODEhttp://localhost:2020/admin/loginUse the Developer Portal Administrator email address and the password set in the previous section.
Click Sign in
Enable the Stay signed in option to maintain your session and prevent logouts when updating and refreshing pages.
Configuration options
AMS
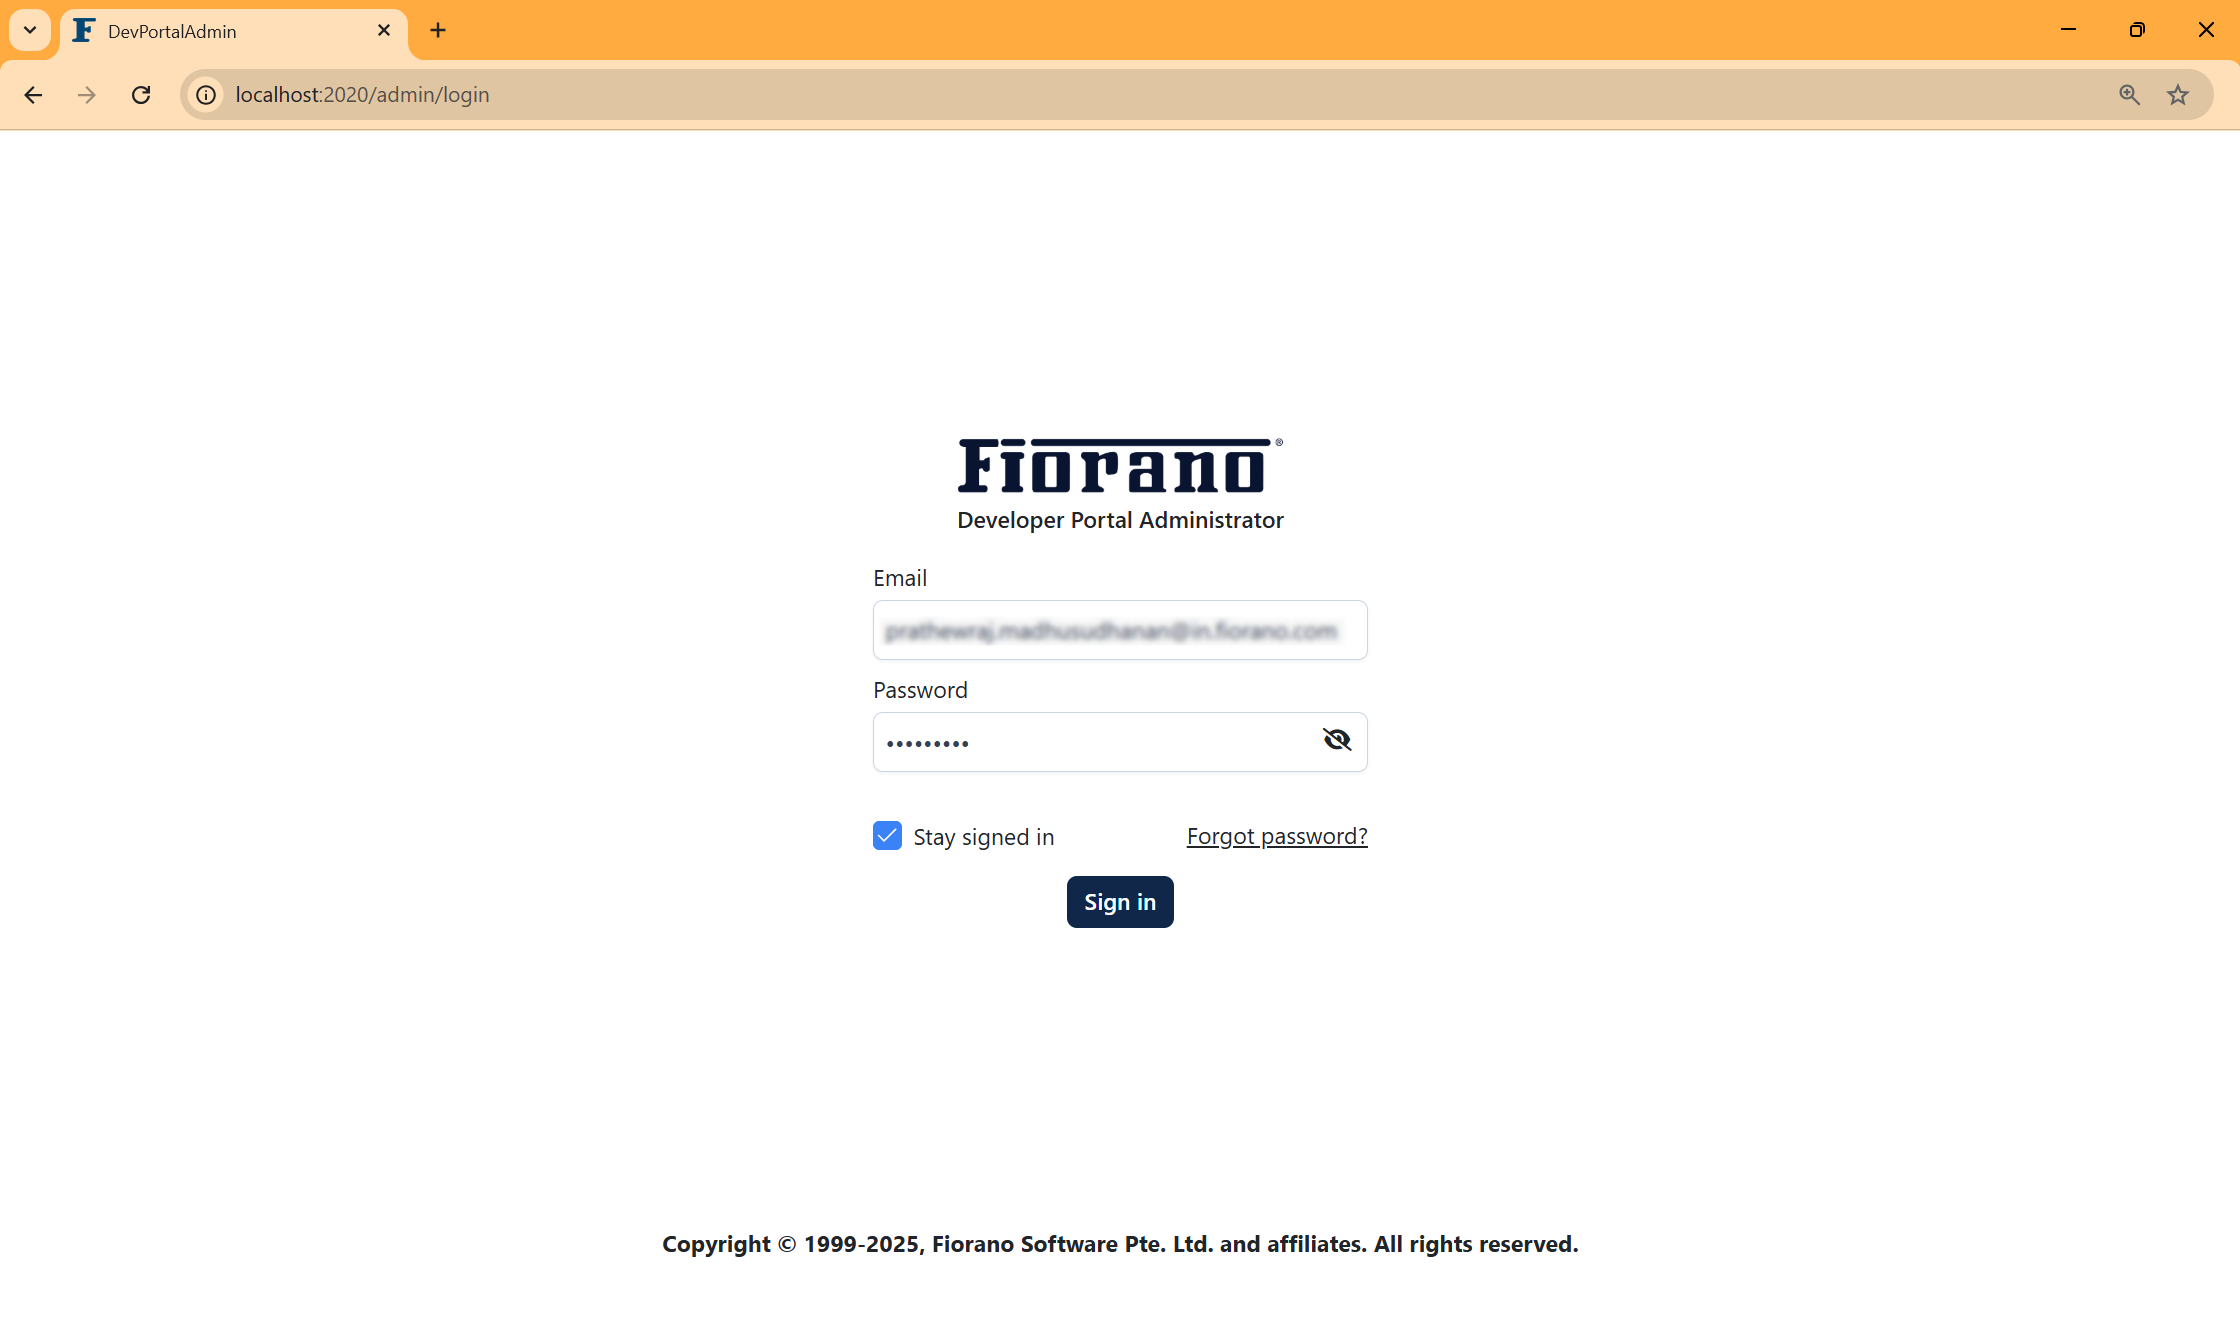
The landing page is the Fiorano API management server page (the AMS tab). This page reflects the AMS connection configuration properties entered in the Developer Portal Administrator Setup page.
Refer to the AMS connection configuration section in the Setting up Administrator Portal page.
These admin credentials can be changed anytime from this panel. After making the changes, click Validate and then click Save to apply the configuration.
SMTP
SMTP server
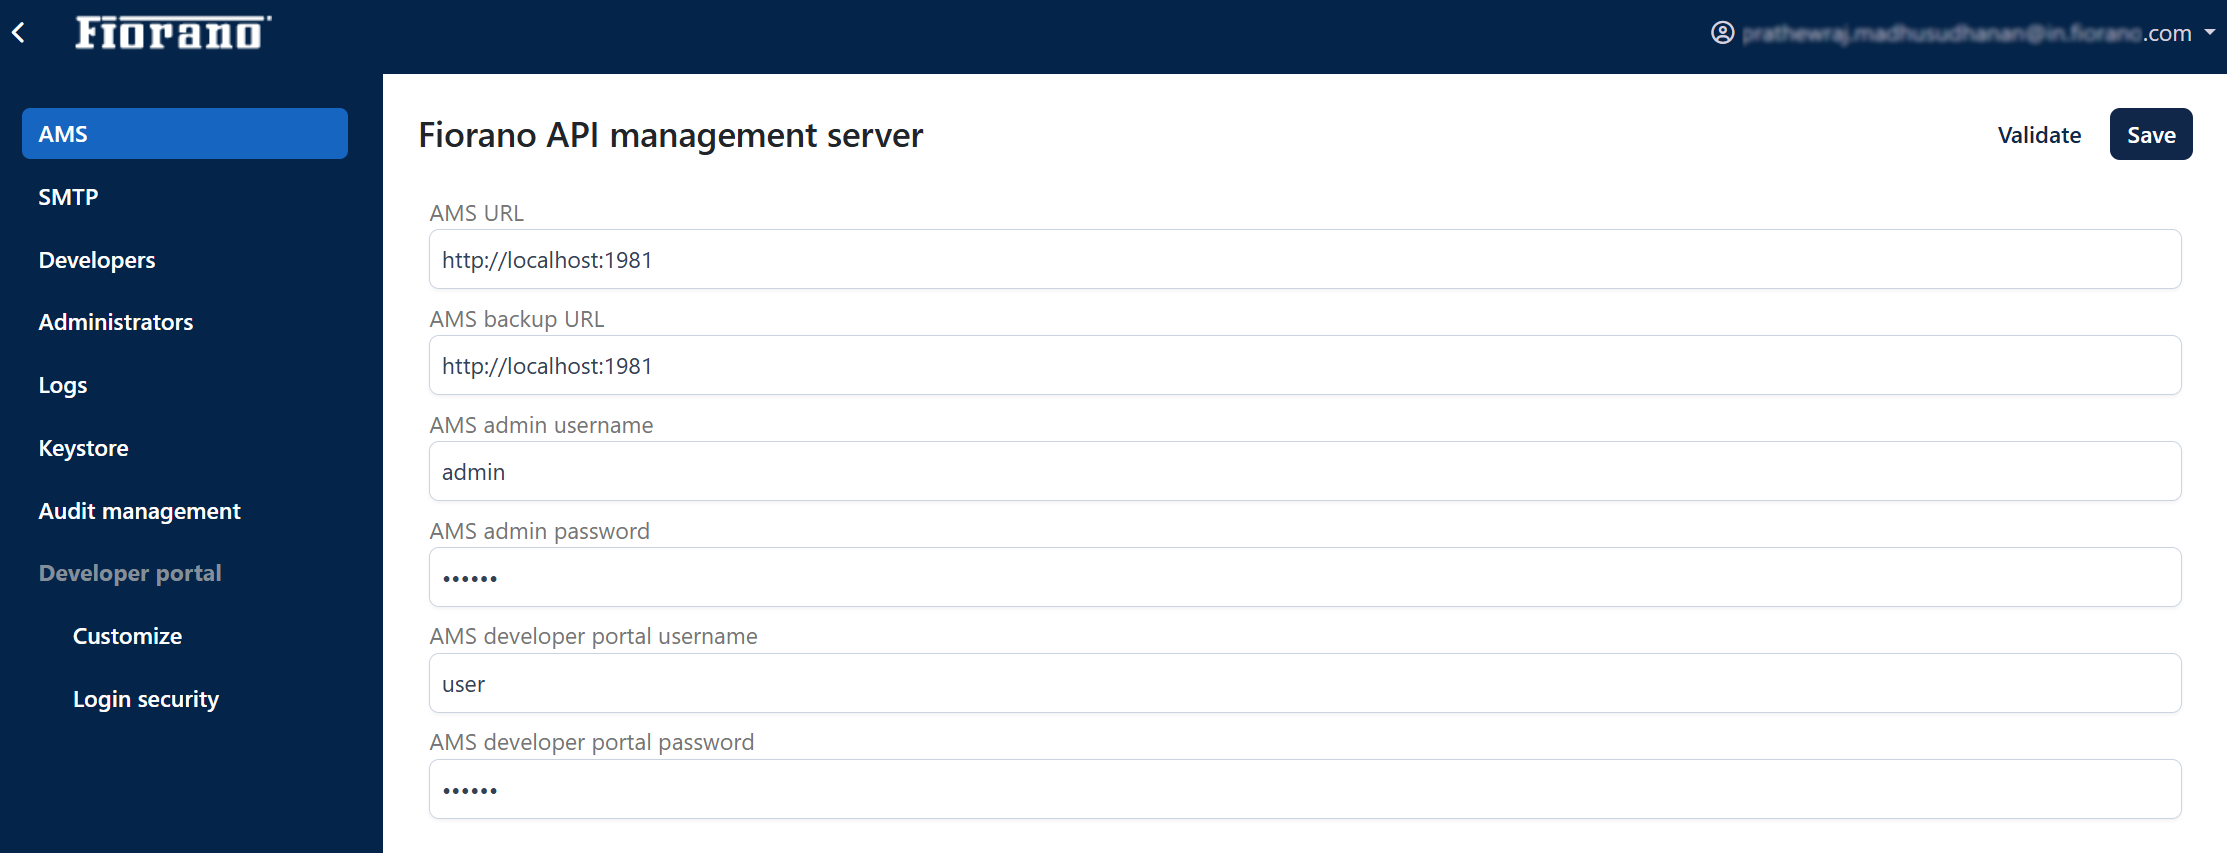
This page reflects the SMTP connection configuration properties entered in the Developer Portal Administrator Setup page.
Refer to the SMTP connection configuration section in the Setting up Administrator Portal page.
These admin credentials can be changed anytime from this panel. After making the changes, click Save to apply the configuration.
E-mail templates
To change the content of the templated notification emails, edit the text, and click Save.

Developers
The clients added by the admin in the API Management dashboard are reflected in this section under the server group selected. The administrator can activate/inactivate and remove clients, log sessions out, and change password for clients. In addition, client subscriptions under each client can be viewed.

Changing the status of the developer
To switch the status between Active and Inactive,
Click the edit button next to the developer's status.
Select the Active or Inactive option.
Click the Save icon.

Activating a new developer after signing up is required to enable the developer to sign into the developer portal unless the Set developer status to ACTIVE upon creation automatically option is enabled under the Customization tab.
Logging out of sessions
The Logout on all sessions ![]() icon under the Actions column logs the particular developer out of all sessions.
icon under the Actions column logs the particular developer out of all sessions.
To log out of sessions on all developer IDs, click the Logout sessions of all users button.
Removing a developer
The Delete developer ![]() icon under the Actions column deletes the particular developer.
icon under the Actions column deletes the particular developer.
Changing developer password
The Change password ![]() icon under the Actions column helps change the developer login password.
icon under the Actions column helps change the developer login password.
Password must include:
at least 8 characters
One alphabetic character (A-Z or a-z)
One digit (0-9)
One special character (from the set @$!%*?&-_)
Viewing subscriptions
The View subscriptions ![]() icon under the Actions column lists the client subscriptions registered under the clients.
icon under the Actions column lists the client subscriptions registered under the clients.
Administrators
In this section, the email with which the dev portal admin is set up will be present.

Adding a new administrator
Additional administrators can be added and removed, and their passwords can be changed. All administrators will have the same admin rights.
Click the Add button.
Provide the following details in the Add administrator dialog box:
Username: Email ID of the person who has to be added as an administrator.
Password: Provide a unique password that follows the rules below:
at least 8 characters
One alphabetic character (A-Z or a-z)
One digit (0-9)
One special character (from the set @$!%*?&-_)
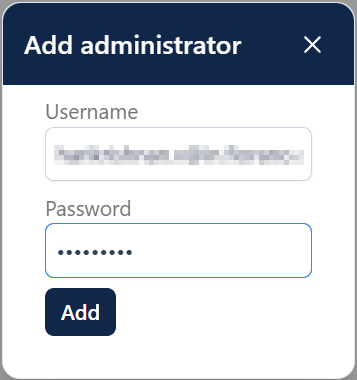
Click the Add button.
A notification mail will be sent to the new admin confirming the person has been added as an administrator.

Share the password with the new administrator to log into the dev portal admin.
A notification mail will be sent to the new admin confirming the person has been added as an administrator.
Deleting an administrator
The administrator who has logged in can delete the other administrators present in this section.
Click the Delete developer
 icon under the Actions column to delete the particular administrator.
If an additional administrator got deleted by mistake, add the admin back again using the deleted mail ID.
Changing password
The administrator who has logged in can change the password for the other administrators present in this section.
Click the Change password
 icon under the Actions column.
Provide the following details:
Old password: Existing password of that administrator.
New password: Provide a unique password that follows the rules below:
at least 8 characters
One alphabetic character (A-Z or a-z)
One digit (0-9)
One special character (from the set @$!%*?&-_)
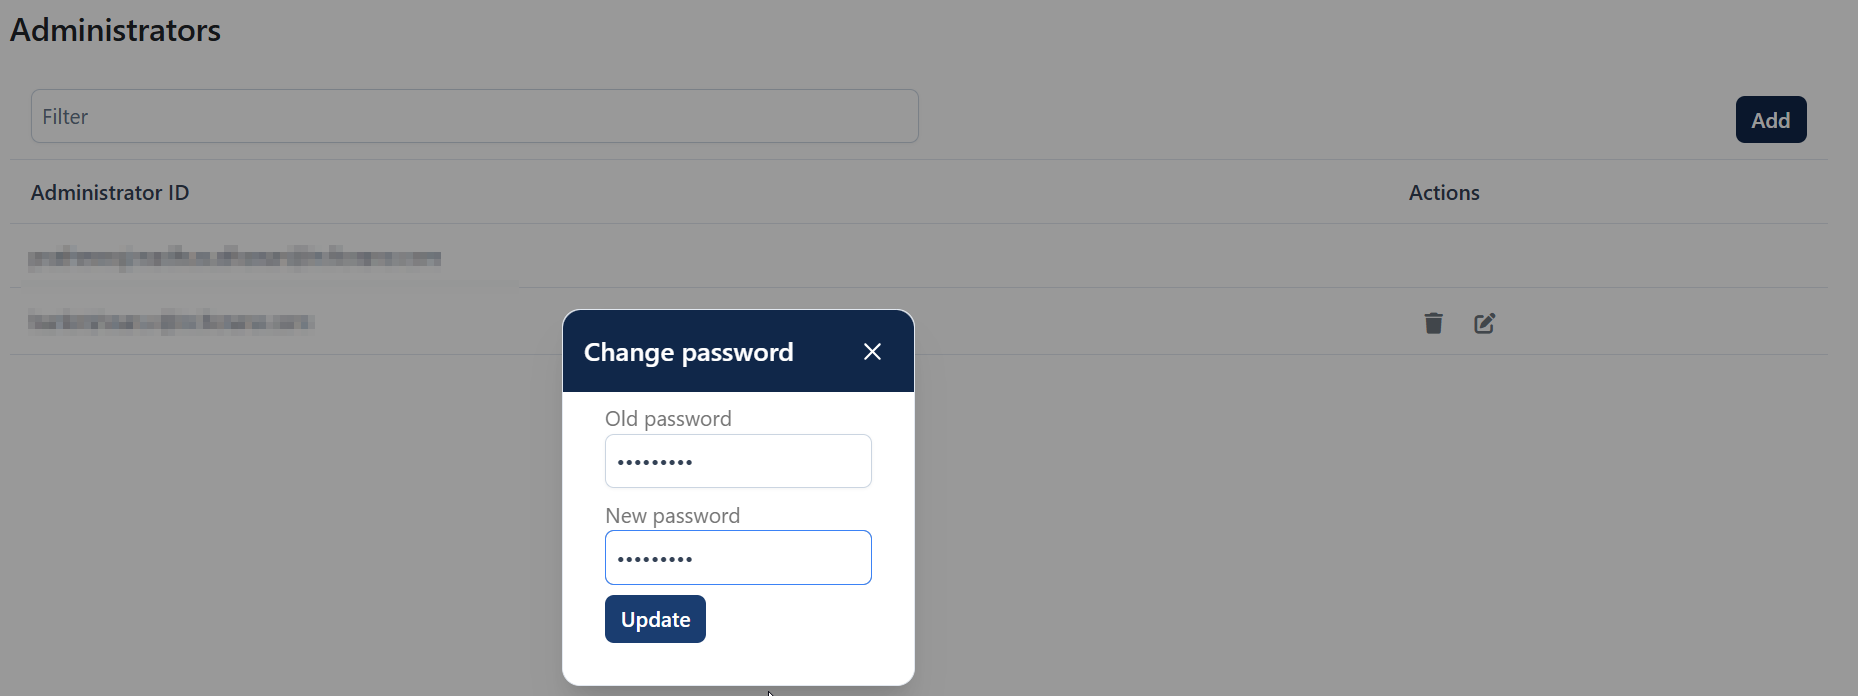
Click the Update button.
Deleting an administrator and changing the password can done only for the additional administrators and not for the one who has logged-in.
Profile
If the administrator needs to change own password, this can be done using the Profile option.
Click the username on the upper-right part of the screen.
Click the Profile option.
Click the Change password button.

Provide the following details:
Old password: Existing password of that administrator.
New password: Provide a unique password that follows the rules below:
at least 8 characters
One alphabetic character (A-Z or a-z)
One digit (0-9)
One special character (from the set @$!%*?&-_)
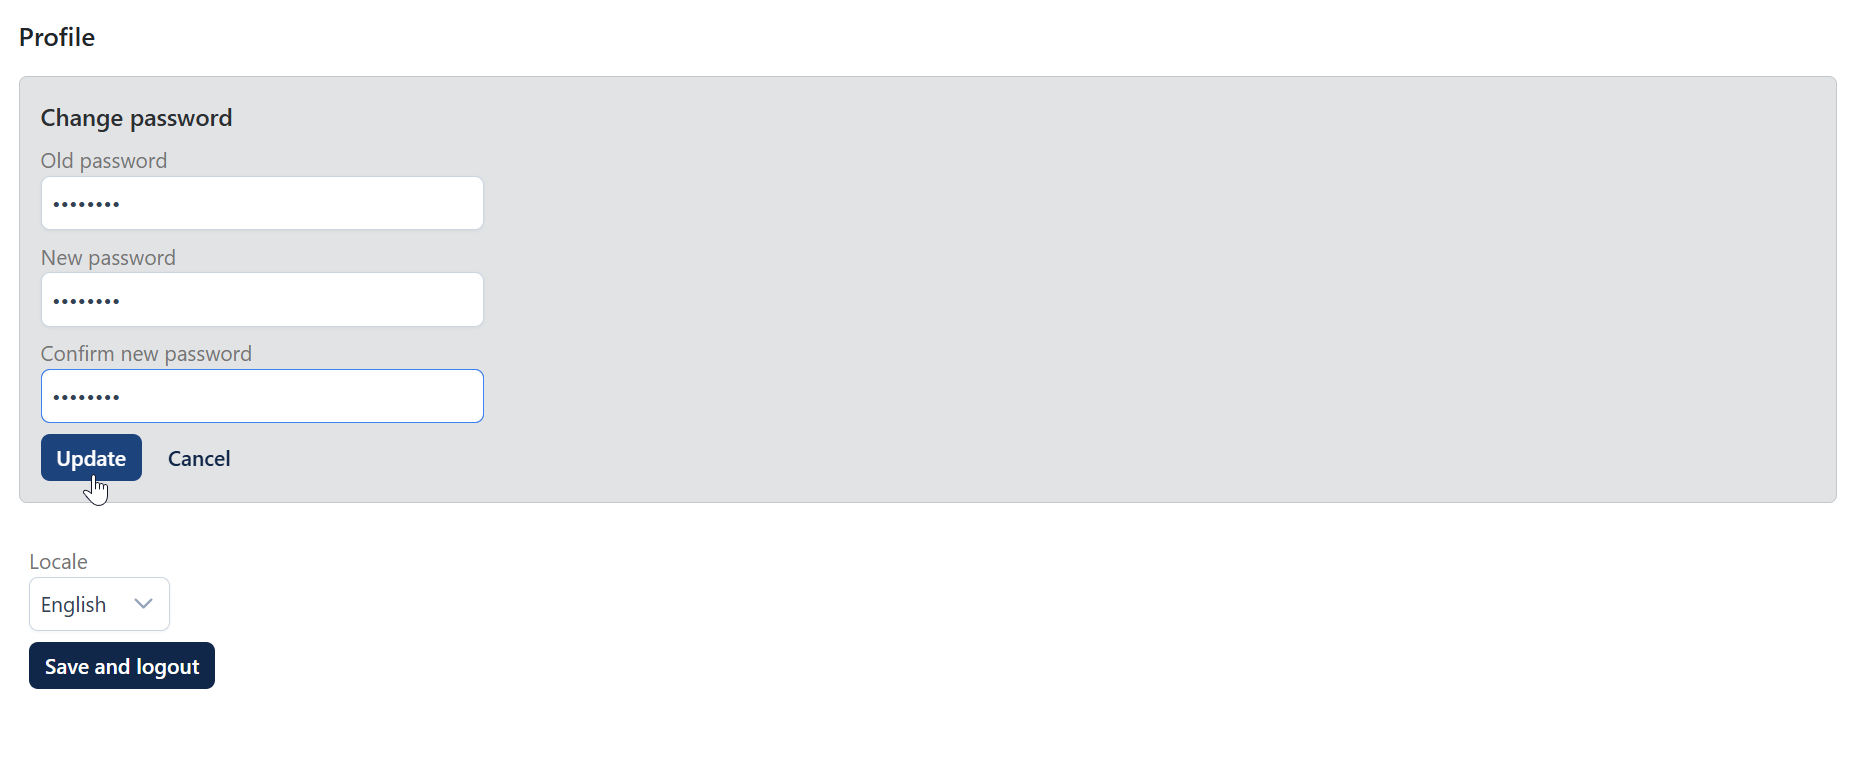
Click the Update button.
Logs
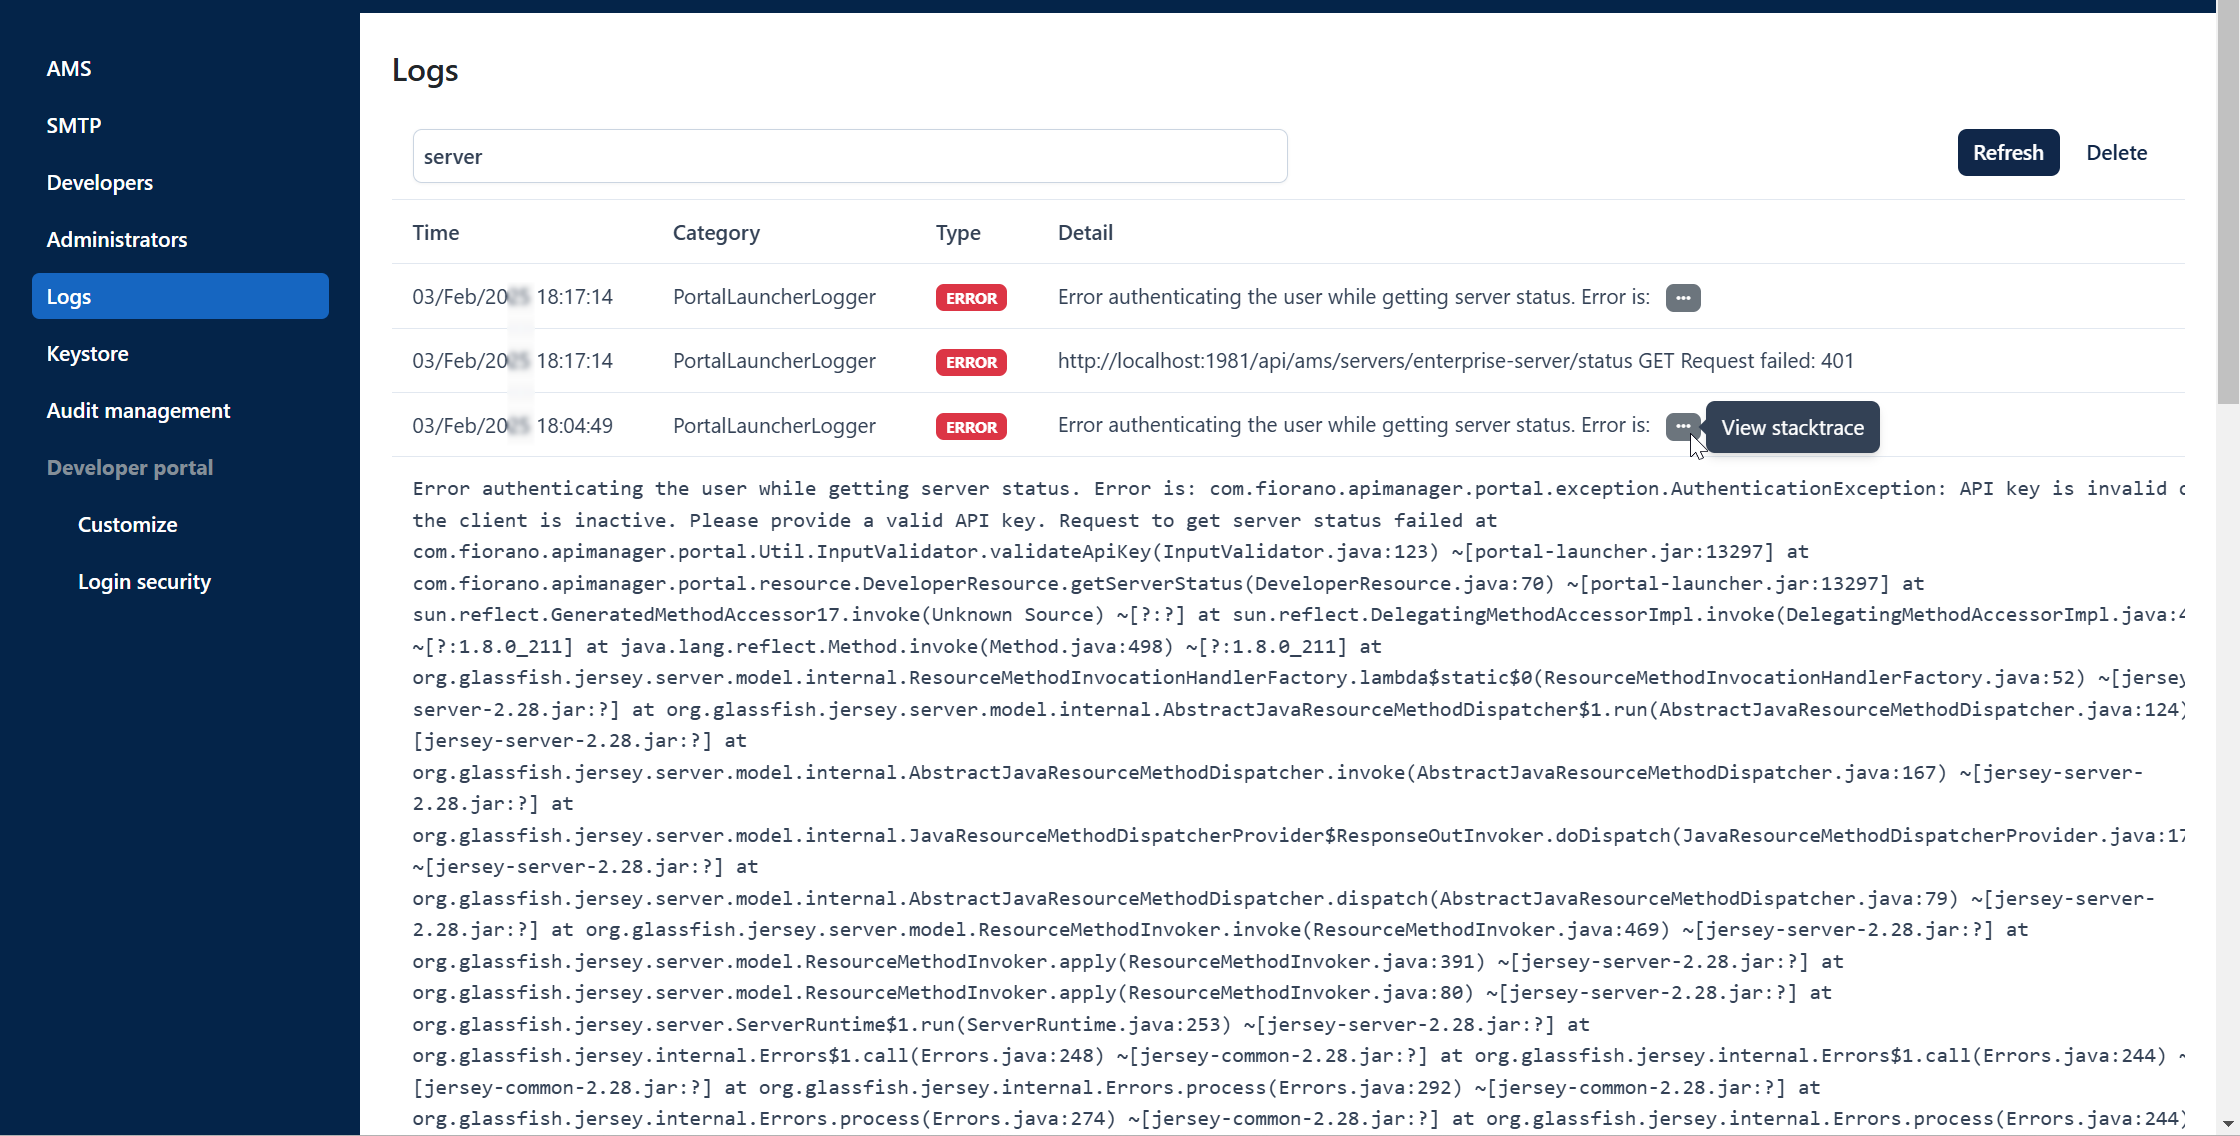
Lists event logs such as Information, Error, and Warning messages.
Click the Refresh button to load the latest logs.
Type a keyword in the filter bar to filter data based on the keyword.
The default display setting is 10 records per page, which can be adjusted to 25, 50, or 100 records per page.
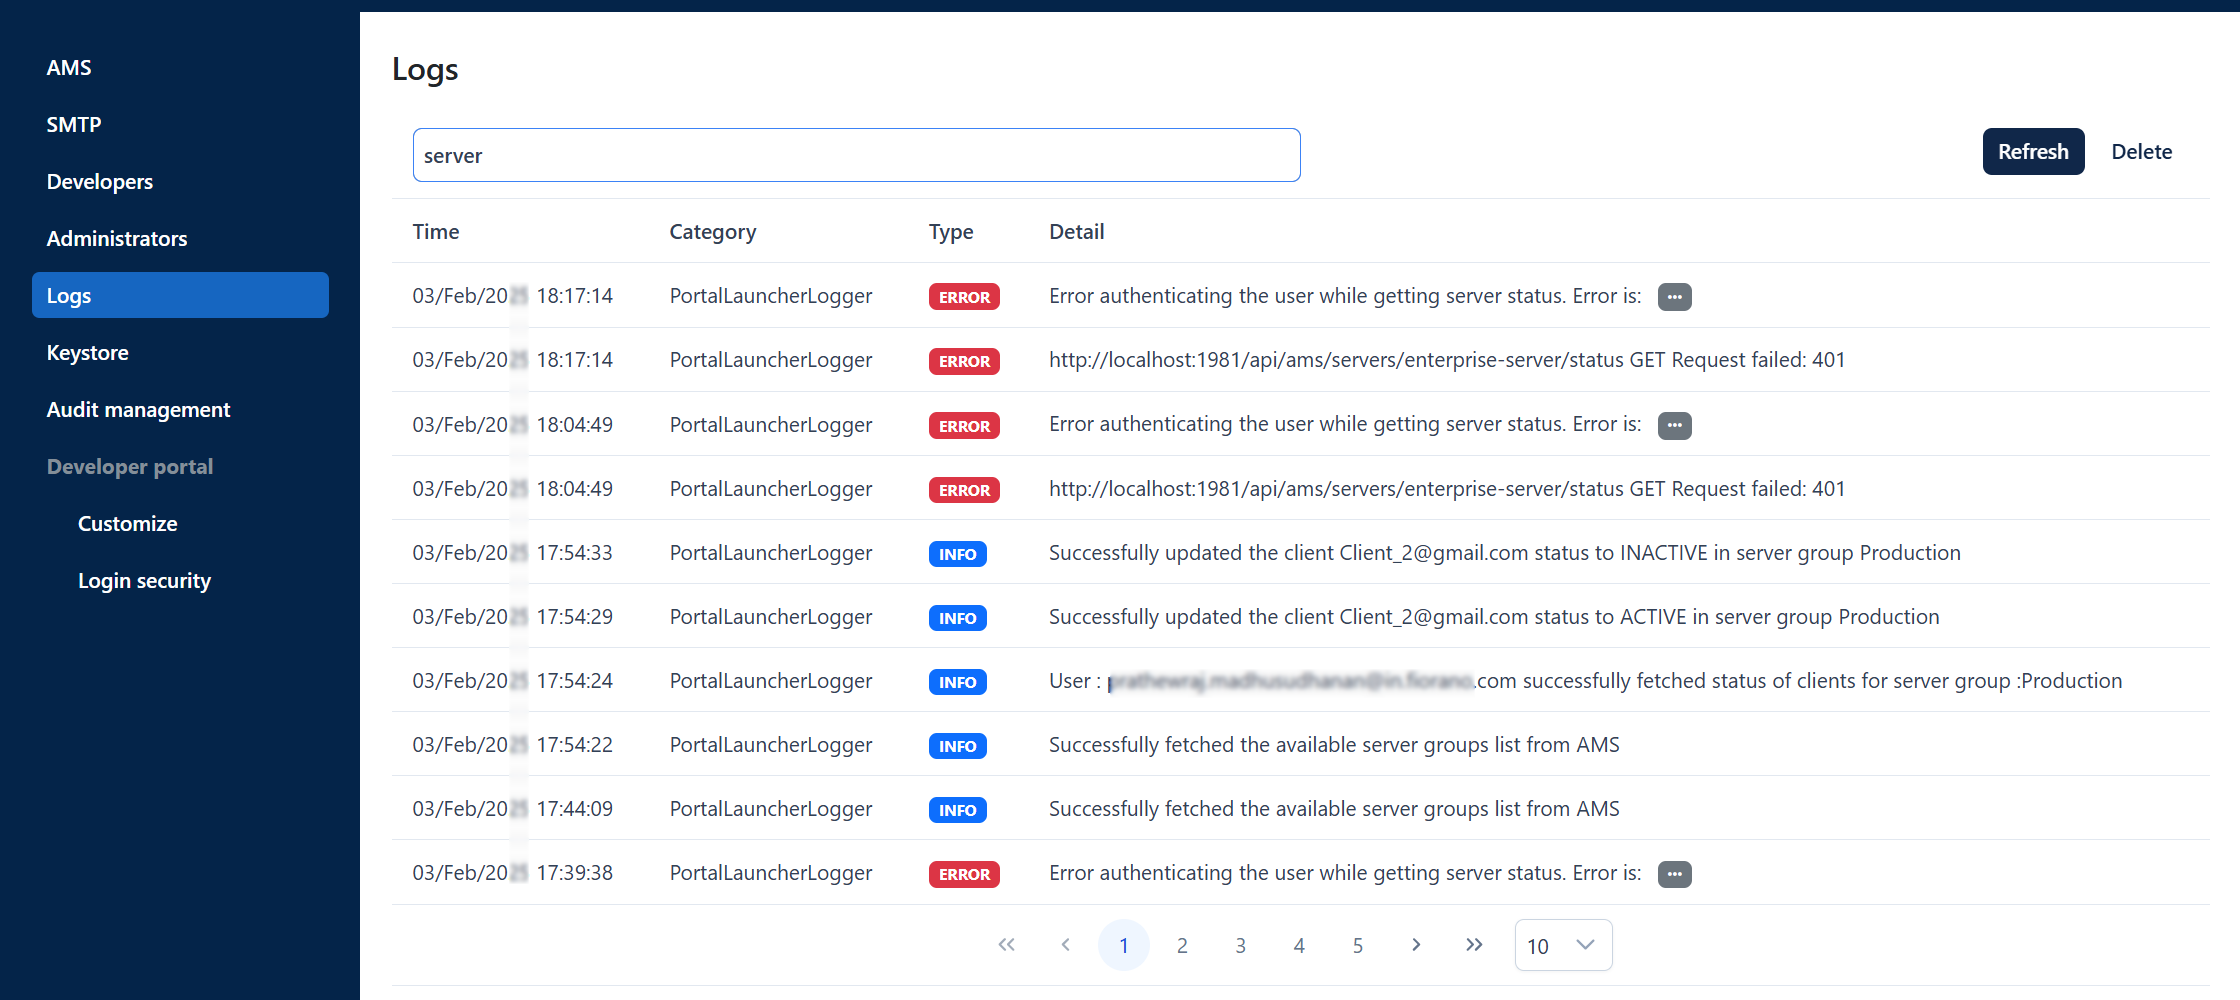
In case of Error logs, click the View stacktrace ![]() button to see the entire error message.
button to see the entire error message.
Keystore
Lists the keystone files available.

Click the Add button and browse from the local device to add a new keystore.
Audit management
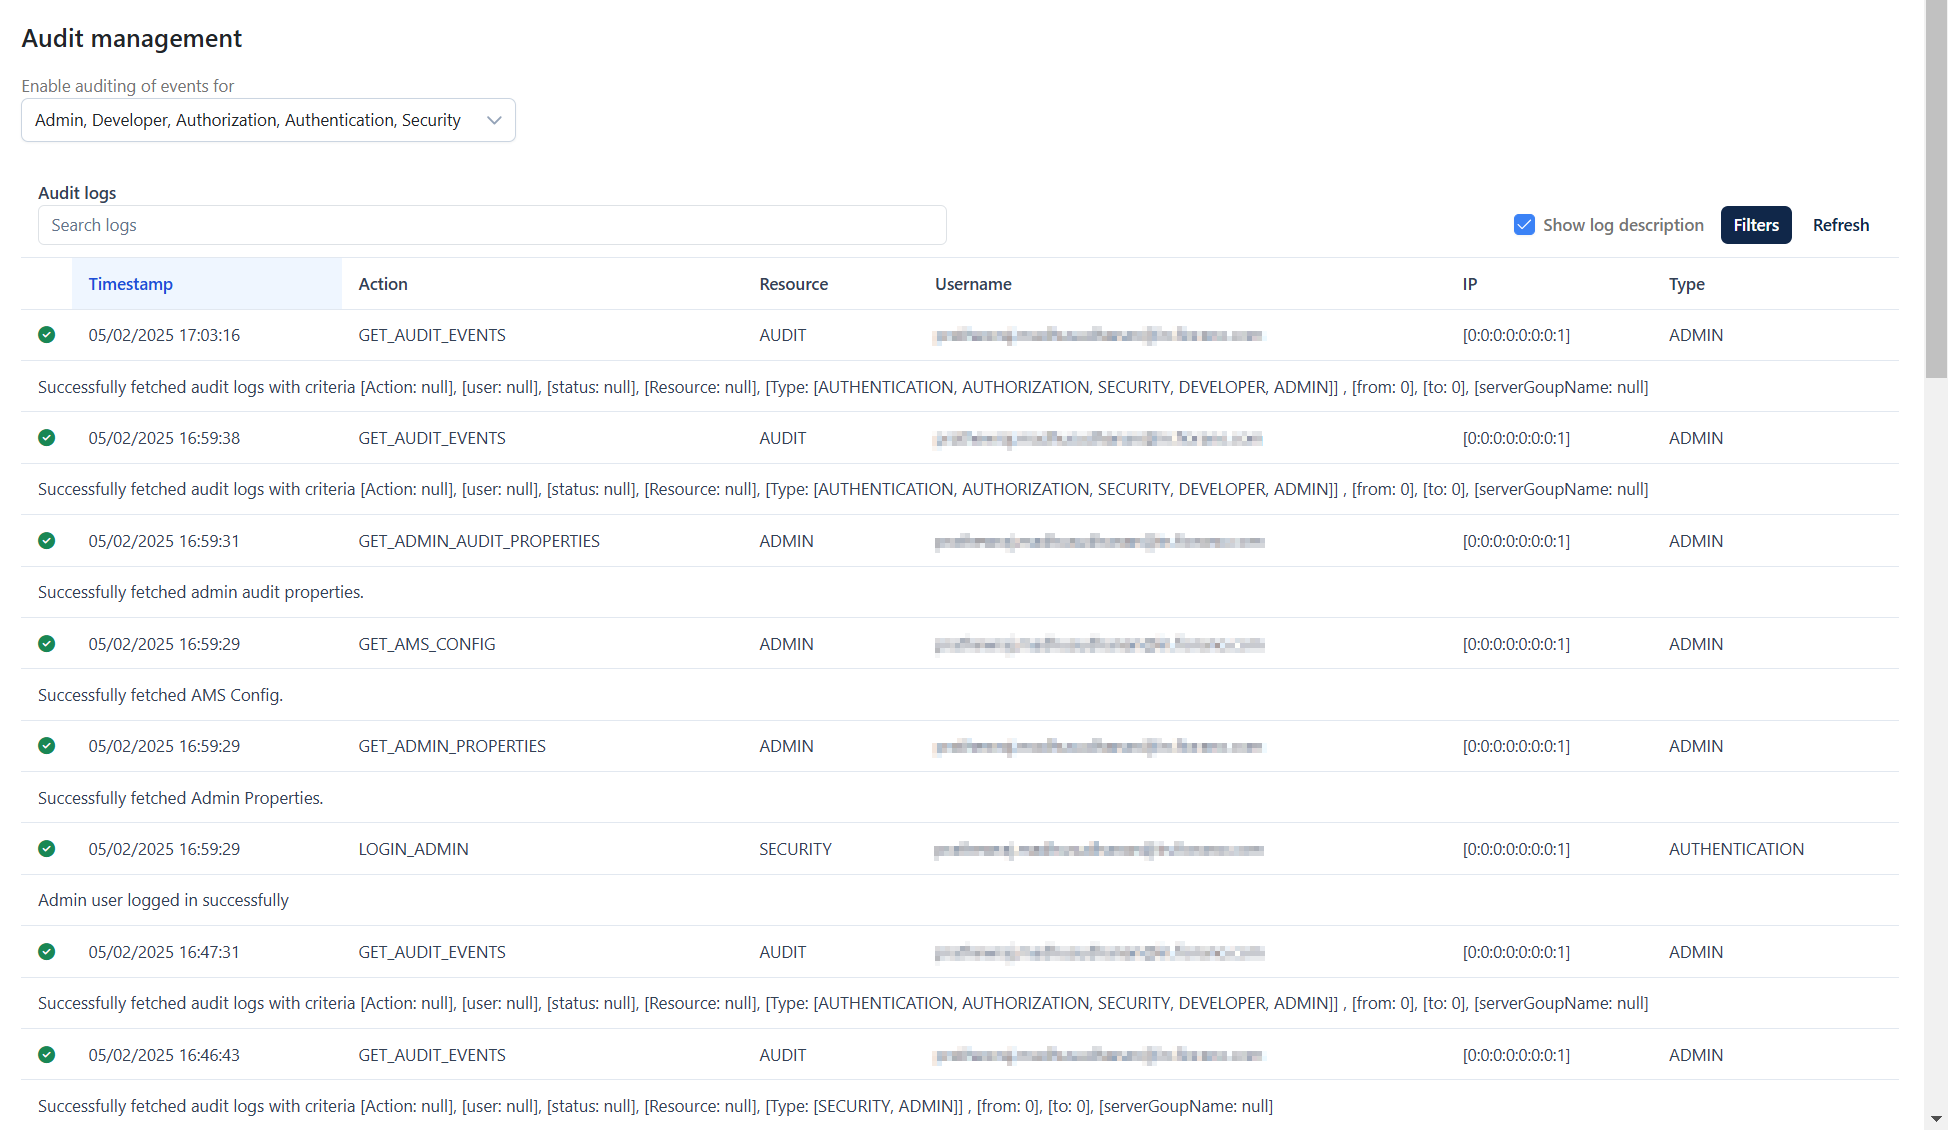
To list audit logs by auditing and filtering of events based on various audit types such as authentication, authorization, security, developer, and admin.

Enabling and filtering events
To list the audit logs,
Click the Enable auditing of events for drop-down and select the event types.
The dev portal starts auditing for the event types selected.
To enable auditing for all the events, select the checkbox on the top of all the event types (see the figure above).
Click Save and then click the Filters button.
In the Audit event filter panel, select all properties based on the required criteria, provide the timeframe, and click the Fetch button.
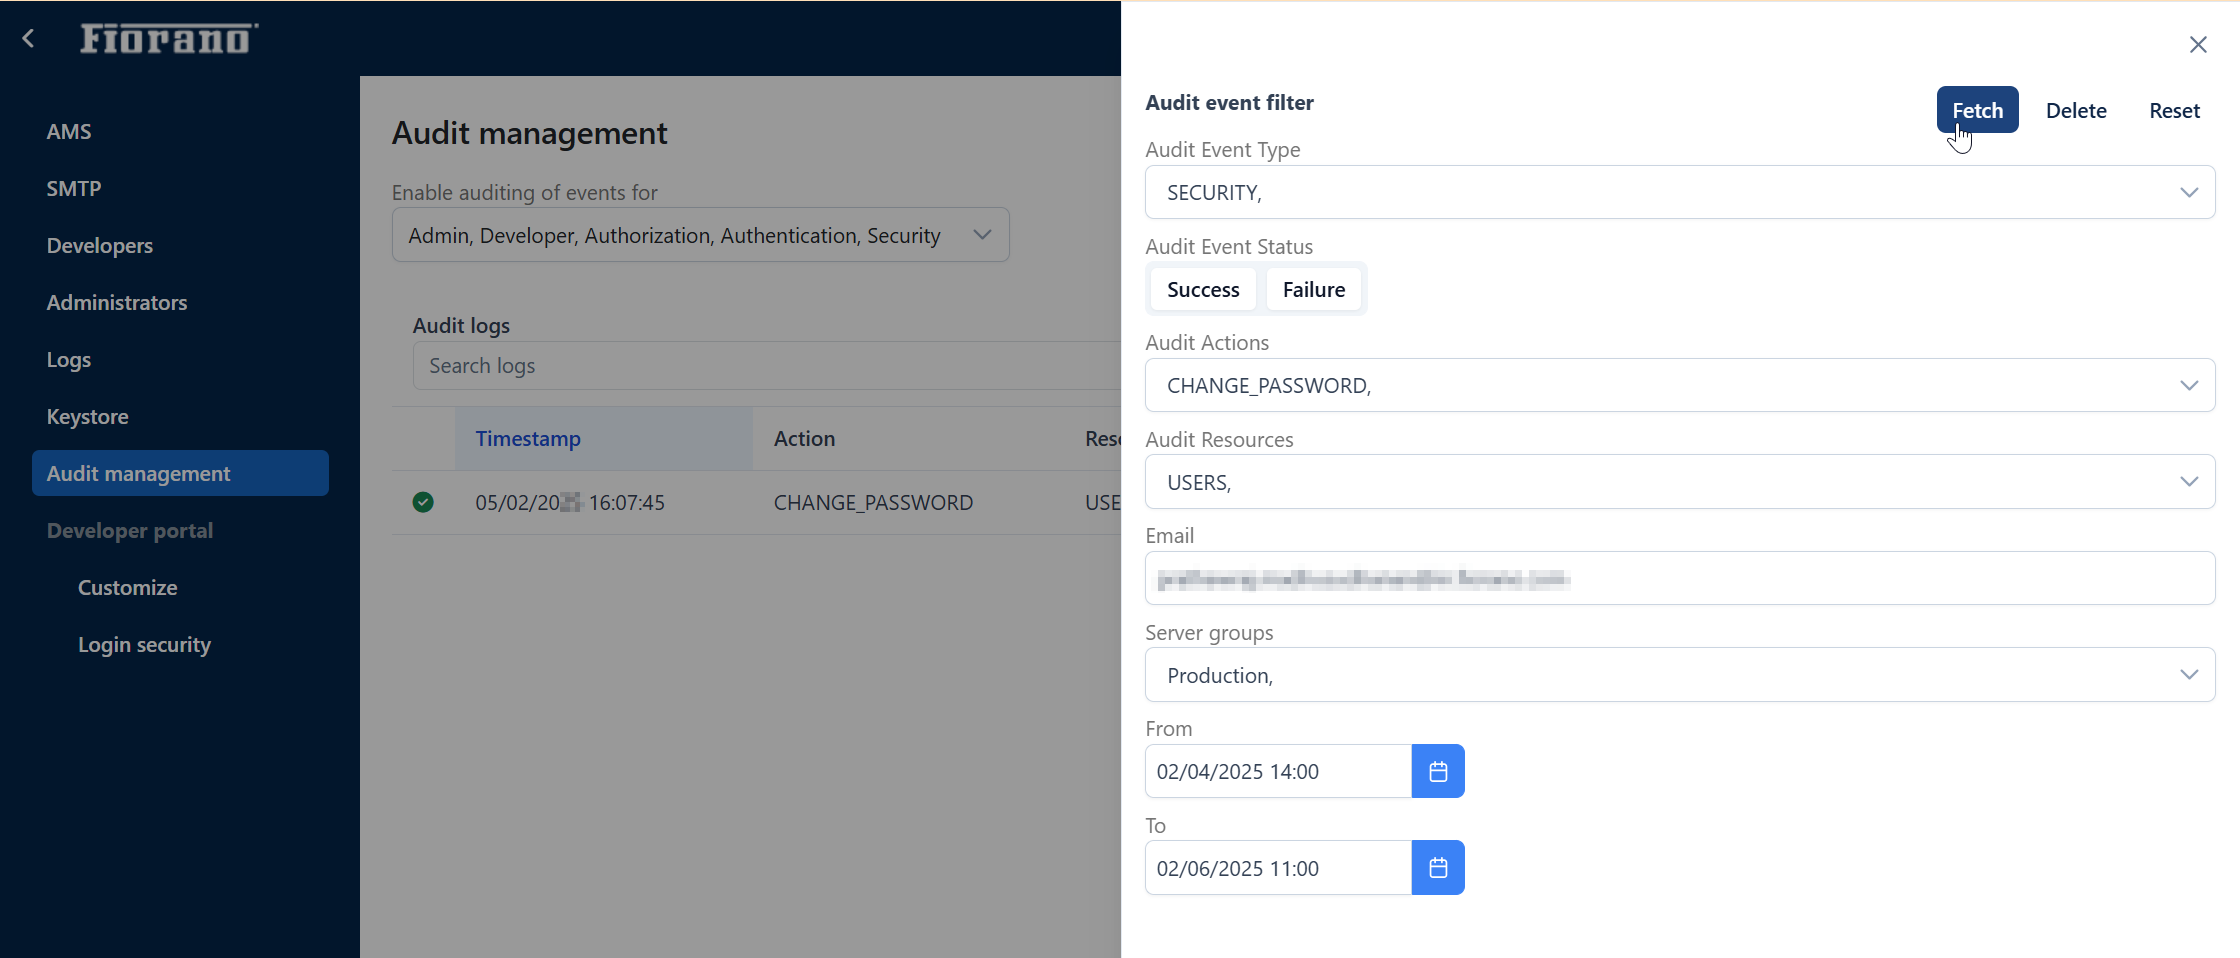
Click the Reset button anytime to clear the search criteria.
Refer to the Audit event filter properties section below for audit event property descriptions.
The Audit logs list gets populated.

Click the Refresh button to list the latest data in case the To property of the time frame in the Audit event filter panel is provided for the future time. This lists the latest data if any.

Deleting specific logs
Click the Filters button.
Select the criteria options in the Audit event filter panel
Click the Delete button to remove the particular audit logs, for example the one in the Step 3 in the Enabling and filtering events section.
Click Yes in the confirmation dialog box.

Searching logs based on keyword
Selecting all audit event types in the Audit event filter panel lists the entire logs. To filter specific logs based on a keyword, use the keyword in the Search logs textbox.
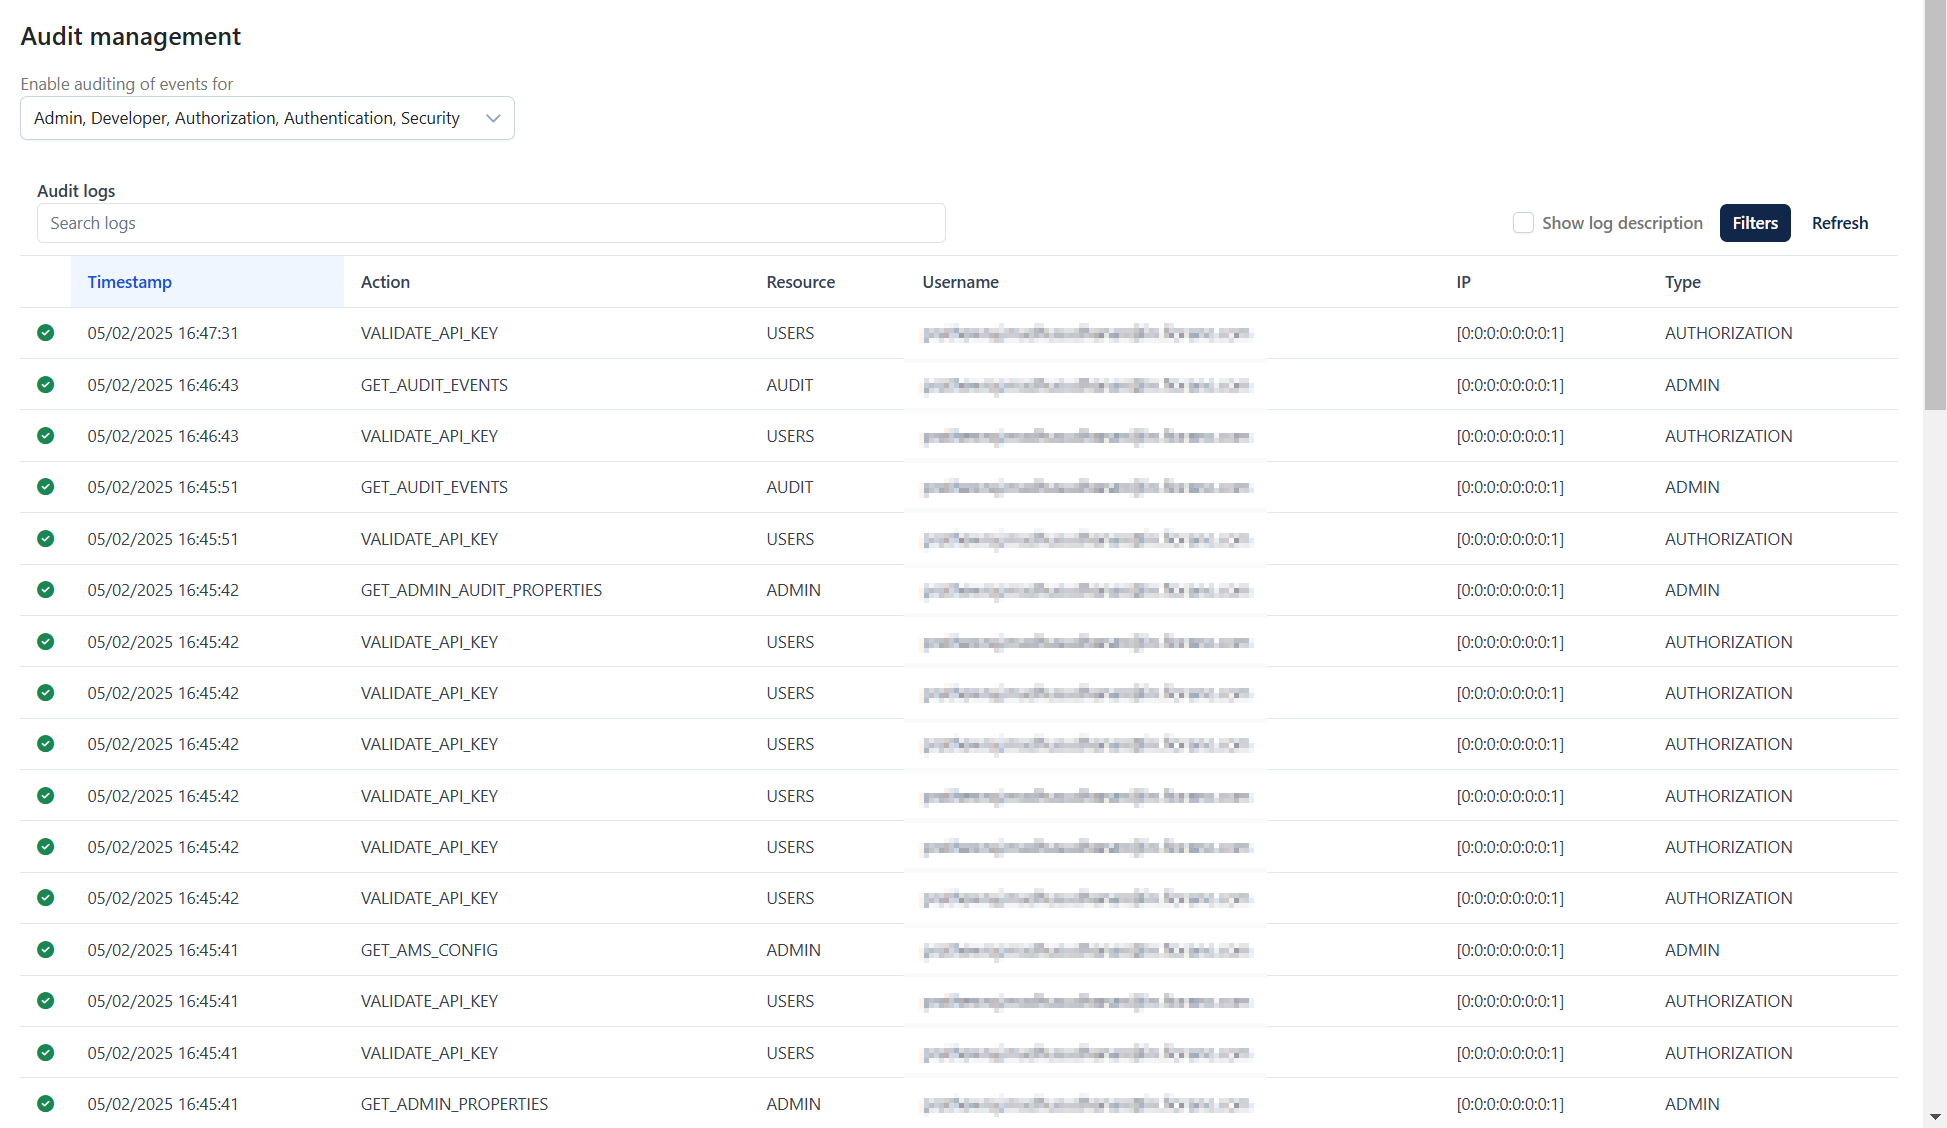
The figure below shows logs filtered based on the keyword “AMS”.
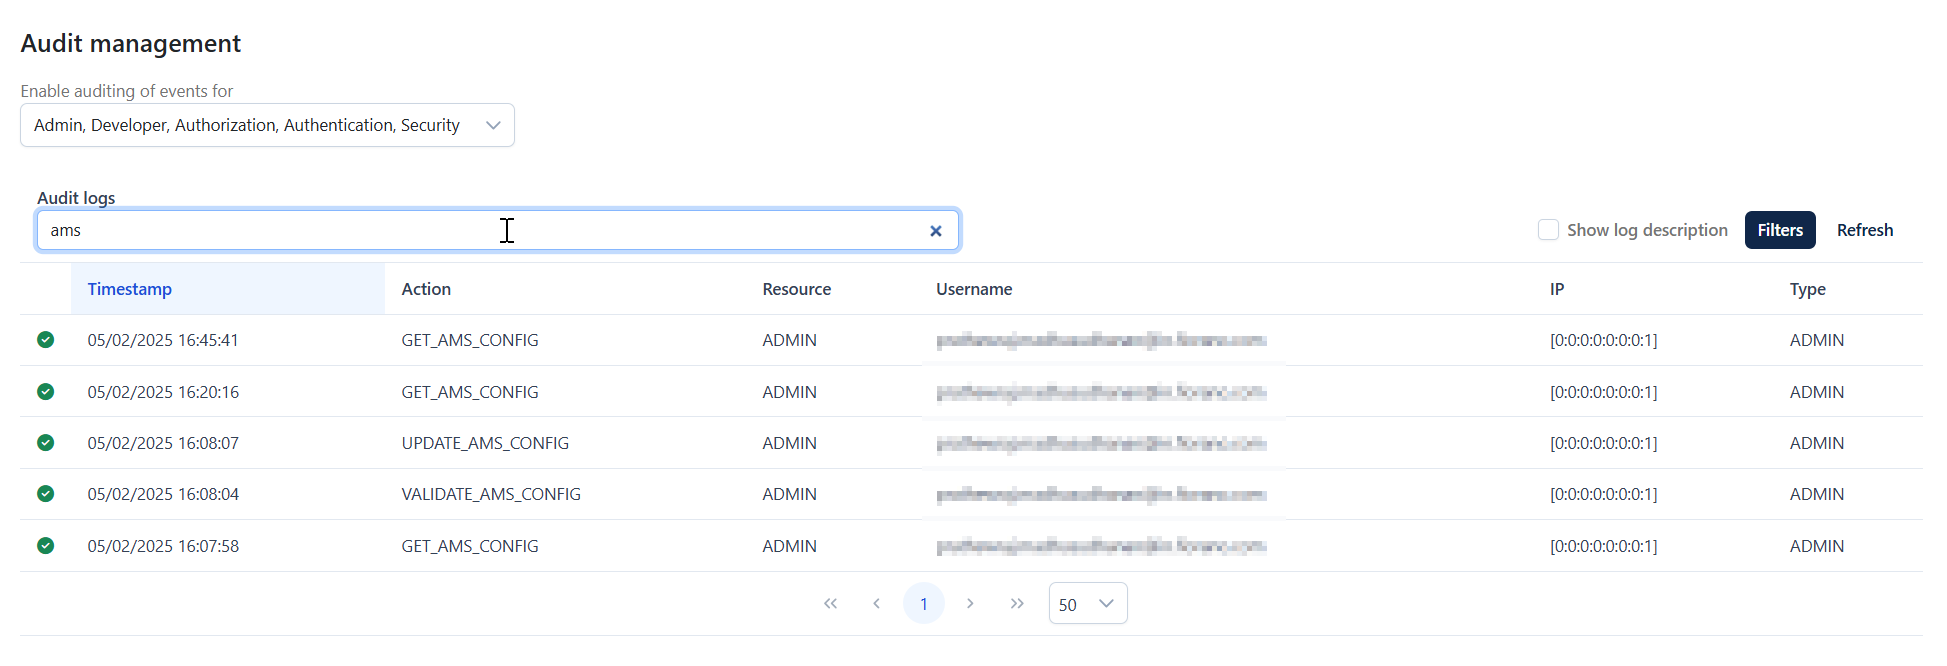
Displaying log descriptions
Enabling the Show log description option displays a short description under each listed log.
Audit event filter properties
Following are the properties that can be selected based on the requirement.
Property | Description |
|---|---|
Audit Event Type |
|
Audit event Status |
|
Audit Actions | Actions such as Login user, Get client details, Get request IP, Validate ams config etc. Not mentioning here as the list is exhaustive. |
Audit Resources |
|
Mail ID of the registered user. | |
Server groups | Developer, Production, and groups that are added by the user. |
From - To | Date range for analyzing data |
Developer Portal customization options
This section allows to customize the appearance, functionality, and access control of the developer portal to suit your organization's preference.
Customize
The look and feel of the Devportal Portal, alignment, global text, date format, currency symbol etc, can be customized in the section. Various options such as “View public API products without signing in“ and “Set subscription status to ACTIVE upon creation automatically” can be enabled/disabled as well.
Images
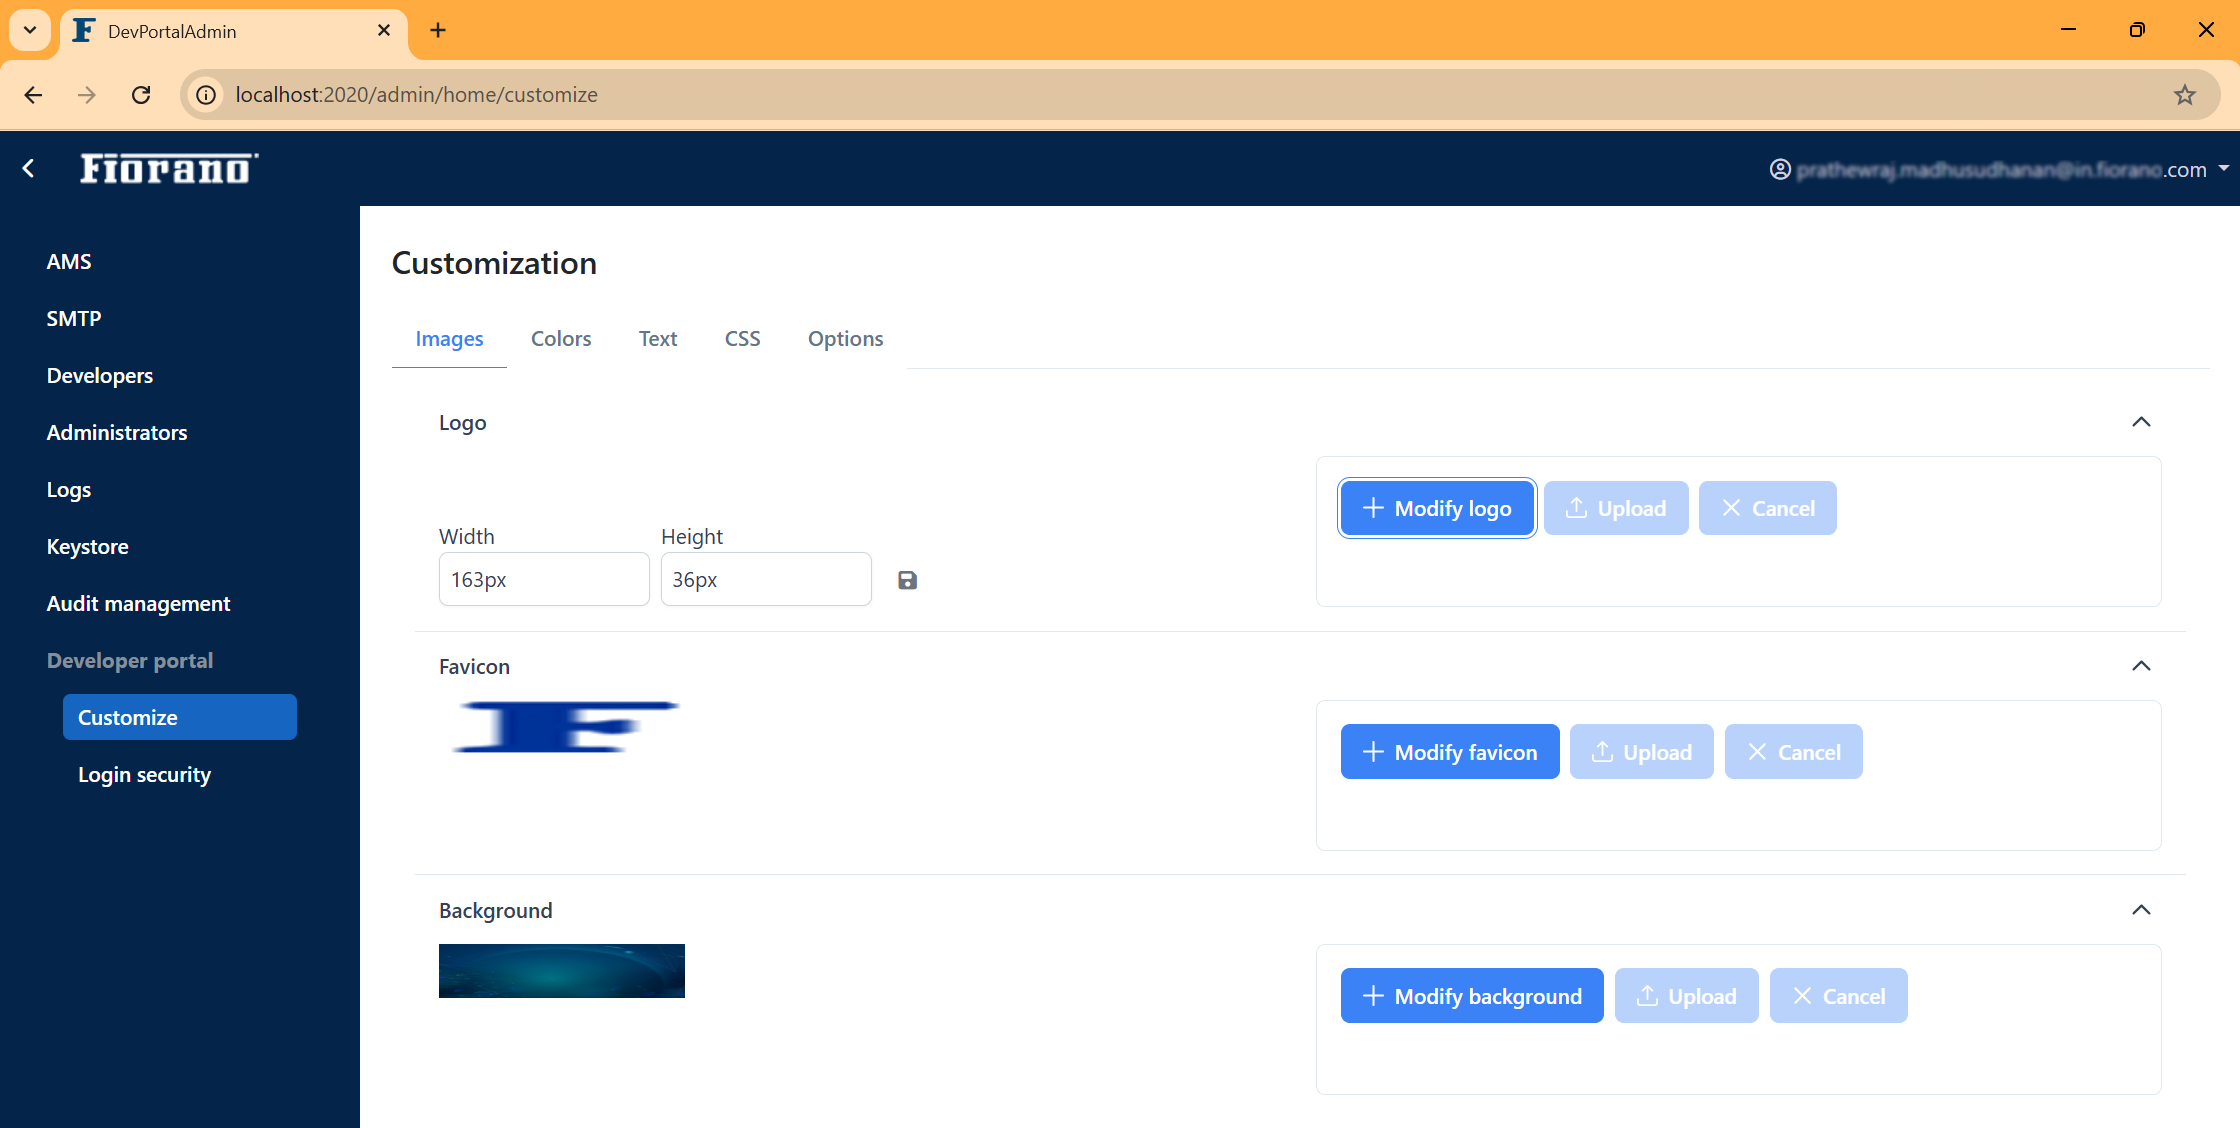
The elements that are part of the global templates and visible on every page within a site can be edited here.
Logo
The name that’s seen on the upper-left part of the pages (“Fiorano” in the image below).
Click the Modify logo button to select an image from the repository and click the Upload button to update the new logo.
Favicon
A small icon typically present above the address bar of the browser which helps users easily identify the website.
Click the Modify favicon button to select an image from the repository and click the Upload button to update the new favicon.
Background
The background color of the developer.
Click the Modify background button to select a background image file from the repository and click the Upload button to update the new logo.
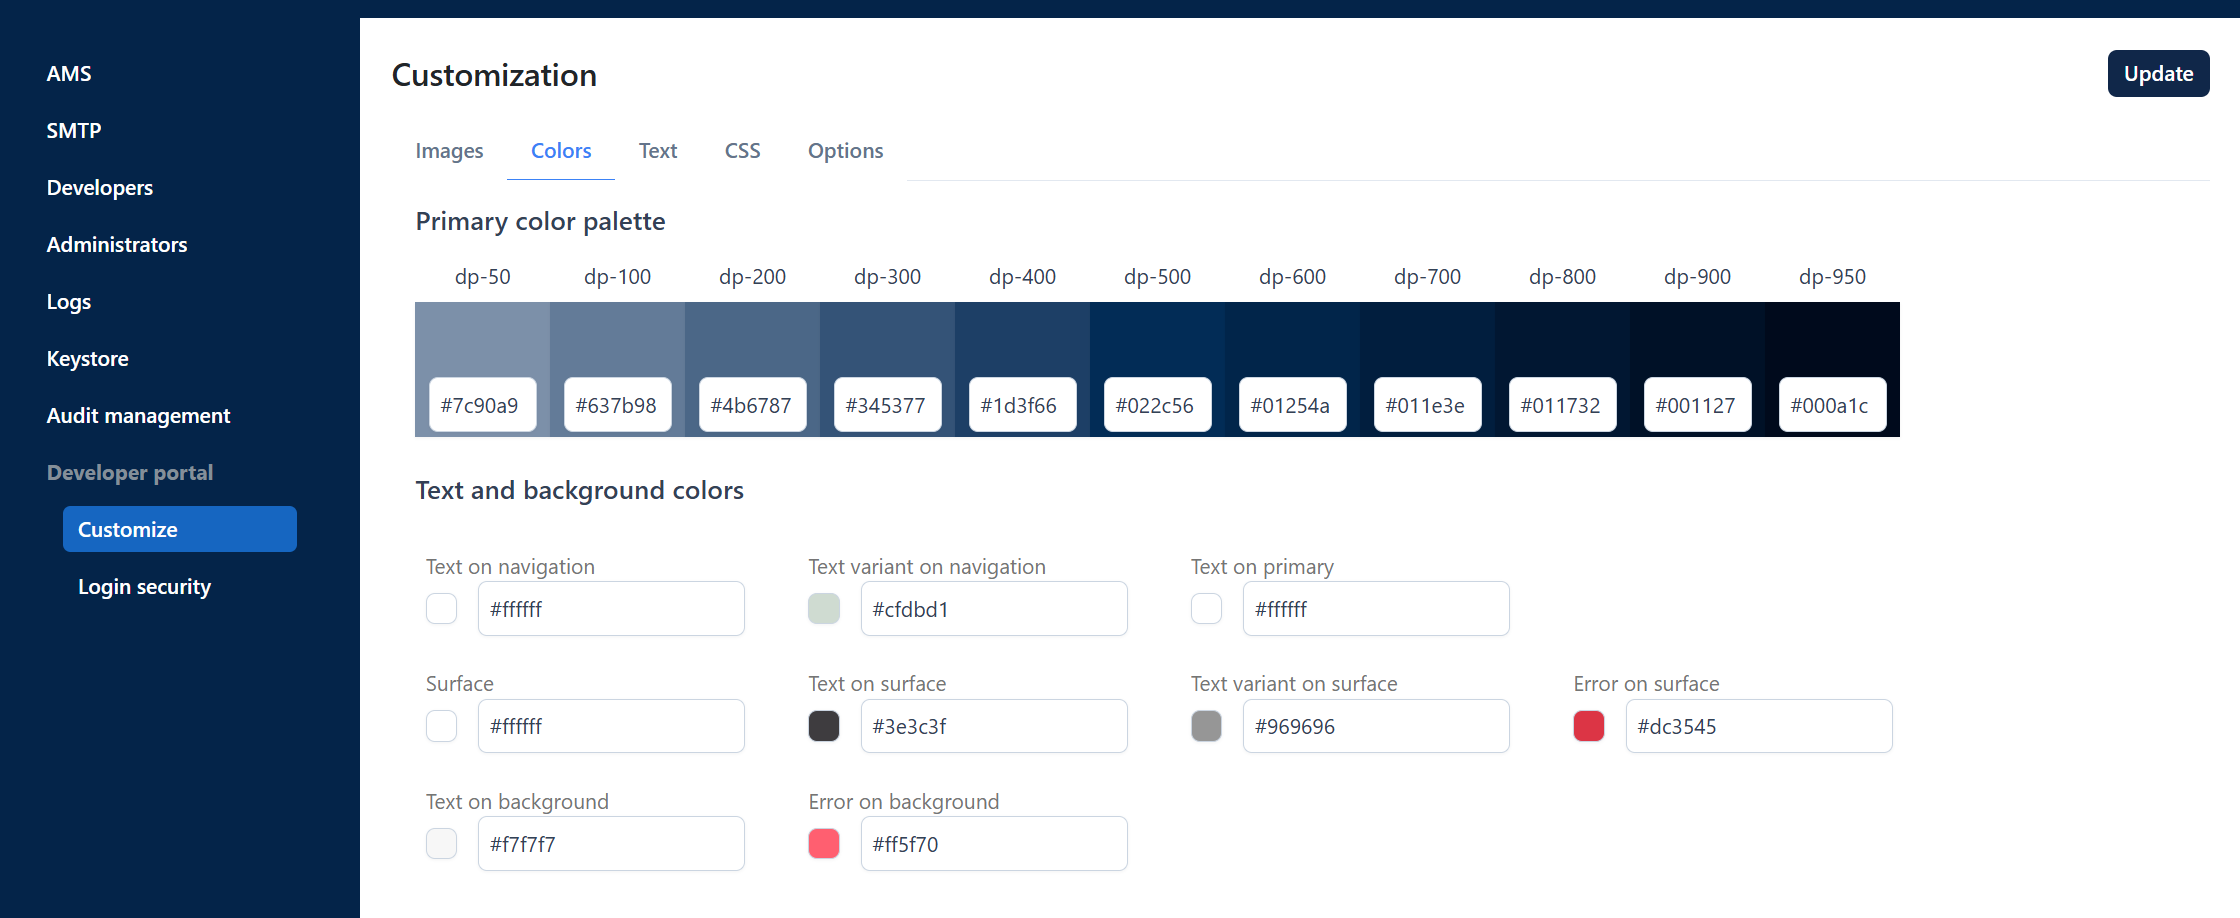
Colors
To modify color of various text elements and surface. Change the color code of the one that needs to be customized and click Update to apply the changes.
Text
To customize the standard text present around the development portal. These include critical content such as Copyright info, privacy policy, Contact us, About us, Terms and Conditions, and password rule as well as general content such as welcome header, welcome description and Page Not Found message.
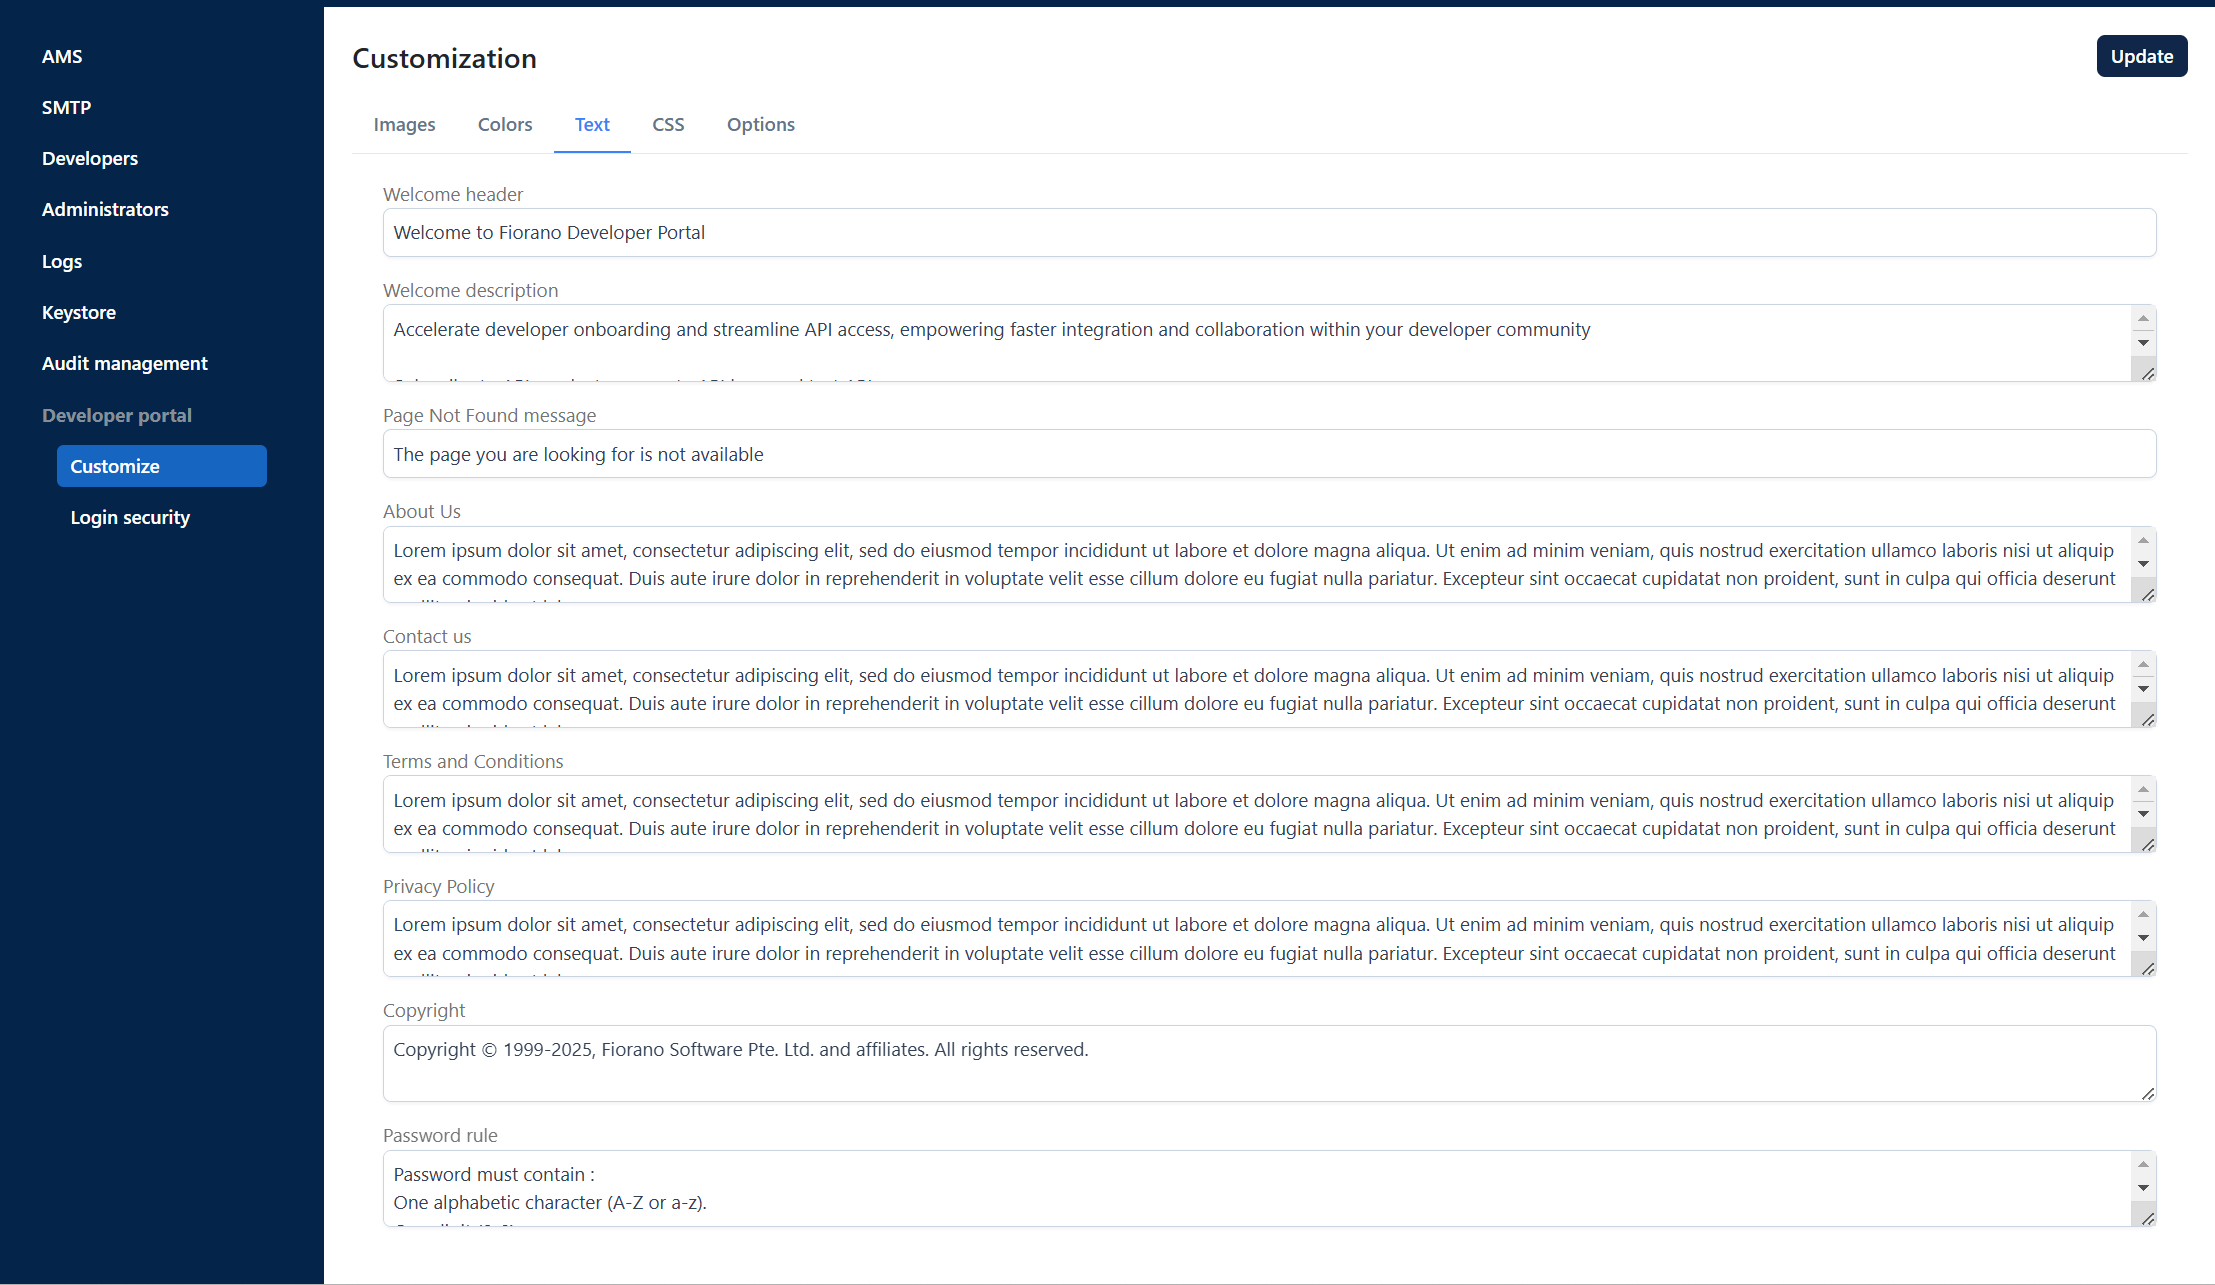
The image below is a reference to identify the properties from the developer portal.
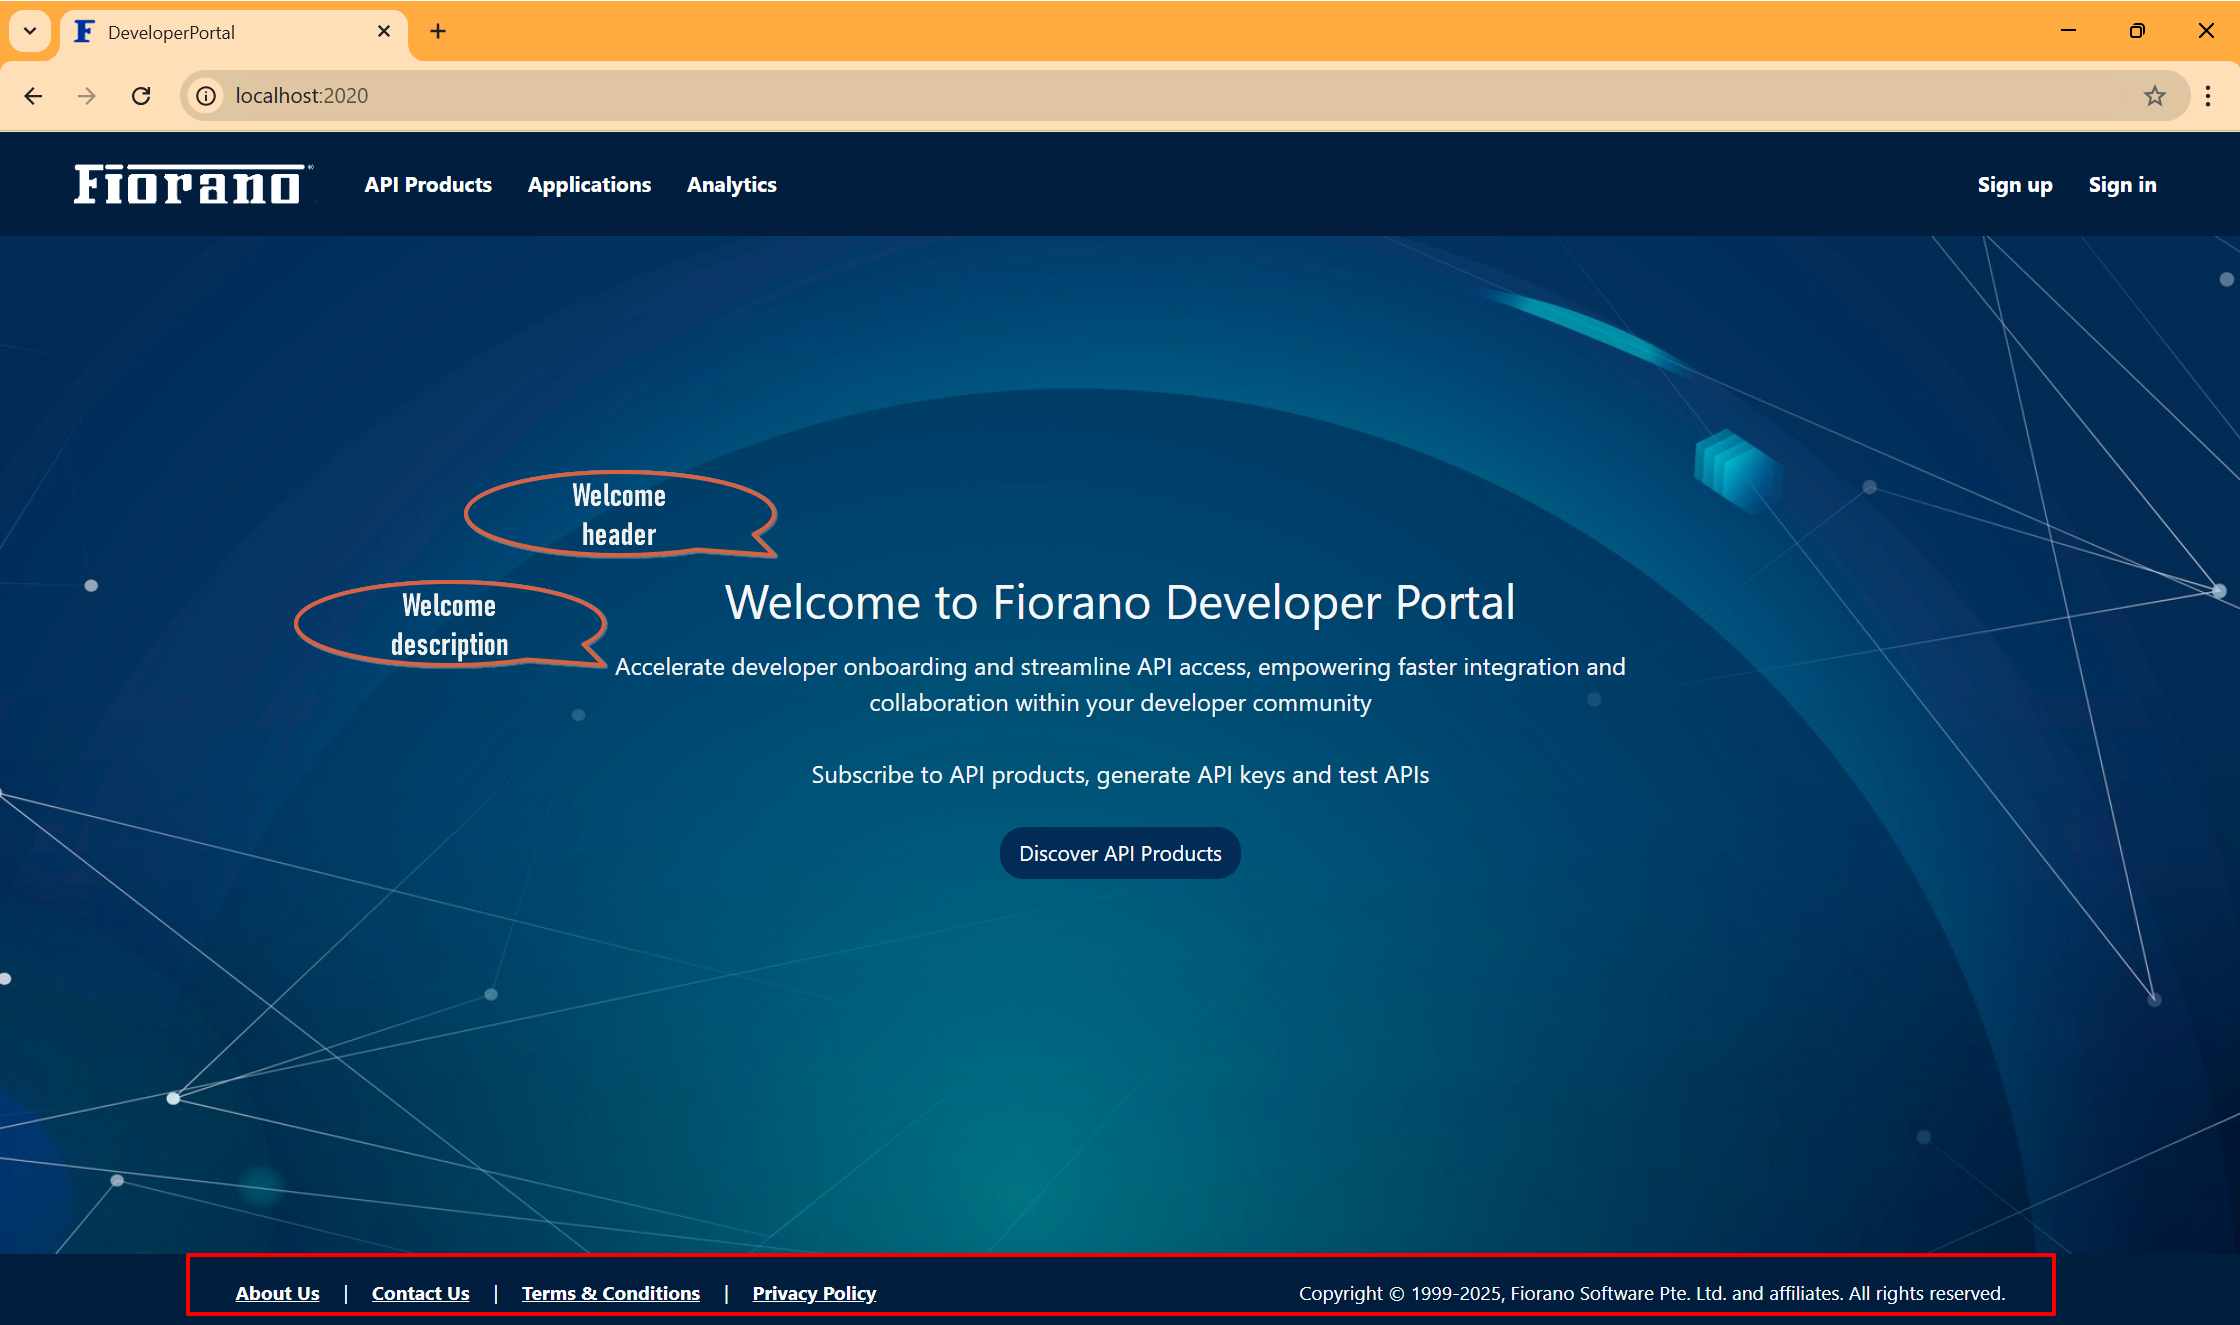
If the following properties are left empty, the corresponding links will not be shown in the developer portal:
About us
Contact us
Terms and Conditions
Privacy Policy
CSS
Elements that are customizable in CSS and their default values are listed below.
CSS properties | Default value |
|---|---|
Button border radius | 16px |
Input border radius | 4px |
Font family | Segoe UI, sans-serif |
Font size | 14px |

Options
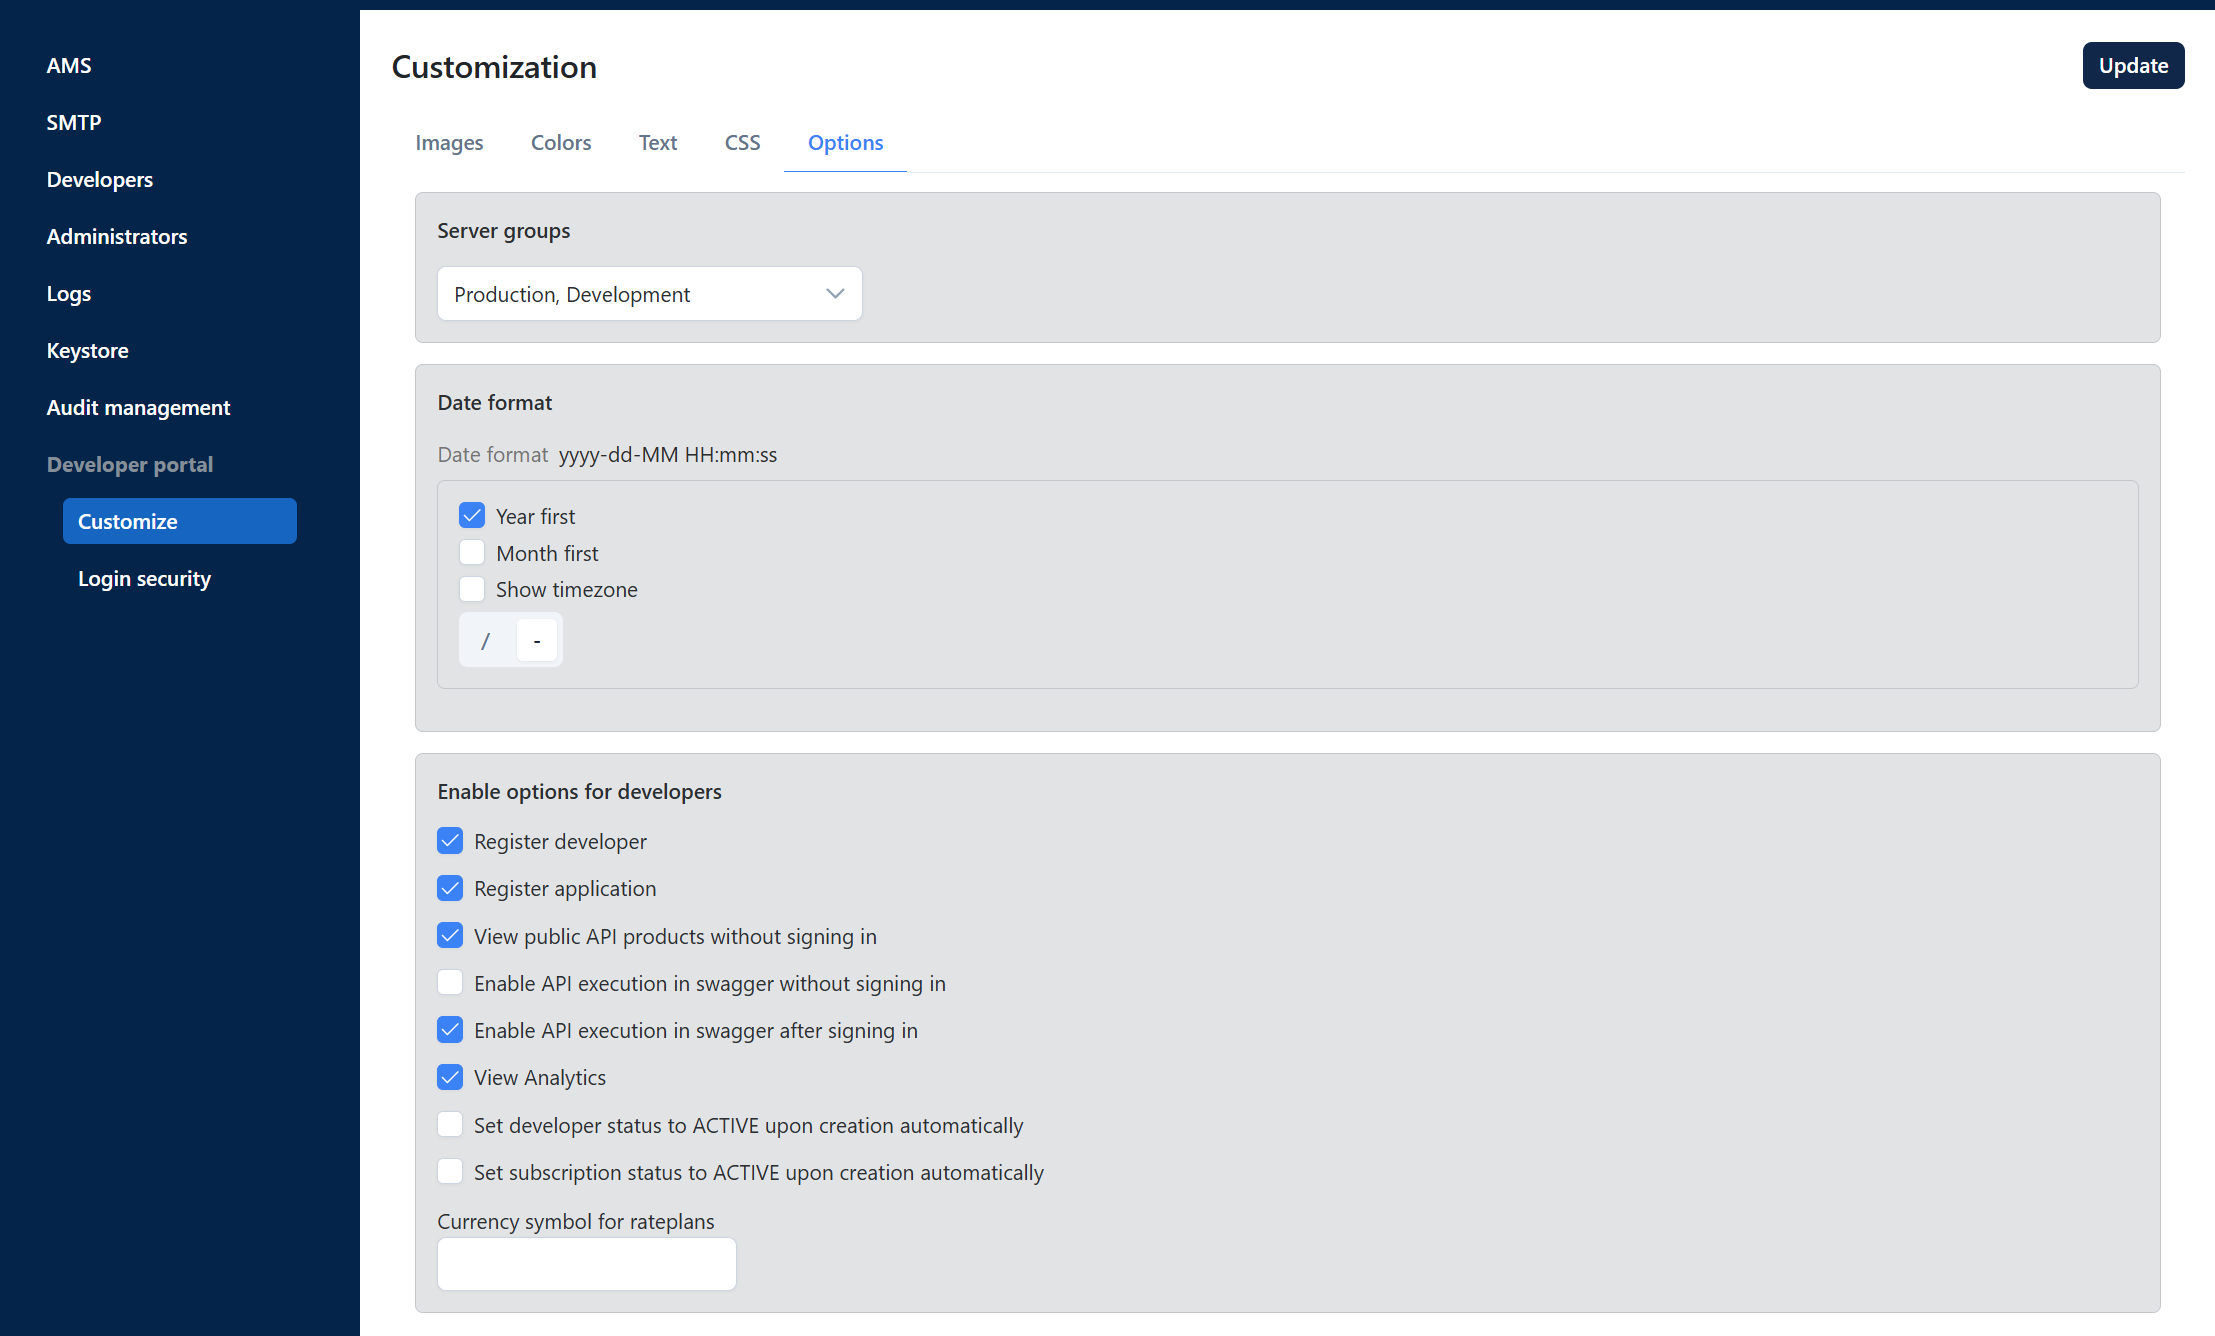
Server Groups
Select from the environments including the default ones - Production and Development.
Date Format
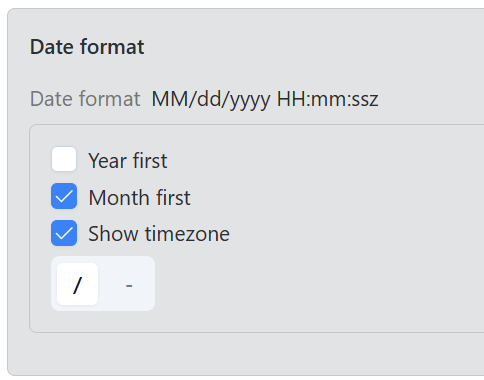
Change the global date format to display year or month first, choose the separator between the symbols given ( / and - ), and show timezone.
Check the DAte format preview to see how it appears after changing.
Enable options for developers
Enable/Disable the following options so that the changes reflect for developers in dev portal.
Register developer
Enables administrators to onboard developers, providing access to APIs, documentation, and other resources. Developers can register through the portal with email verification.
Register application
Enables developers to create and manage applications that interact with APIs, providing them with API credentials, usage tracking, and authentication configuration options.
View public API products without signing in
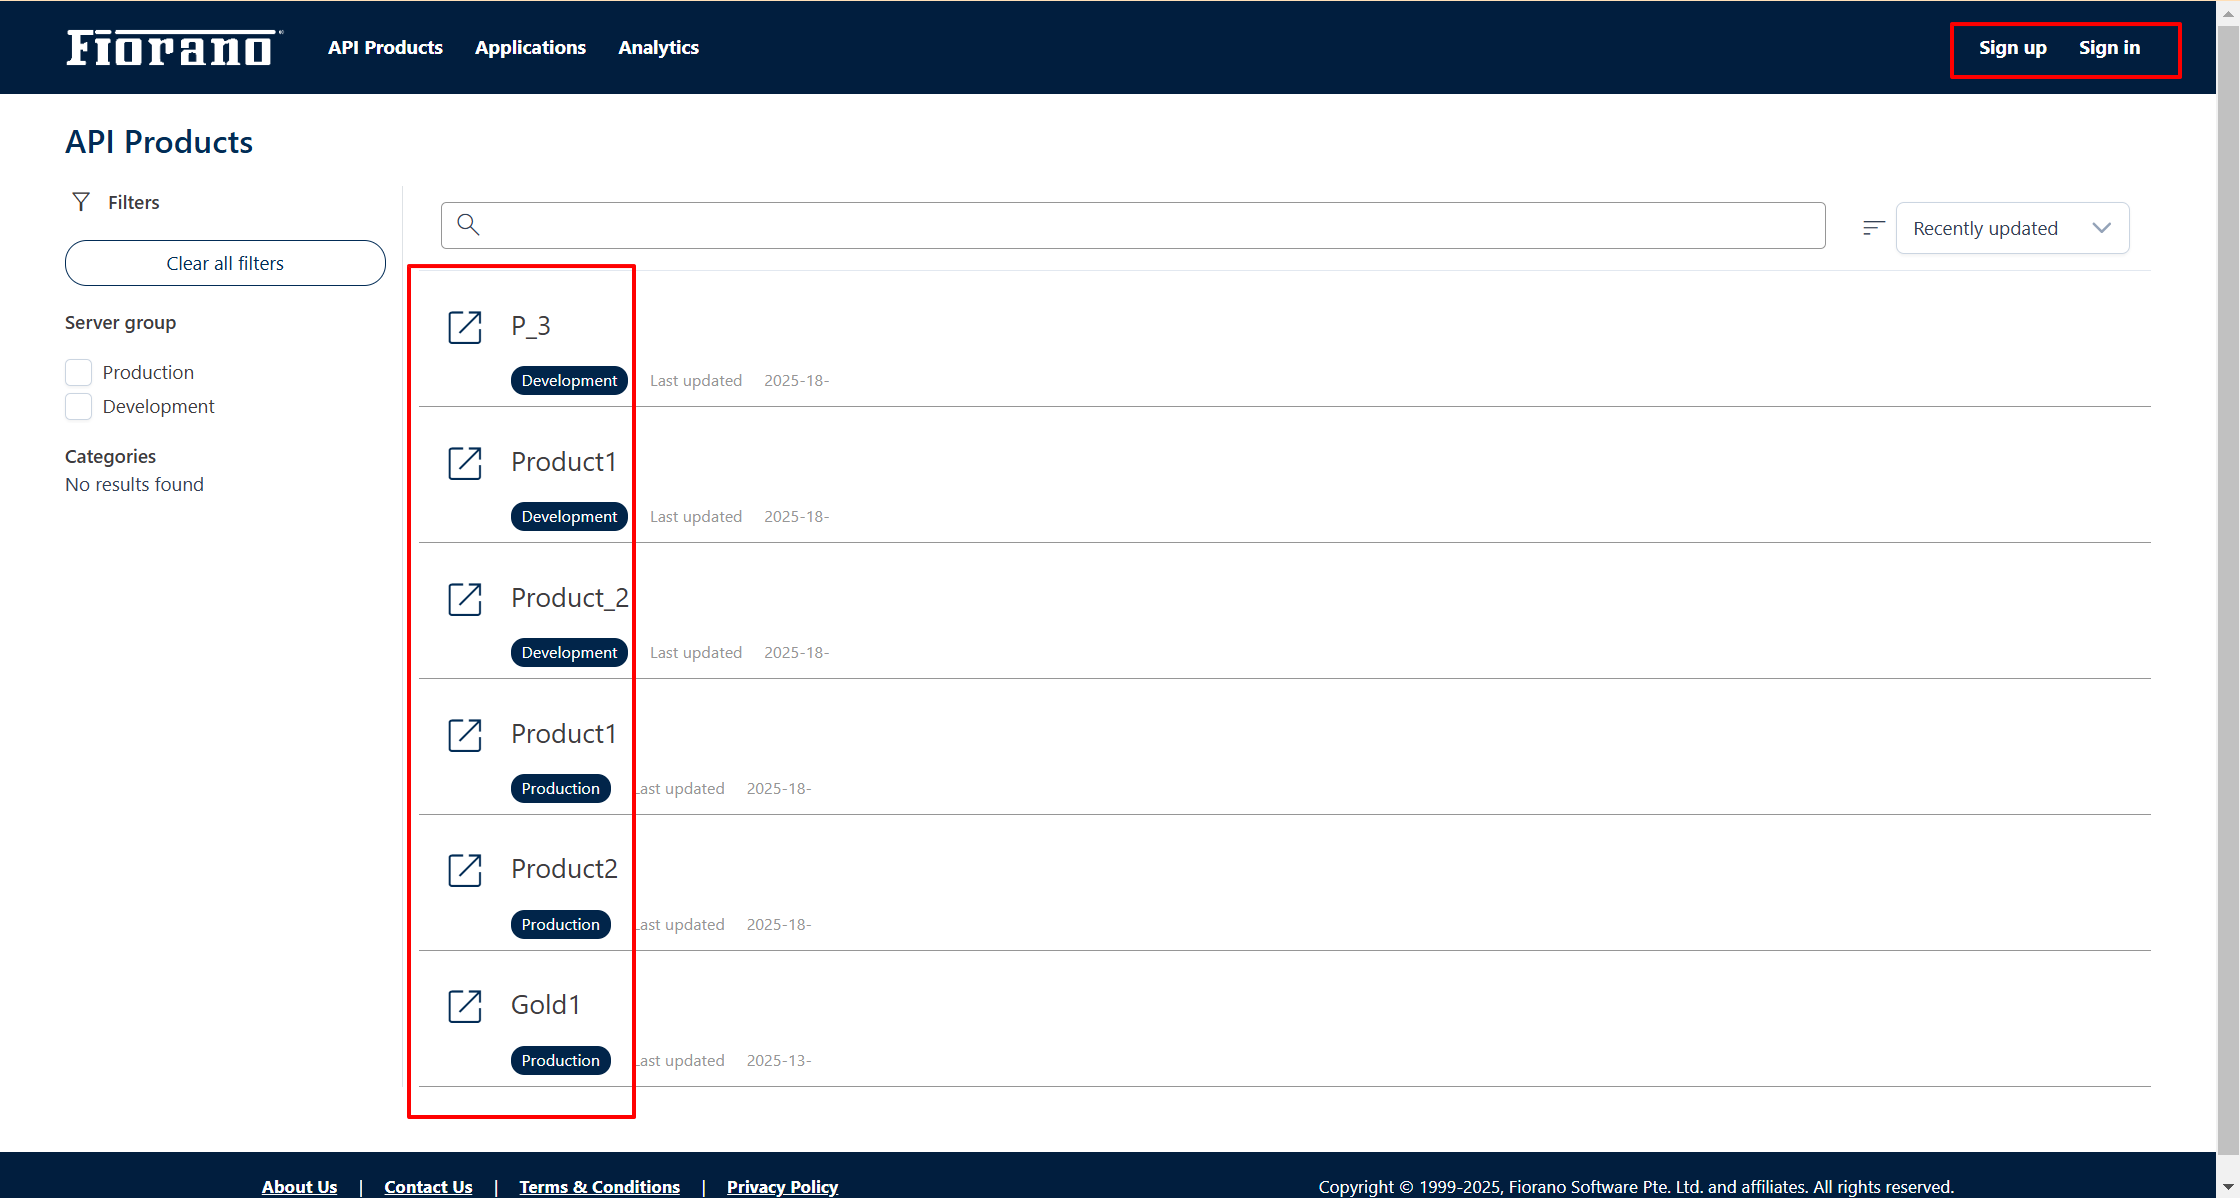
If this option is enabled, products under all server groups for which “Public” is enabled for the Access option in the Products section of API Management Dashboard will be displayed for anonymous users (without signing up or signing in) in the developer portal.
Enable API execution in swagger without signing in
Allows anonymous users to test and interact with APIs through Swagger UI.
Click the Explore ![]() icon next to the product name to go to the product screen. See the figure above.
icon next to the product name to go to the product screen. See the figure above.
Click the Try it out button and then the Execute button.
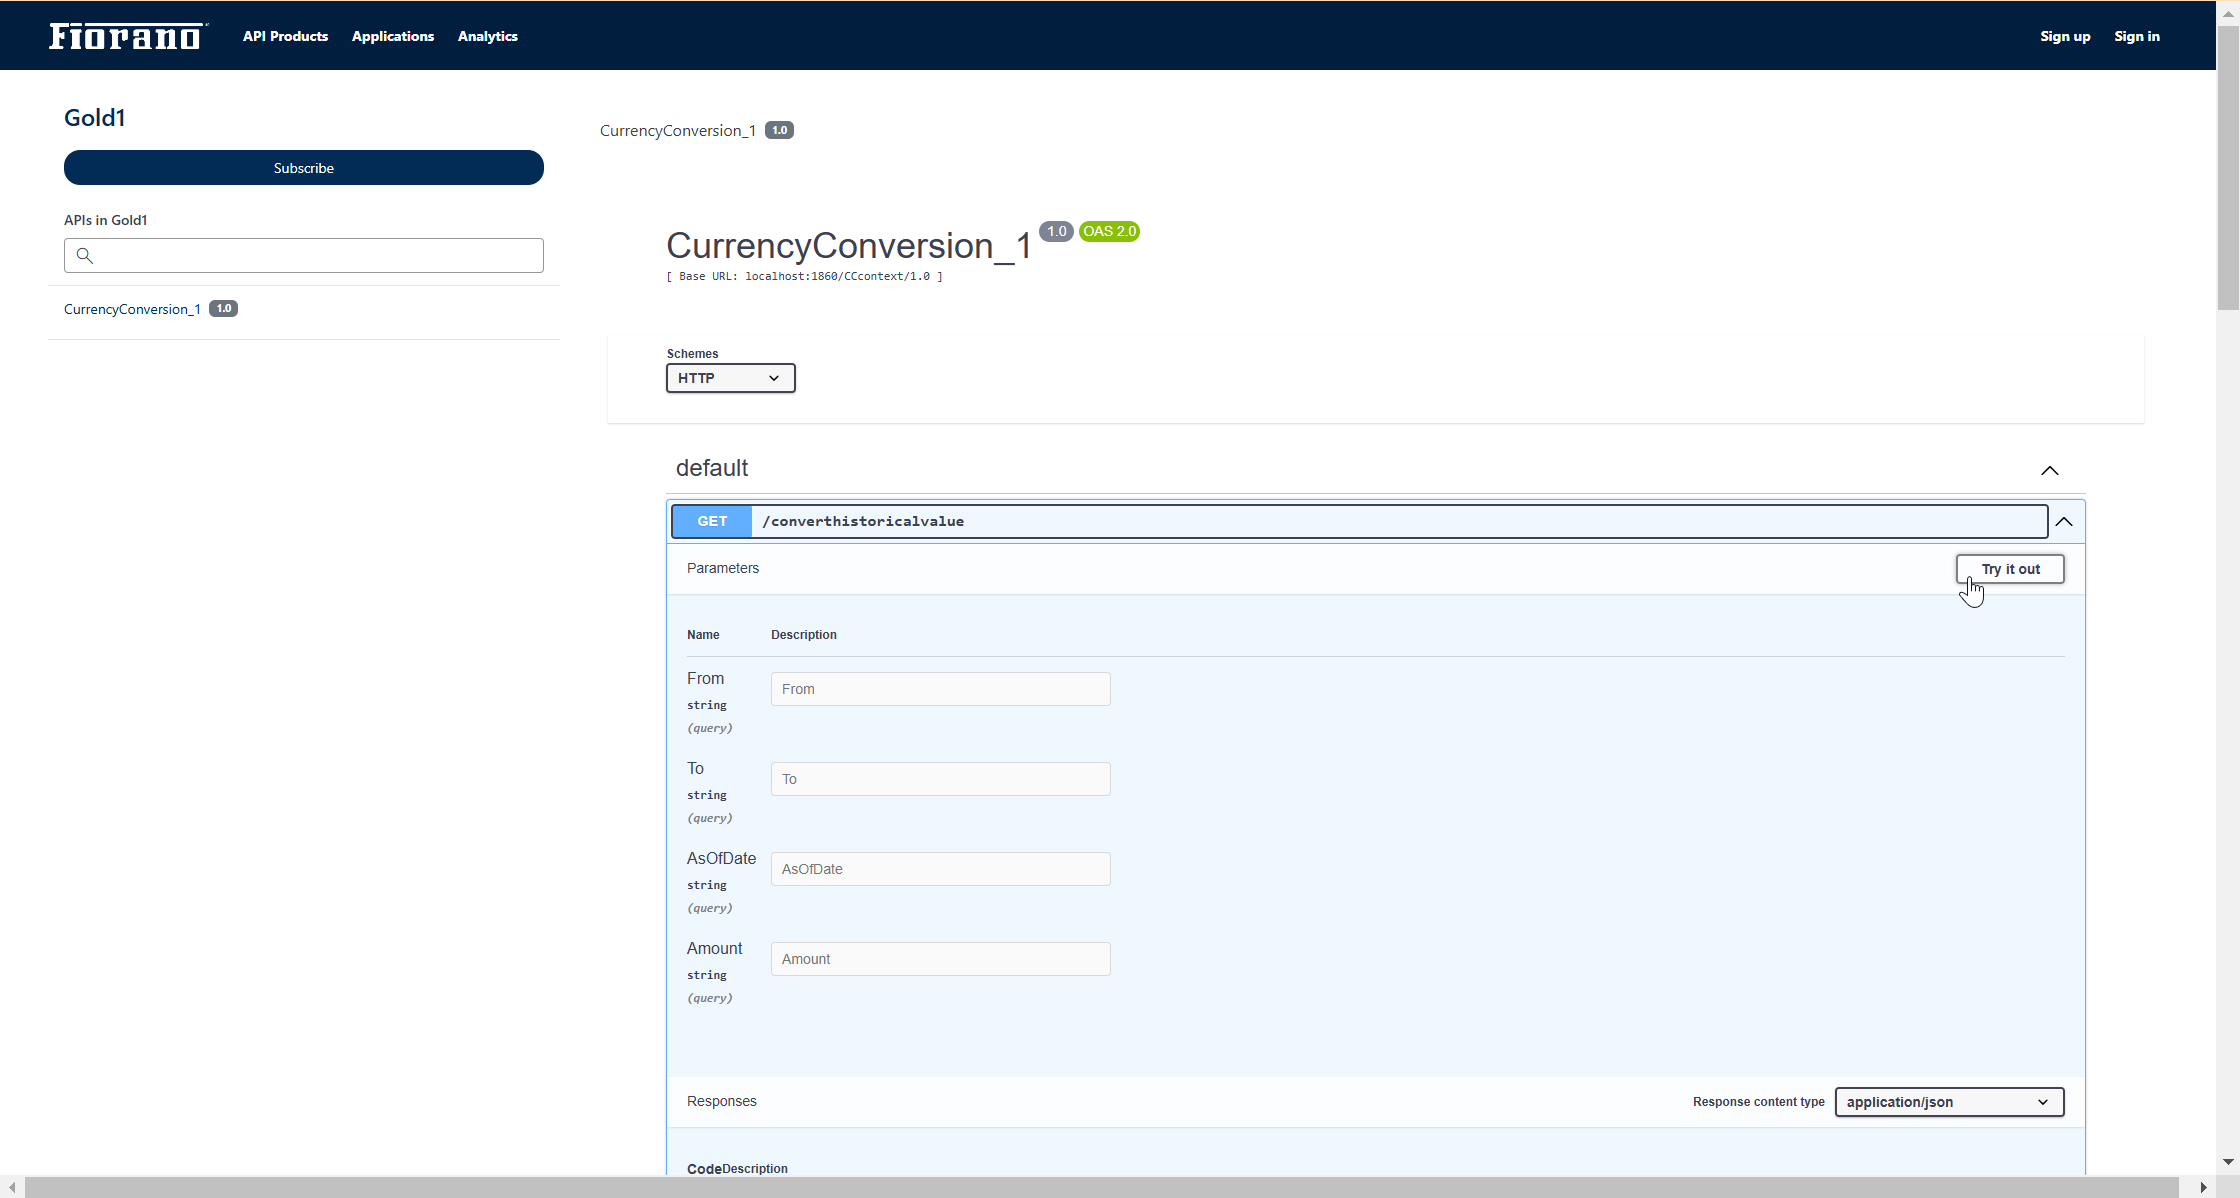
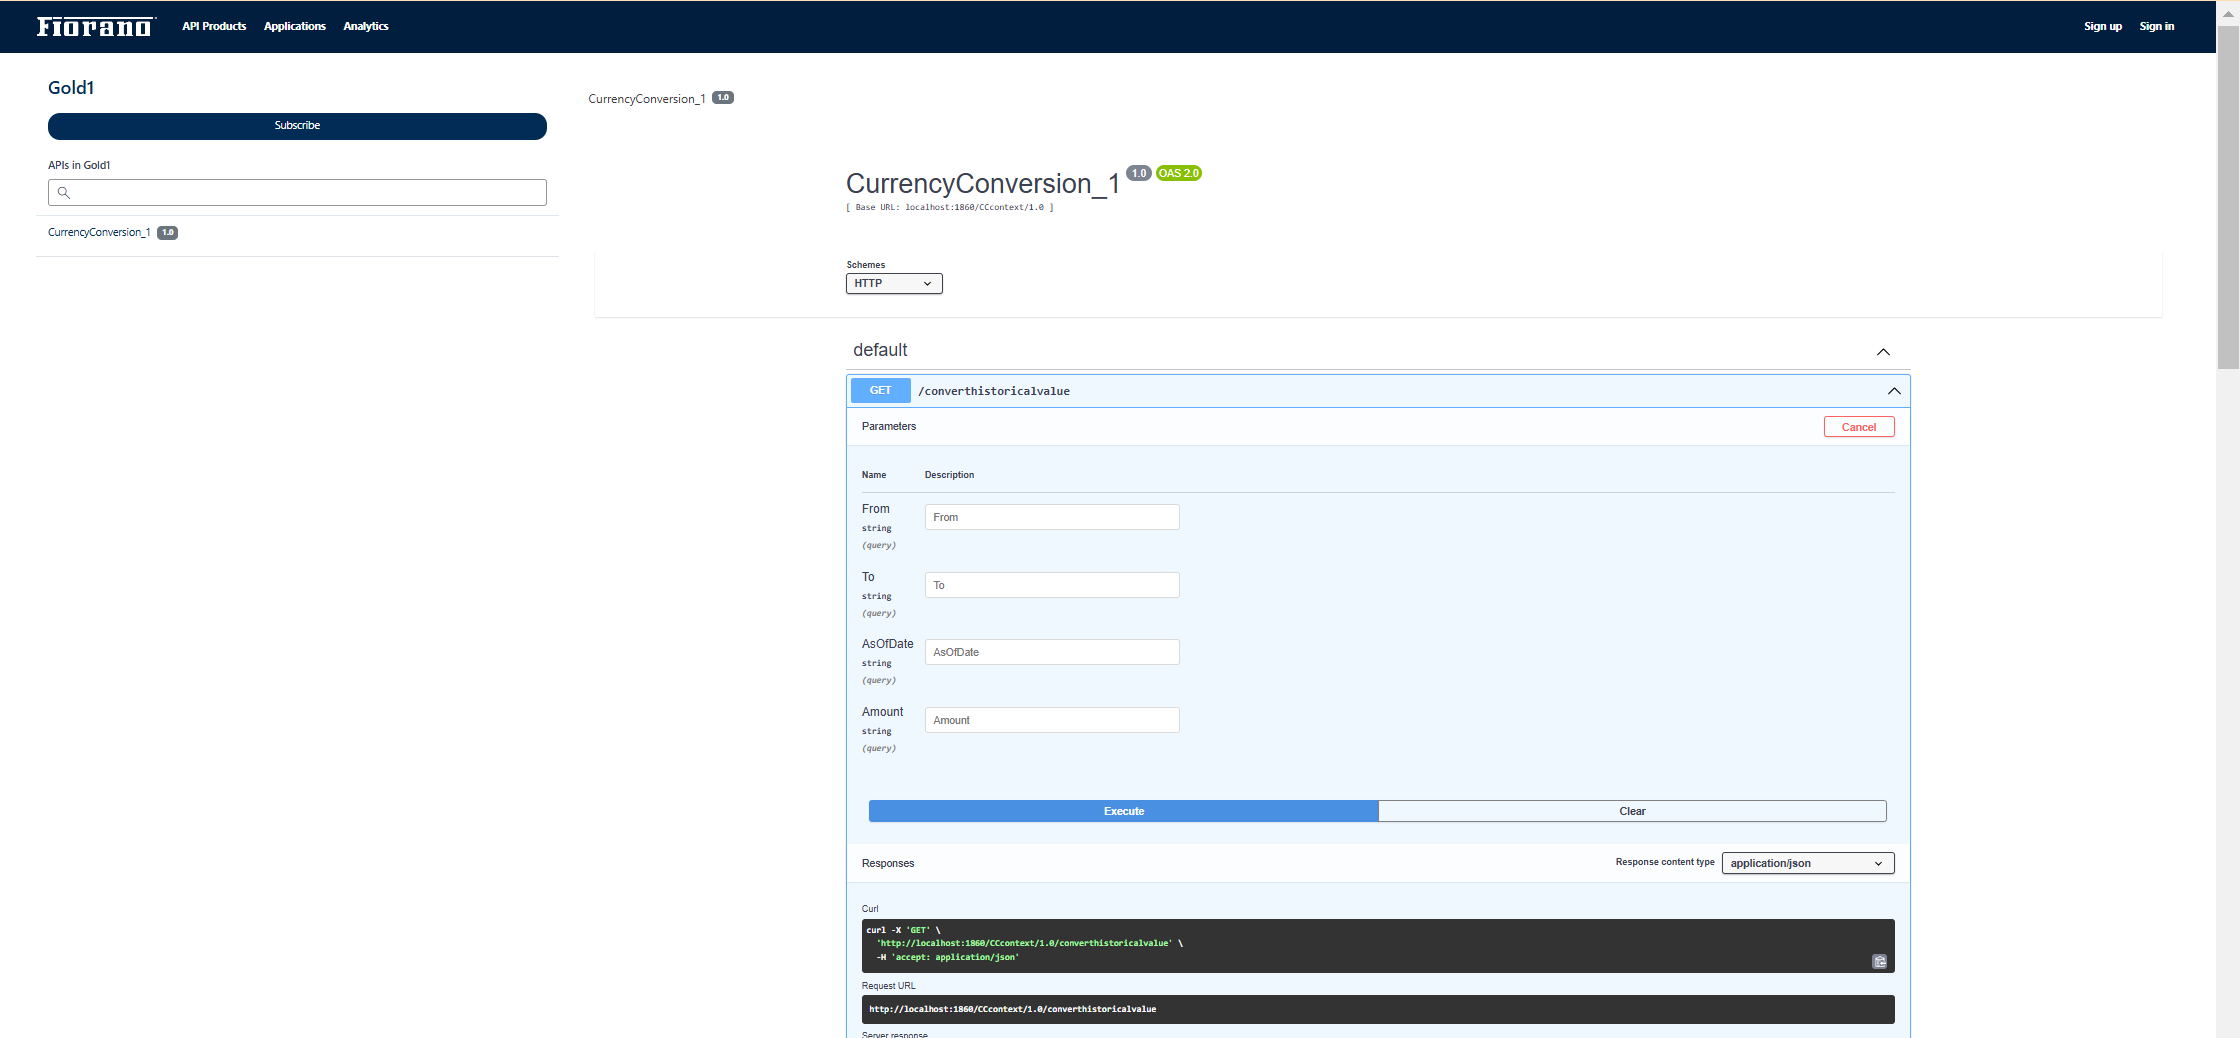
If disabled, the execute option won’t be available to the public.
Enable API execution in swagger after signing in
Enables signed-in users to allow API requests to be executed in Swagger UI.
If disabled, the execute option won’t be available for the signed-in users.
If both of the above options are enabled, testing can be performed with or without signing in.
If both of the above options are disabled, testing cannot be performed with and without signing in.
View Analytics
It gives developers access to analytics views, giving them insights into API usage, performance metrics, and user engagement.
Set developer status to ACTIVE upon creation automatically
Ensures that new developer accounts are immediately activated when created, without requiring manual intervention. Step mentioned in
Set subscription status to ACTIVE upon creation automatically
Automatically activates a developer's subscription when it is created, ensuring they have immediate access to the APIs.
Currency symbol for rateplans
Allows to set currency symbol for rate planners.
Login security
Login security properties
To customize Maximum failed login attempts for users and IP addresses, and change password rule.
Properties | Default value |
|---|---|
Maximum failed login attempts for user | 6 |
Maximum failed login attempts per IP | 10 |
Password rule | ^(?=.[A-Za-z])(?=.\d)(?=.[@$!%?&\-])[A-Za-z\d@$!%*?&\-]{8,}$ |

IP ban
To restrict or permit specific IP addresses from accessing the portal.
Enter the IP, range or CIDR to be banned or unbanned in the respective textboxes.
