The policies added for a particular scope in this section are applied to all the resources in a project. For example, if a policy is added to the Proxy Request scope, all the resources will have this policy processed firstly.
Adding policies at the Project level
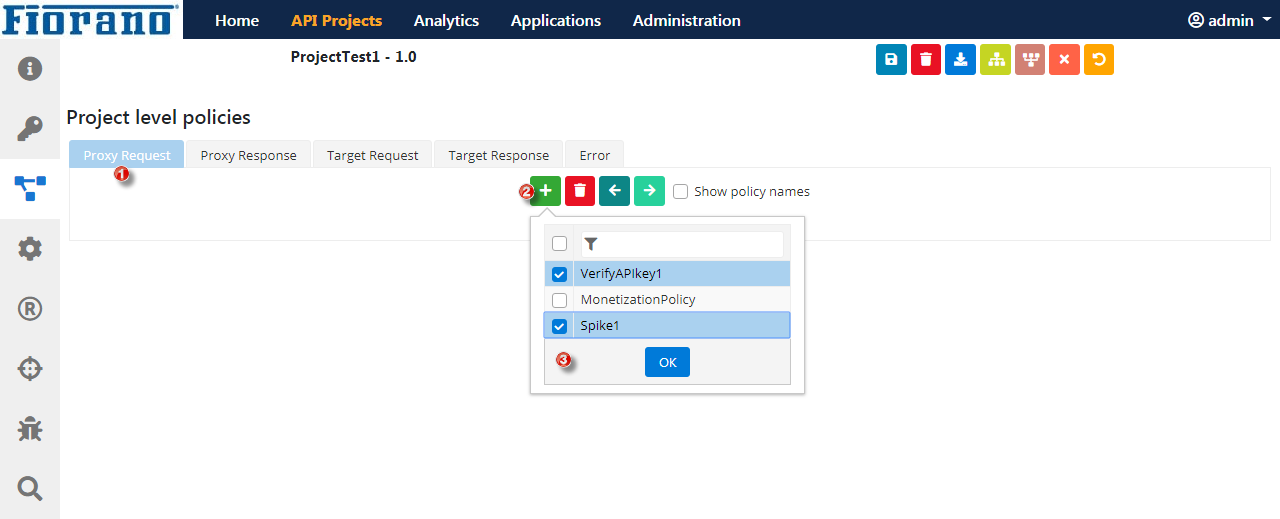
To add a policy to a particular scope, perform the following actions:
Click any of the following endpoint tabs to choose the scope that needs to be applied for all resources within a project:
Proxy Request
Proxy Response
Target Request
Target Response
Error
Click the Add icon, select the required policies from the list of policies (configured policies get prepopulated).
Click OK and click the Save icon.
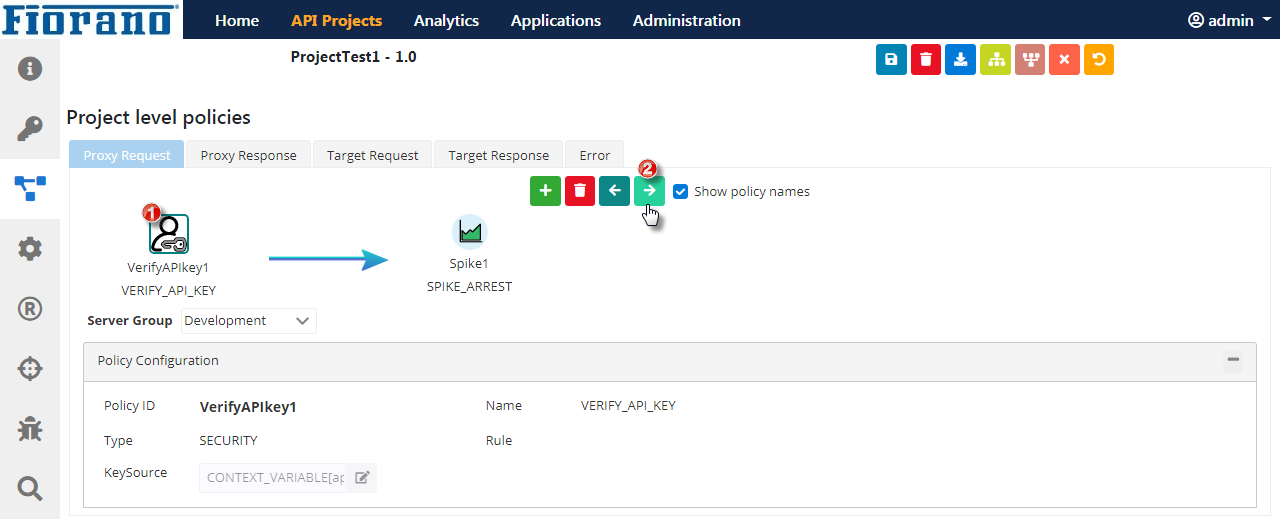
Server Group to which the project level policies can be set after clicking any of the policies added; see Figure 4.
Figure 1: Project Level Policies configuration
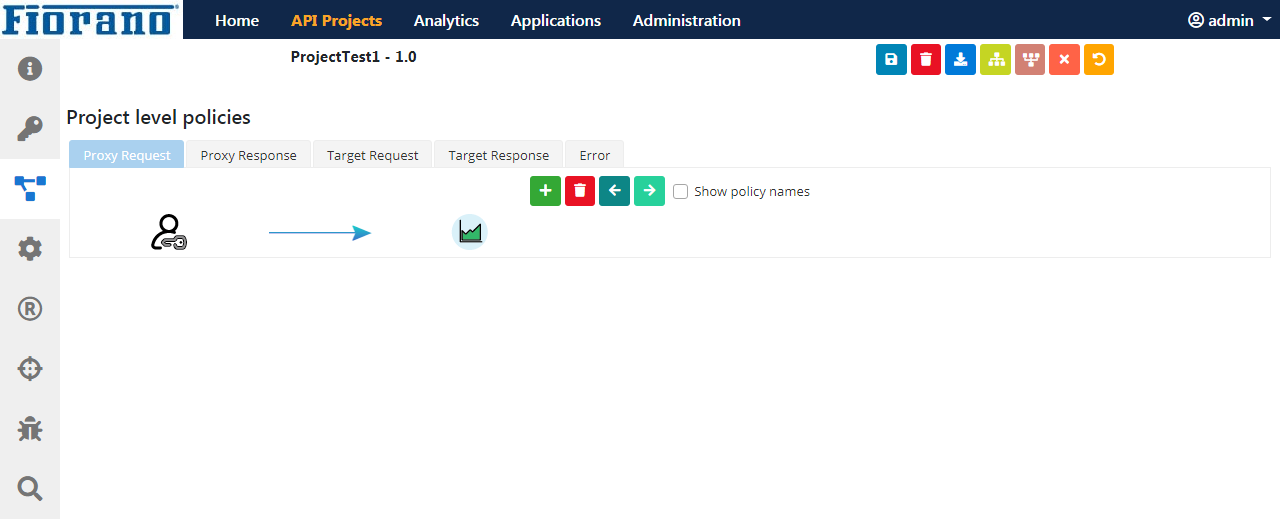
Policies will be added in the Project level policies screen, which gets displayed as icons.
Figure 2: Project Level Policies added
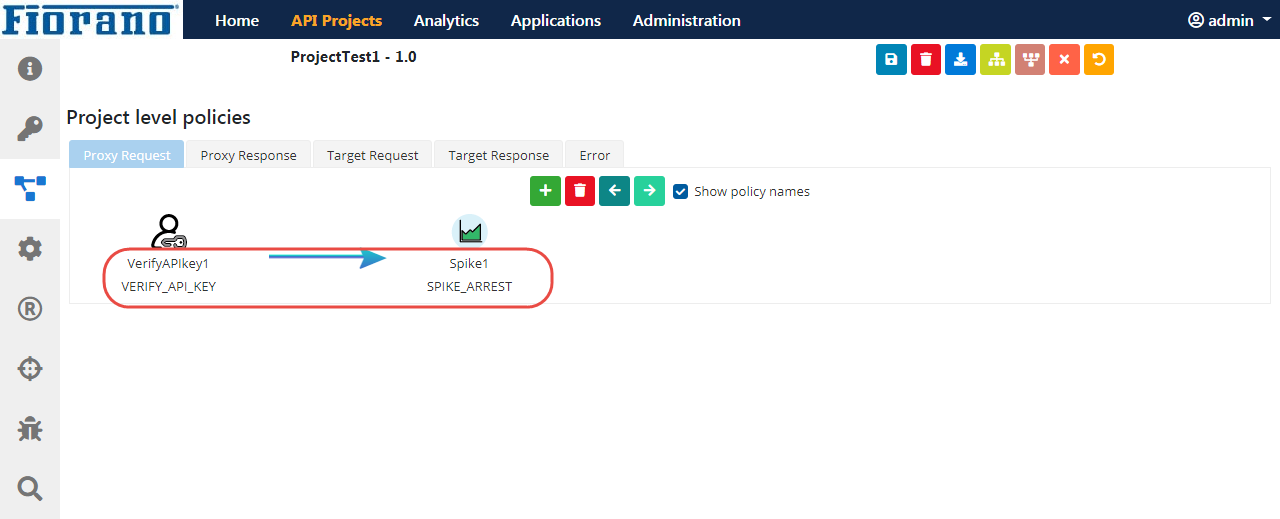
Displaying policy names below the icons
Policy names can be displayed below their respective icons by choosing the Show policy names option.
Figure 3: Policy names displayed under their respective icons
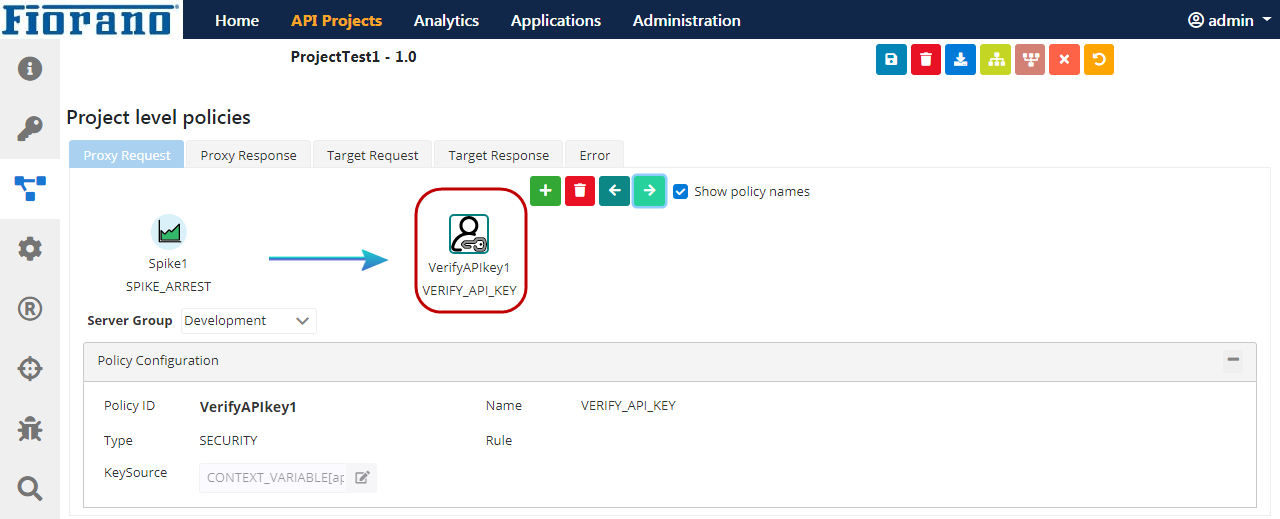
Viewing the Policy Configuration
Click the icon that represents the policy to display the policy configuration.
The selected policy changes its colour from black to blue.
Figure 4: Policy configuration displayed under the policy icons
Configuration cannot be changed from this screen; to change policy configuration, go the Policy Configurations section.
Changing the order of policy execution
The order in which the policies are applied to the attached scope can be identified by the arrow mark between the policies.
This order of execution can be altered by using the left and right arrow icons.
The selected policy changes its colour from black to blue.
Select the policy that needs a change in the order and click the arrow button based on the direction it has to be moved.
Figure 5: Changing the order of the policy
Notice the change in the order of policies.
Figure 6: Order of the policy changed
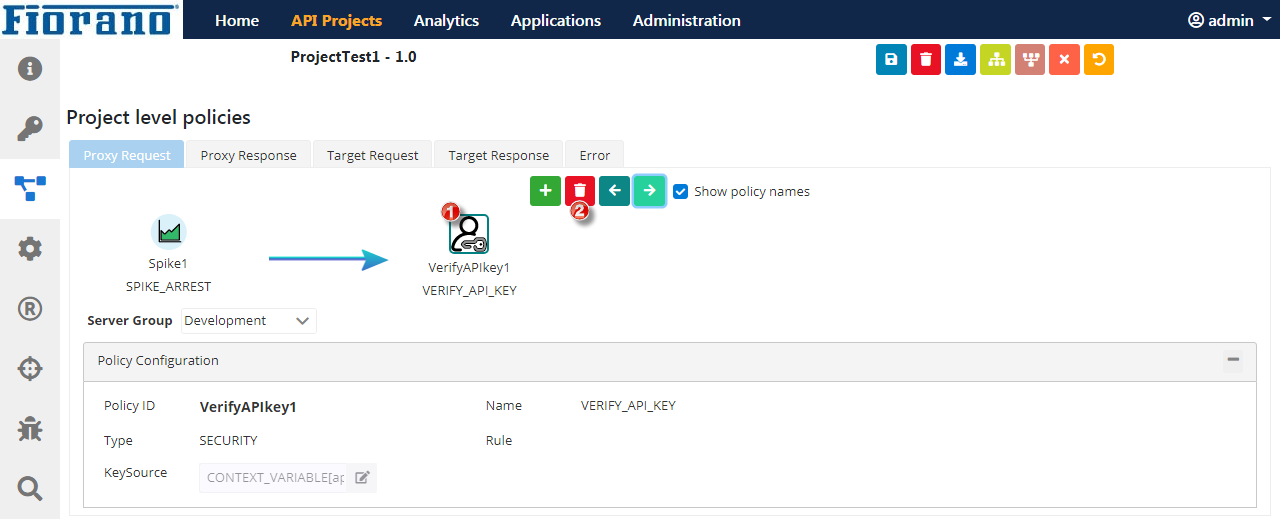
Removing an added Policy
To remove an added policy, select the policy and click the Remove icon.
Figure 7: Removing a policy
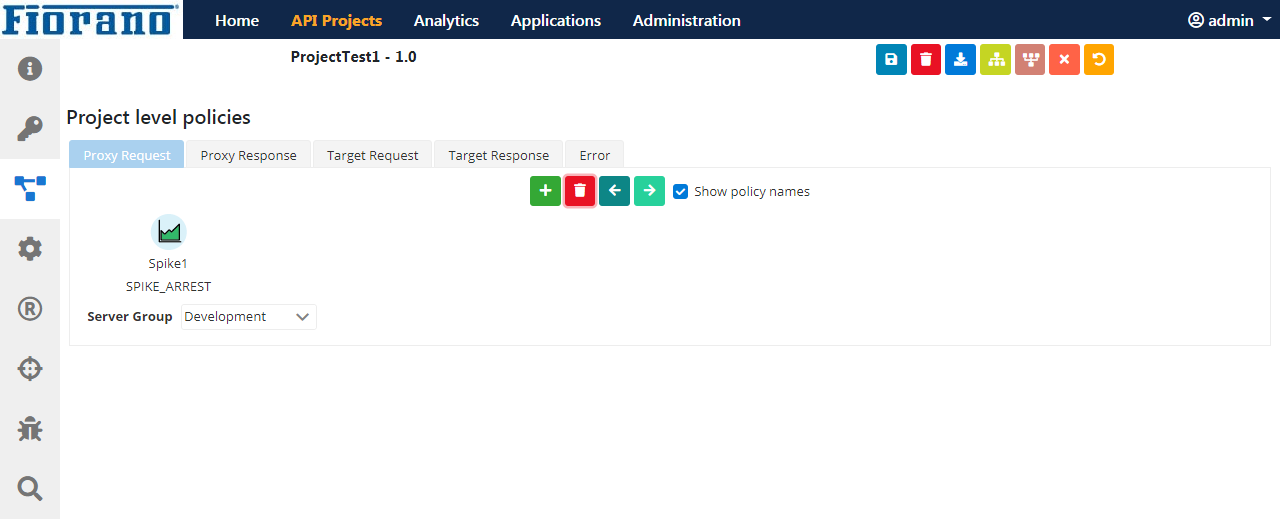
The policy gets removed from the screen.
Figure 8: Policy removed
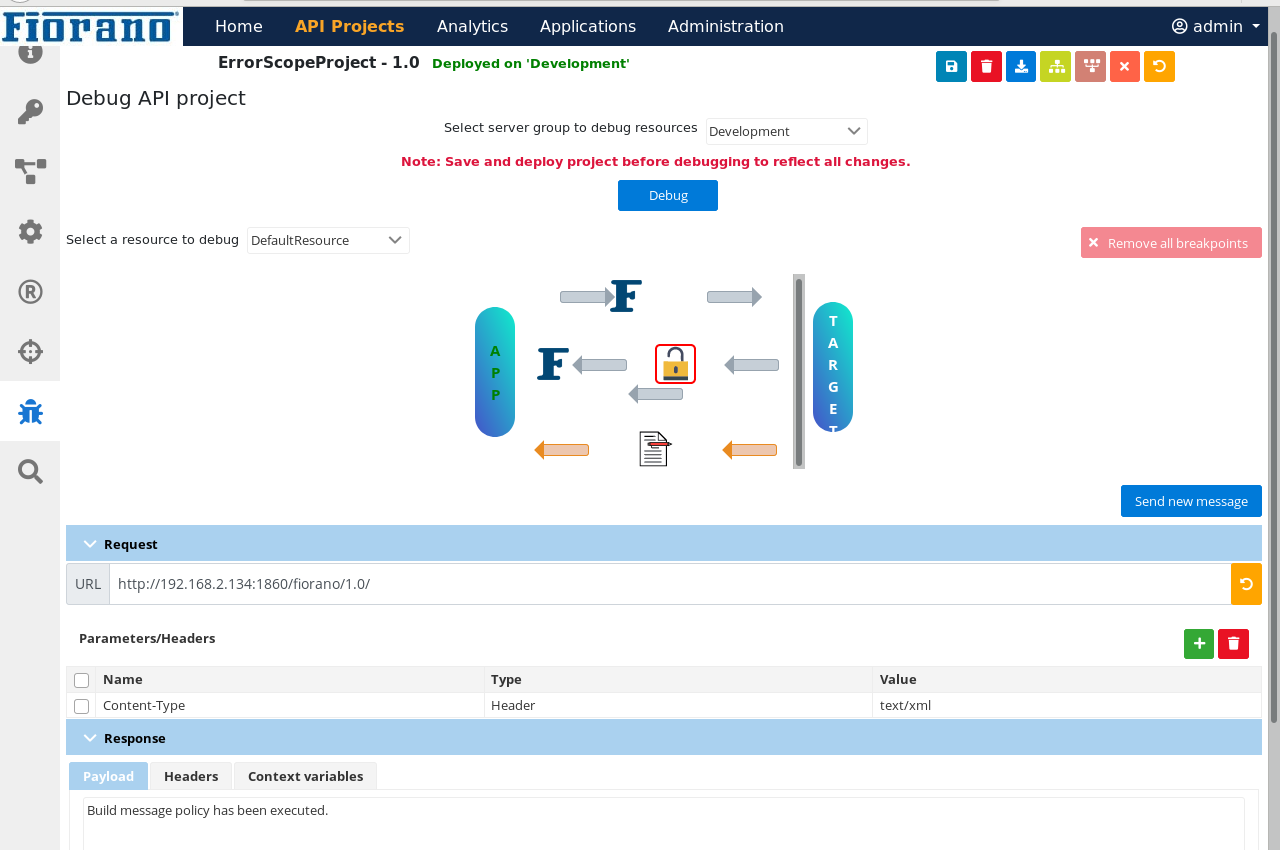
Error scope
The policies in this scope will be executed only when a policy that is added to any of the other four scopes fails to execute.
Figure 9: Error policy getting executed in the event of an error
In the above example, Decrypt Policy present in the target response scope has failed, hence the execution flow has moved on to the policies present in the error scope i.e Build Message Policy in this case. Thus, a customized message rather than an error message is obtained in the response payload section.
Whenever a change is made, click the Save icon to apply the changes.
JavaScript errors detected
Please note, these errors can depend on your browser setup.
If this problem persists, please contact our support.