HL7Receiver
The HL7 Receiver listens on a port specified on a particular IP address to receive HL7 messages, sends the messages received on to the output port and sends the acknowledgement to the Sender.
Configuration and Testing
The component can be configured using the properties in the Custom Property Sheet (CPS) as shown in Figure 1.
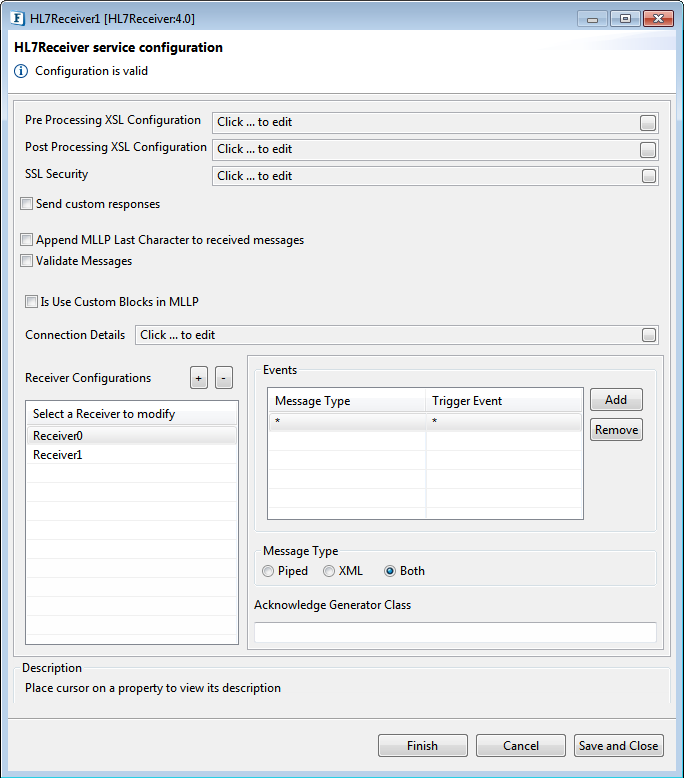
Figure 1: Custom Property Sheet (CPS) with Send custom responses property enabled
Pre Processing XSL Configuration
Pre Processing XSL configuration can be used to transform request message before processing it. Click the small button against the property to configure the properties.
Refer to the Pre/Post Processing XSL Configuration section under Common Configurations topic for details regarding XSL configuration. The properties comprising this XSL configuration are:
- Provide XSL
- XSLT Engine
- Transformation source data
- Set transformation result as
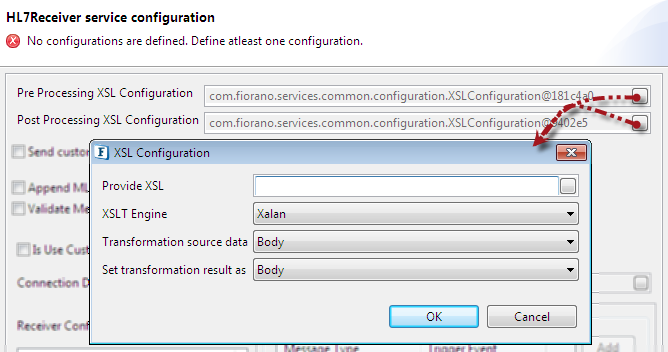
Figure 2: Pre/Post Processing XSL Configuration
Post Processing XSL Configuration
Post Processing XSL configuration can be used to transform response message before sending it to the output port.
As mentioned in the above section, refer to the Pre/Post Processing XSL Configuration section under Common Configurations topic for details regarding XSL configuration.
Send Custom Responses
Enable this property to send responses received over input port as ACK messages instead of default ACK responses. An input port will be generated for every receiver configuration. Error ACK message is sent if a response is not received before the configured timeout on the corresponding input port.
Working of this property is explained with an example under the Functional Demonstration section (Scenario 3) below.

Figure 3: Send custom responses property enabled (Request Timeout property appears)
Request Timeout
Time (milli seconds) to wait for a response at the input port.
This property is configurable only if Send Custom Responses property is enabled.
Select the 'Validate Messages' and 'Is Use Custom Blocks in MLLP' check boxes to view their respective options.

Figure 4: Append MLLP Last Character to received messages, Validate Messages and Is use custom block in MLLP enabled
Append MLLP Last Character to received messages
When selected, the last character used in MLLP will be appended to received messages before sending them to the output port.
Validate Messages
This checkbox enables the validation of HL7 messages.
DEFAULT: Messages will be validated with standard HL7 message rules.
CONFORMANCE_PROFILE: Message will be validated with the conformance profile file configured for its type.
Default validation is performed if the conformance profile is not configured for a specific type.
Is Use Custom Blocks in MLLP
Select this checkbox to define custom blocks to be used in MLLP. Specify valid hexadecimal representation of characters in the Start Block, End Block, and Last Character fields. The default values populated are standard blocks used in MLLP.
- Start Block: Start Block character (1 byte). The default value is 0B (0x0B).
- End Block: End Block character (1 byte). The default value is 1C (0x1C).
- Last Character: Usually, Carriage Return is used as the last character (1 byte). Default value 0D (0x0D).
Connection Details
Click the small button against the Connection Details property to provide the Port number.
Port Number
Port number on which HL7 Receiver is listening. It can be changed using the Up and Down buttons in the spin box or by typing in the value.
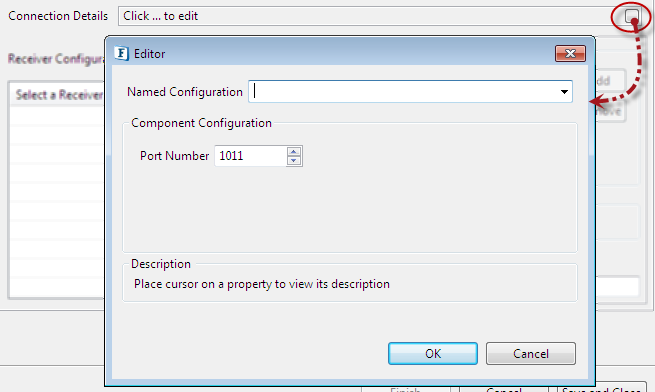
Figure 5: Port Number
Port number can be saved to use later by providing a preferred name in the Named Configuration text area. Conversely, a preconfigured port number can be selected from the drop-down.
Receiver Configurations
Select a Receiver to Modify: Add the receiver which is used in the creation of input and output ports. By default, the component has no ports. Depending on the names provided in the Custom Property Sheet, a set of input and output ports gets generated.
Identifiers: It is a string of form <HL7 Message Format> | <Trigger Event> that can be configured in the Event windows.
Example: The identifier ADT|A01 listens for ADT A01 messages.An asterisk * can be used as a wild character for both message format and trigger event.
Message Type
The type of message that is sent on to the components output port.
- Piped: Piped message is expected on the input port
- XML: XML message is expected on the input port
- Both: Message received on the input port can be of any type (piped or XML).
Acknowledge Generator class
A class whose instance can be delegated the responsibility of generating an ack message for HL7 message received. If a value is not provided, a default ack generator is used which will generate AA if HL7 message is successfully converted to JMS Message and sent to the output port and AE otherwise.
Acknowledge Generator should implement com.fiorano.services.hl7receiver.engine.IAckGenerator and should have a default constructor.
Ack Generator class
public interface IAckGenerator {
    /**
     * Generate Acceptance Ack for <code>message</code> received
     * @param message message received by recevier
     * @return ack message which will be sent back to the sender
     * @throws HL7Exception
     * @throws IOException
     */
    Message generateAckForSuccess(Message message) throws HL7Exception, IOException;
    /**
     * Generate Error Ack for <code>message</code> received when an exception <code>e</code> happens
     * while proccessing the <code>message</code>
     * @param message message received by recevier
     * @param e excveption occured while processing the message
     * @return ack message which will be sent back to the sender
     * @throws HL7Exception
     */
    Message generateAckForException(Message message, HL7Exception e) throws HL7Exception;
}
Functional Demonstration
The figure below illustrates the event process where HL7Sender accepts ADT and ORU messages and sends them to HL7Receiver.
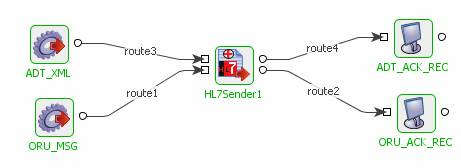
Figure 6: Sample Event process using HL7Sender
The figure below illustrates the event process where HL7Receiver listens to the messages from HL7Sender and sends them to the output port.
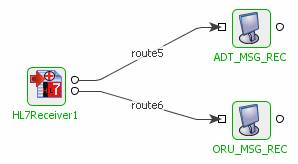
Figure 7: Sample Event process using HL7Receiver
Scenario 1: Receiving an ADT A01 message
Configure the HL7Receiver as explained in the Configuration and Testing section above.
Figure 8 illustrates a snapshot of the ADT A01 message received by HL7Receiver when the message (expand the message below Figure 8) is sent by HL7Sender.
Figure 9 illustrates the acknowledgment sent by HL7Receiver.
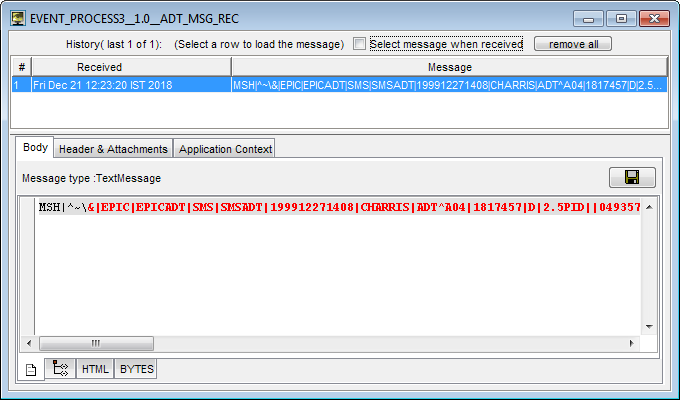
Figure 8: ADT A01 message received by HL7Receiver
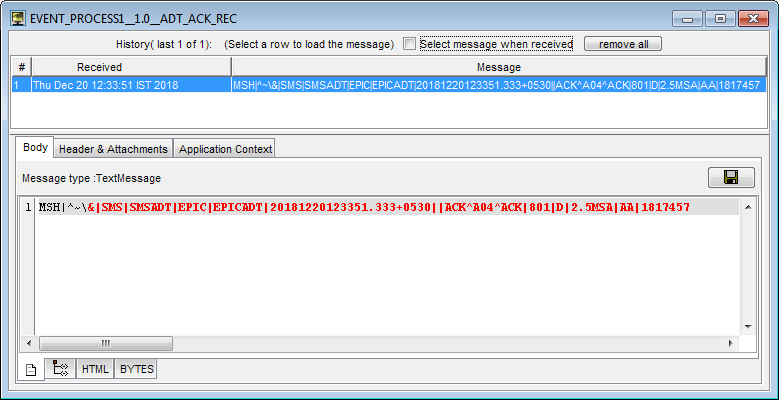
Figure 9: Acknowledgment sent by HL7Receiver
Scenario 2: Receiving an ORU R01 message
Configure the HL7Receiver as explained in the Configuration and Testing section above.
Figure 10 illustrates a snapshot of the ORU R01 message received by HL7Receiver when the message (shown in Figure 12) is sent by HL7Sender.
Figure 11 illustrates the acknowledgment sent by HL7Receiver.
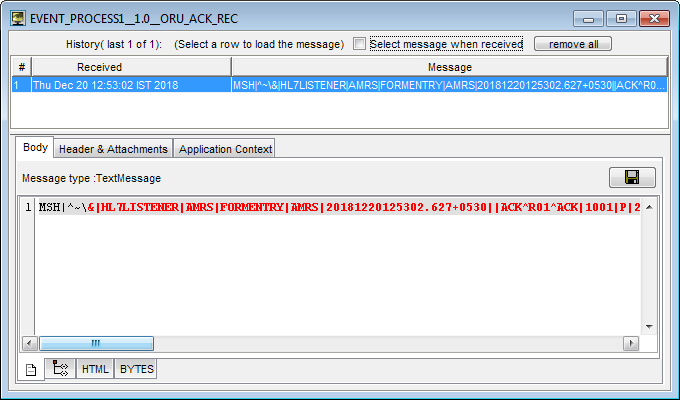
Figure 10: ORU R01 message received by HL7Receiver
Sample ORU R01 message sent by HL7Sender
MSH|^~\&|FORMENTRY|AMRS|HL7LISTENER|AMRS|20060809121931||ORU^R01|formentry-20060809121931|P|2.5|1||||||||2^AMRS-ELDORET^http://schema.openmrs.org/2006/FormEntry/formId^URI
PID|||3^^^^||Patient^John^D||
PV1||O|1^Unknown||||2^Ima Doc (2-6)|||||||||||||||||||||||||||||||||||||20060807|||||||V
ORC|RE||||||||20060807161605|1^Super User
OBR|1|||1238^MEDICAL RECORD OBSERVATIONS^99DCT
OBX|1|NM|5089^WEIGHT (KG)^99DCT||70|||||||||20060807
OBR|2|||1019^COMPLETE BLOOD COUNT^99DCT
OBX|1|NM|1015^HEMATOCRIT^99DCT||1000|||||||||20060807
OBX|2|NM|21^HEMOGLOBIN^99DCT||1000|||||||||20060807
OBX|3|NM|678^WHITE BLOOD CELLS^99DCT||100000|||||||||20060807
OBX|4|NM|729^PLATELETS^99DCT||10|||||||||20060807
OBR|3|||1284^PROBLEM LIST^99DCT
OBX|1|CWE|6042^PROBLEM ADDED^99DCT||2^ANEMIA, HEMOLYSIS^99DCT|||||||||20060807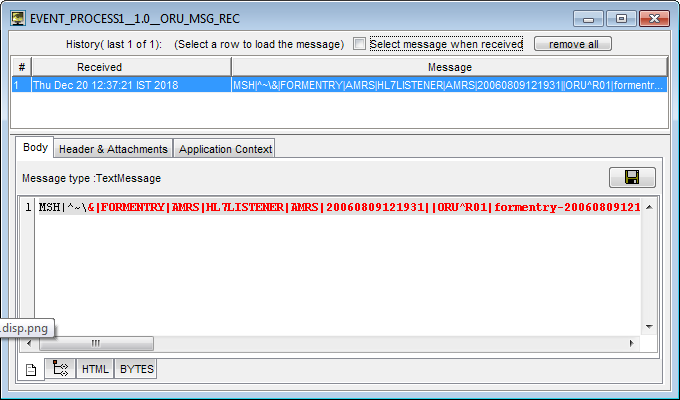
Figure 11: Acknowledgement sent by HL7Receiver
To understand the service better, refer to the HL7Sender-Receiver example which demonstrates HL7Receiver service features.
Scenario 3: HL7Receiver with Send Custom Responses
Configure the HL7Receiver as explained in the Configuration and Testing section above.
The figure below illustrates the event process where HL7Sender accepts Input from the Feeder. In the HL7Receiver Send Custom Responses property is enabled and the messages from the HL7Receiver at 'route1' are added with message property "default_ack" with the value set to "true" using breakpoint.
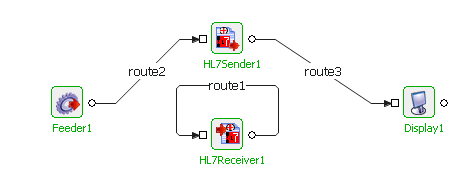
Figure 12: Sample event process using HL7Sender and HL7Receiver
Sample Input from Feeder
MSH|^~\&|EPIC|EPICADT|SMS|SMSADT|199912271408|CHARRIS|ADT^A04|1817457|D|2.5|
PID||0493575^^^2^ID 1|454721||DOE^JOHN^^^^|DOE^JOHN^^^^|19480203|M||B|254 MYSTREET AVE^^MYTOWN^OH^44123^USA||(216)123-4567|||M|NON|400003403~1129086|
NK1||ROE^MARIE^^^^|SPO||(216)123-4567||EC|||||||||||||||||||||||||||
PV1||O|168 ~219~C~PMA^^^^^^^^^||||277^ALLEN MYLASTNAME^BONNIE^^^^|||||||||| ||2688684|||||||||||||||||||||||||199912271408||||||002376853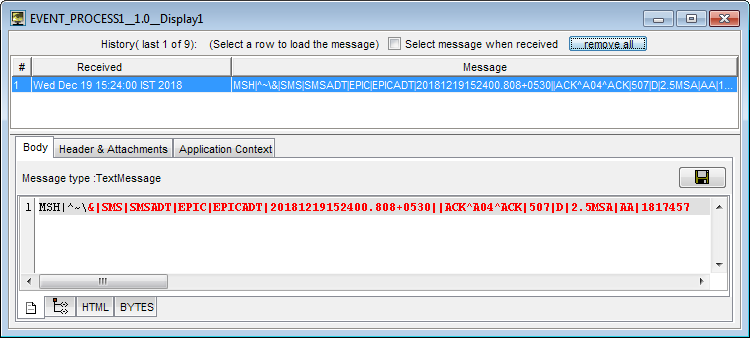
Figure 13: Output displayed in Display
