Create and Edit User-defined Functions
Custom Functions can be added to the User Defined Functions category of the Function Palette.
Mapper Perspective
Custom function creation (adding a new script) and adding jars are done in the Mapper Perspective.
To open eMapper, perform any of the below from the Fiorano orchestrator:
- XSLT microservice: Double-click the XSLT Microservice and click the Mappings ellipsis button.
- Route Transformation: Right-click the route where Route Transformation needs to be done and click Mapper Project under the Configure Transformation option.
Custom Functions can be added to the User Defined Functions category of the Function Palette. Functions can be created by performing the following steps: On the Tools menu, click Create/Edit User defined Function(s) option; User Defined Functions dialog box appears. Alternatively, click Type the name of the extension to be created in the Extension Name text box provided in this dialog and click the Edit button. Select the respective extension present under Defined Extensions and click the Edit button. The New Script Function Wizard appears as shown in Figure 5; the wizard has two panels in sequence—Script Information panel and Function List panel as explained in the next section. Extensions can be defined either in Javascript or Java language. The language of the extension being added can be specified from the Language dialog box present in the Script Information panel. After choosing the language, provide Java Script (for javascript language) or the qualified name of the Java class (for java language). Function List panel (Click the Next button in the Script Information panel) shows the list of functions that were defined in the Script Information panel. Upon selecting the desired functions, these will be added to the Function palette under the User Defined Functions category. The Function List items will be different for the languages—javascript and java. Below sections illustrate the specific steps for javascript and java language options. Provide the script in the text editor which says 'Type in the script here'. Sample Javascript Click Next; the script will be processed and the list of javascript functions will be populated. Choose from the function list by selecting the checkbox; change the Type (String/Decimal/Real/Unknown) of function as required. Provide the fully qualified name of the Java class in the text editor which says 'Type in the fully classified class here'. Java Class example Click Next; the list of java functions will be populated. In the panel, perform the following actions as required: Choose from the java function list that appears under the name table by selecting the checkbox. Select the function name to see the parameters appear. Double-click the parameter name to change the name if necessary. While adding Java functions, the user has to add a .jar file containing the class defining the functions to the classpath in order to fetch the list of functions. To use the added funclet(s) in an XSLT component, add the jar to the component resources. To add jar files, follow the steps mentioned in the Adding Resources to a Service section. To use the added funclet(s) in Route Transformation, add the jar to the Class Path of servers. To add the jar, provide the path in the Server Configuration file by following the below steps: Save the file and close it. Refer the Funclet Repository section to know where these user-defined funclets are stored.Creating/Editing User-defined Function(s)
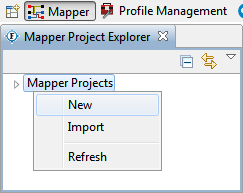
Figure 1: Creating a new Mapper project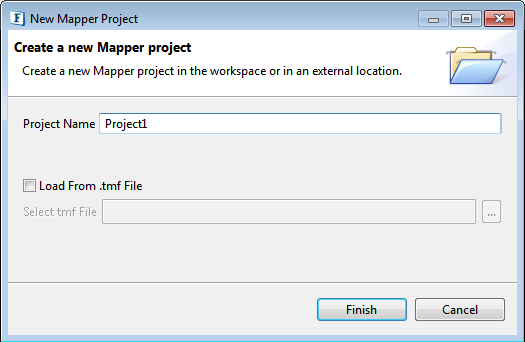
Figure 2: Providing a name to the new project

Figure 3: Opening User Defined Functions dialog box To create a new extension
To edit one of the existing extensions
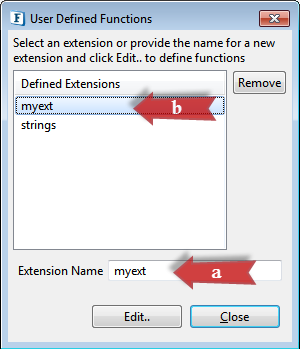
Figure 4: Extensions DialogScript Information and Function List
Javascript
function compute(expr){
	return eval(expr);
}
function nextMillenium(){
	d = new Date()    //today's date
	mill=new Date(3000, 00, 01, 00, 00, 00)    //Next millennium start date
	diff = mill-d    //difference in milliseconds
	mtg = new String(diff/86400000)    //calculate days and convert to string
	point=mtg.indexOf(".")    //find the decimal point
	days=mtg.substring(0,point)    //get just the whole days
	return "There are only " + days + " days remaining to the start of the next millennium.";
}
function replace(input, pattern, flags, str){
	return input.replace(new RegExp(pattern, flags), str);
}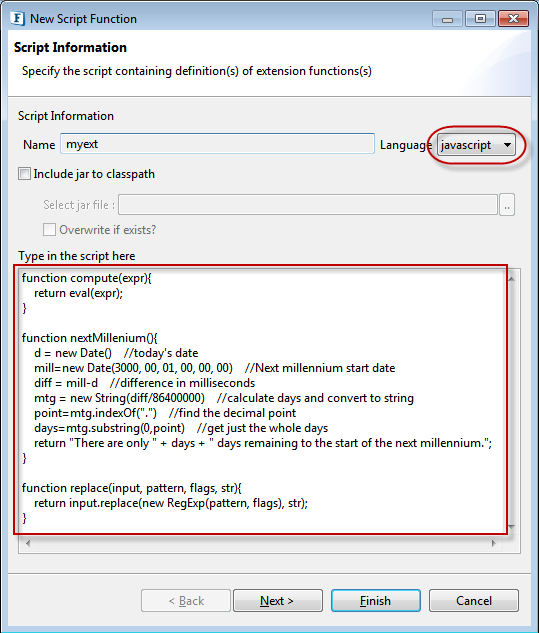
Figure 5: Java script provided in the Script Information Panel
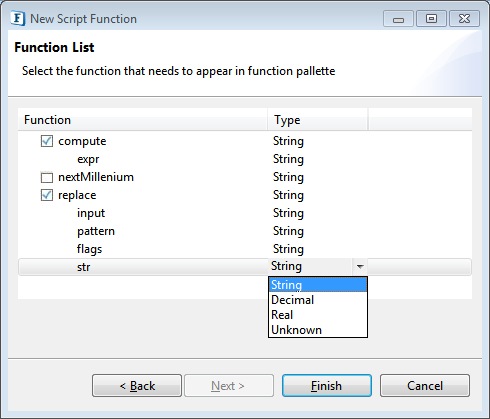
Figure 6: javascript Function ListJava
com.fiorano.funclet.FileChecker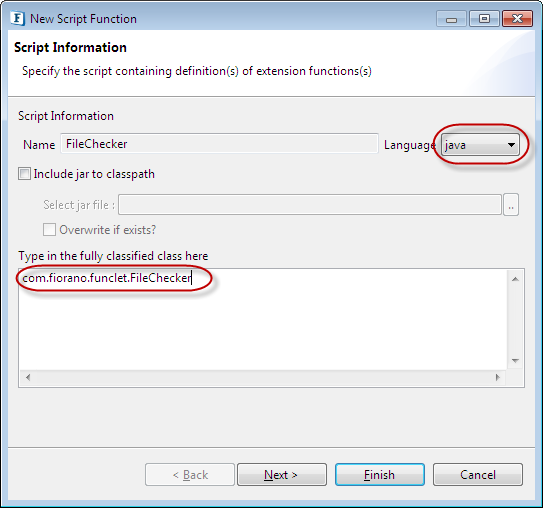
Figure 7: Java class provided in the Script Information Panel
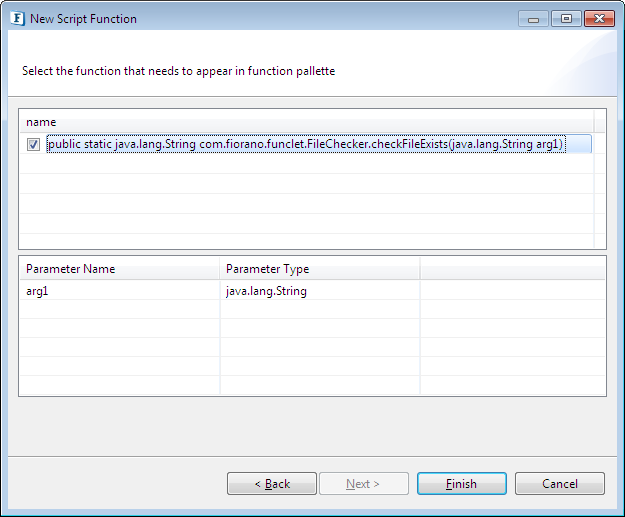
Figure 8: Java class parameters
Adding Required Jars
For Testing in Mapper
From Script Information panel
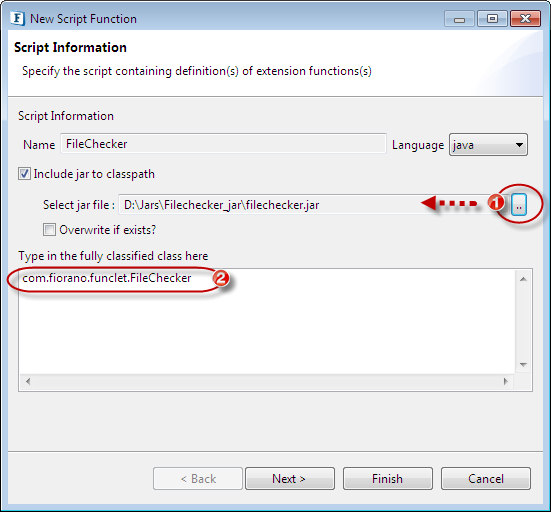
Figure 9: Adding Jar to mapper classpath from Script Information panelFrom Preferences
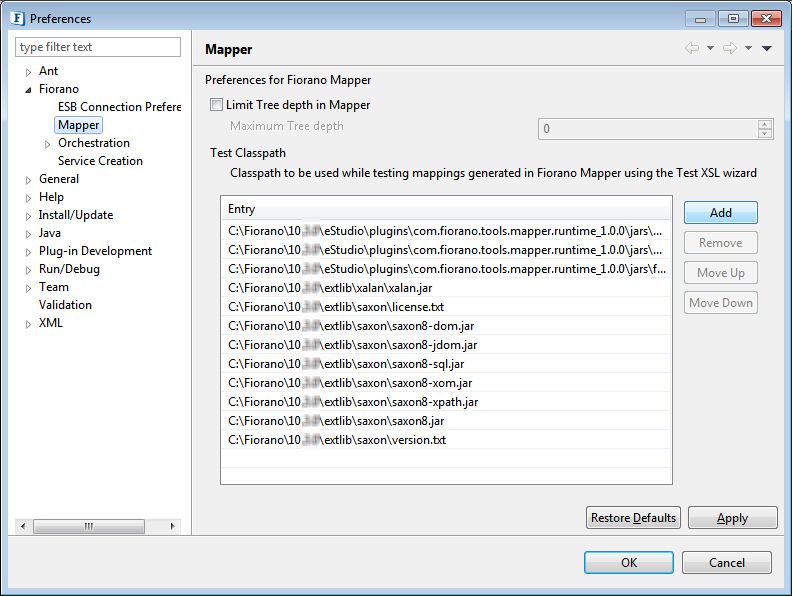
Figure 10: Adding Jar to mapper classpath from Mapper Preferences panelFor Runtime
Xslt Component
Adding Classpath for Route Transformation
Example: D:\jars\FileChecker_jar\filechecker.jar (filechecker.jar being the jar file)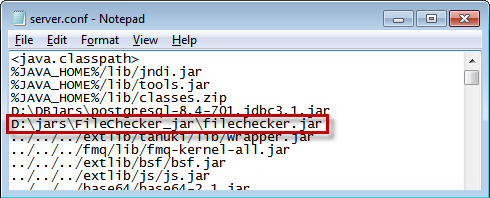
Figure 11: Adding Jar to classpath in case of server.conf configuration file
