Adding Resources to a Microservice
Overview
The resources required for a particular component need to be added to its class path so that the program can access and utilize them properly and effectively, which ultimately helps the smooth functioning of the overall application. It can be added during configuration or during runtime. Resources can be of any type such as dil, zip, jar and exe.
Procedure and Prerequisites
To add resources to a component, edit the respective component, or the corresponding system library present in the Microservice Repository, using eStudio application.
Before starting with the steps, ensure that the Enterprise Server is started and is running.
Adding Resources for DB Category components
Instructions for adding resources are illustrated below by taking DB component as an example.
Considering the DB component as the example, the point to be noted is that all the components under DB category such as DB, DBProc, DBQuery, and DBQueryOnInput share a common System Library (jdbc) which handles the JDBC connection. Hence, add JDBC drivers as resources to JDBC System Library, instead of adding them separately for each component under the DB category.
Login to the Enterprise Server in eStudio application and follow the below steps:
- If the Microservice Repository panel is not found in the eStudio screen, navigate through Window > Show View > Other > Fiorano, select Microservice Repository and click OK.
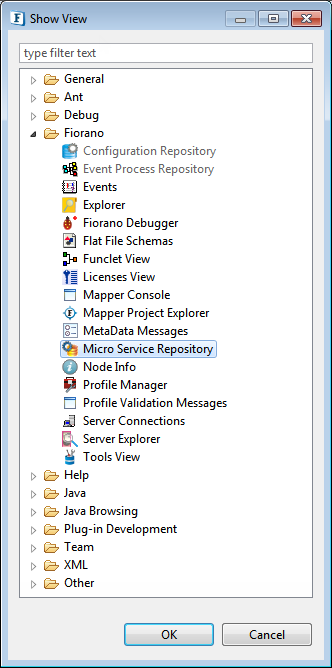
Figure 1: Opening Microservice Repository panel - In the Microservice Repository panel, expand the System Lib option.
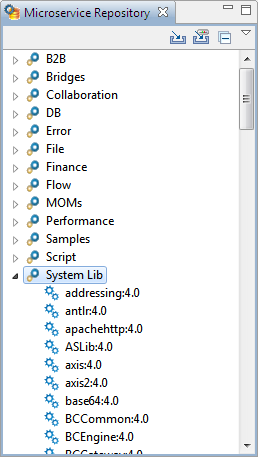
Figure 2: Expanding System Lib service
- Under System Lib option, right-click jdbc:4.0, and then click Edit.
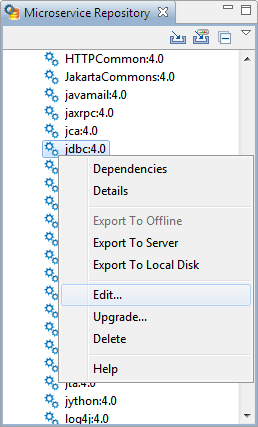
Figure 3: Navigating to Editing Service
- In the Editing Service dialog box, where it says, "Changes made to service will be saved to repository only after the editor associated with the service has been closed", click OK.

Figure 4: Alert saying that the changes will be saved only after the editor gets closed
- Double-click the tab of ServiceDescriptor.xml page that appears, or right-click and click Maximize in the right-click menu to maximize the page for easy editing.
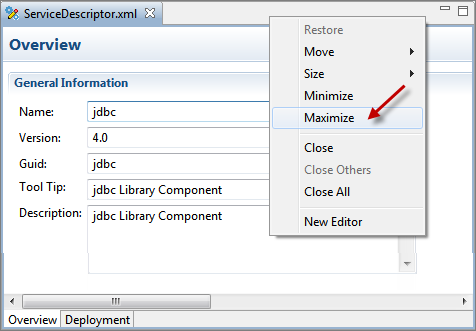
Figure 5: Maximizing the ServiceDescriptor.xml window
- Click Deployment tab present at the bottom of ServiceDescriptor.xml page and click the Add button under Resource subsection to choose the respective drivers.
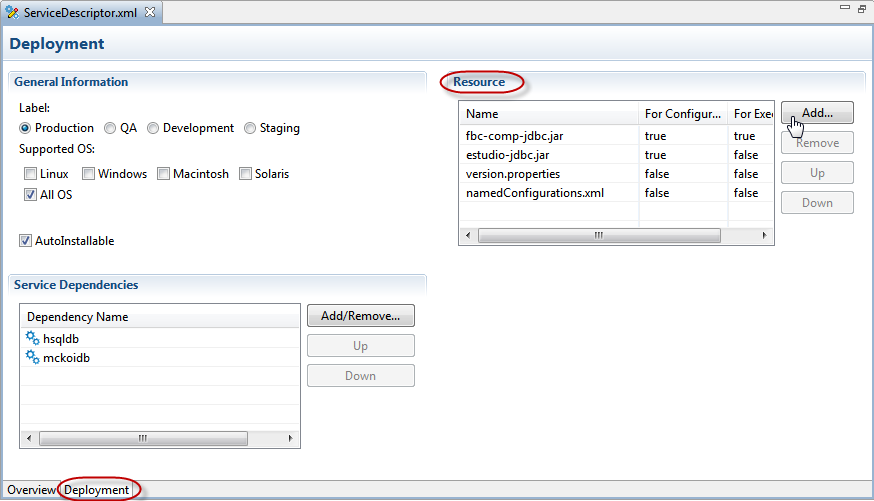
Figure 6: Navigating to Resource section to choose the resource
- Browse to the location where jar files are saved, select the respective jar file (ojdbc142.jar for Oracle in this example) and click Open. Note: Please download the file using internet if it is not available in your system.
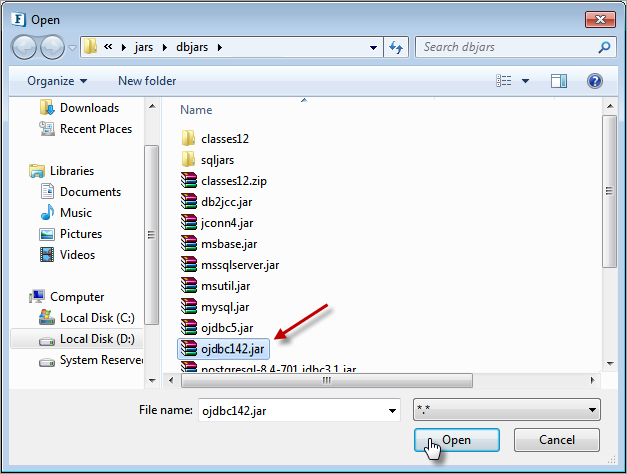
Figure 7: Choosing the resource by browsing to the system location
- The new resource gets added in the Resource section. The added resource can be used for configuration and/or execution, by choosing the values between 'true' and 'false' accordingly, under For Configuration and For Executions columns respectively. To remove a resource, select the resource and click the Remove button.
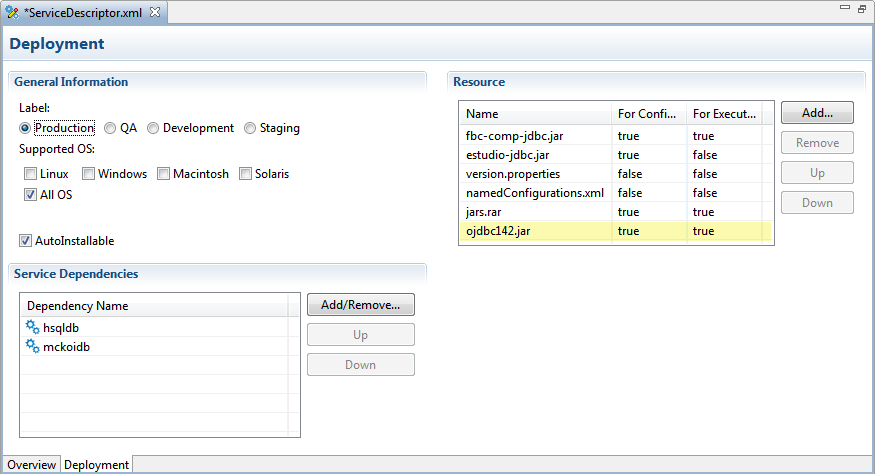
Figure 8: Saving the changes made by adding the new resource
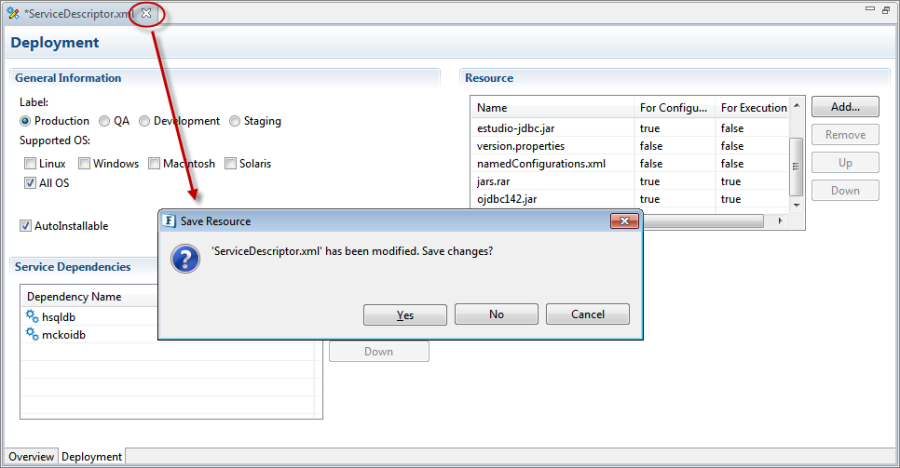
Close the ServiceDescriptor.xml window to apply the changes to all the associated instances of this microservice.
Changes are saved only when this window is closed.
- In the Save Resource dialog box that appears, where it says "ServiceDescriptor.xml, has been modified. Save changes", click Yes.
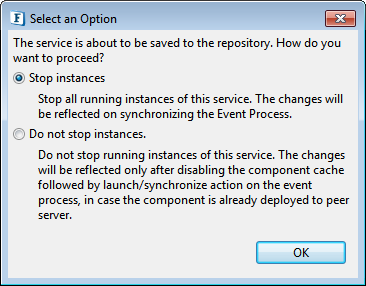
- In the Select an Option dialog box, choose any one of the below options as per requirement and click OK.
- Stop instances: Stops all components depending on the added resource and changes get reflected on synchronizing the Event Process. If this is chosen, Adding Resources completes here.
Do not stop instances: Choose this option if you are running any Event Process which you do not want to stop. The new resources will be added when the instance is run next time, but the cache component has to be disabled as explained in the next step.
- The newly-added resources will be added in the classpath of the microservice only if you stop all the instances of the microservice and synchronize it.
- Next step is required only if you choose the second option.
- If Do not stop instances option is selected in the Select an Option dialog box, after stopping the Event Process(s) which is/are running, disable the cache by performing the following actions:
- Click the microservice (DB component) which requires the jdbc service.
- Open Properties panel, go to Deployment tab and select 'No' from Cache Component
The resource gets added to the component on the event of next execution.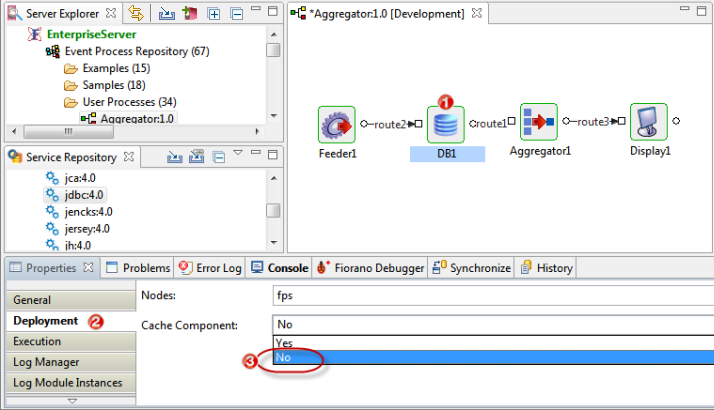
Resources for JMS and MQSeries
The below resources required for JMS and MQSeries components can be added in the same manner. For example, JMSAdapters:4.0 added to JMS category applies to all the three components involved as below.
Category | Components Involved | Resource Needed |
|---|---|---|
JMS | JMSIn 4.0, JMSOut 4.0 and JMSRequestor 4.0 | JMSAdapters:4.0 |
JMS | JMSIn 5.0, JMSOut 5.0 and JMSRequestor 5.0 | JMSCommon:4.0 |
MQSeries | MQSeriesIn 4.0 and MQSeriesOut 4.0 | MQSeries:4.0 |
