
Fiorano Deployment Manager allows you to control the deployment of business components and event processes on various nodes in the Fiorano network. You can use a combination of Labels (Development, QA, Staging, and Production) and other identifiers (GUIDs, version numbers and node names) to create comprehensive and powerful rules to control the deployment of Event Processes.
Select Deployment Manager Node from Tools view, right-click and select Login to connect to Enterprise Server.
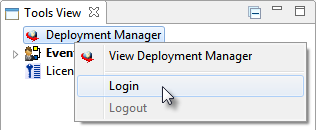
Figure 1: Tools View
After Logging, a Deployment Manager View will be displayed. All Deployment Manager related actions like designing of new rules, modifying existing rules, etc can be performed from this view. To explicitly open Deployment Manager View, right-click on Deployment Manager Node and select View Deployment manager.
Reference
For an overview of rules, refer to the Labels and Rules section.
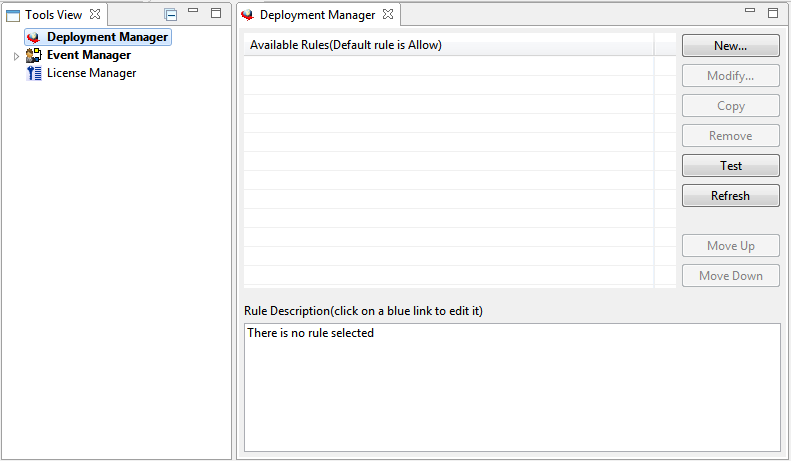
Figure 2: Fiorano Deployment Manager View
Fiorano Deployment Manager is a fairly straightforward tool with self explanatory controls. This section briefly describes the various actions that can be performed using this tool.
Creating a Rule
You can set rules for the deployment of a business component in an event process(s) on a particular node(s).
To create a new rule, click on New button; the New Rule dialog box is displayed.
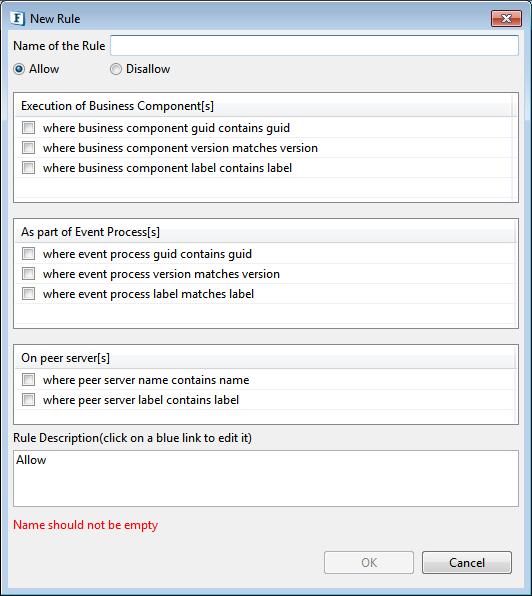
Figure 3: New Rule Dialog
The New Rule window consists of the following controls:
-
Allow: Select this option to create a positive rule. A positive rule is one where a business component, event process, or peer server are allowed to perform a task.
-
Disallow: Select this option to create a negative rule. A negative rule is one where a business component, event process, or peer server are restricted from performing a task.
-
Execution of business service: This field contains three check boxes for creating business service specific rules:
-
Where business component guid contains guid: Select this option to specify the GUID of a business service in a rule.
-
Where business component version matches version: Select this option to specify the Version of a business service in a rule.
-
Where business component label contains label: Select this option to specify the Label of a business service in a rule.
-
-
As part of event process(s): This field contains three check boxes for creating event process specific rules
-
Where event process guid contains guid: Select this option to specify the GUID of an event process in a rule.
-
Where event process version matches version: Select this option to specify the Version of an event process in a rule.
-
Where event process label matches label: Select this option to specify the Label of an event process in a rule.
-
-
On peer server[s]:
-
Where peer server name contains name: Select this option to specify the name of a peer server in a rule.
-
Where peer server label contains label: Select this option to specify the label of a peer server in a rule.
-
-
Select Allow or Disallow button for choosing the deployment of business service.
-
Set conditions for the rule in Business component[s] panel selecting the desired check boxes. You can specify multiple conditions for a single rule by selecting more than one check box.
-
To set the rule on the basis Business Component GUID, select Where business component guid contains guid condition and select GUID hyperlink from "Rule Description panel", and select the required Business Components from the Business Component selection dialog
-
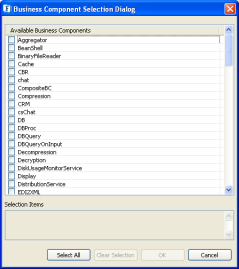
Figure 4: Business Component Selection dialog
-
To set the rule on the basis of Business Component Version, select Where business component version matches version condition and select Version hyperlink from "Rule Description panel", and select the required Business Component Versions from the Business Component Version selection dialog
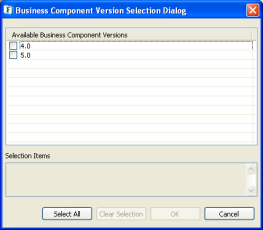
Figure 5: Business Component version selection dialog
-
To set the rule on the basis of Business Component Label, select Where business component label matches label condition and select Label hyperlink from "Rule Description panel", and select the required Business Component Label from the Business Component Label selection dialog
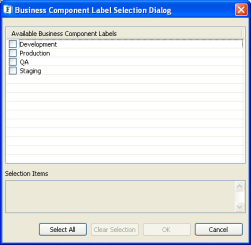
Figure 6: Business Component Version selection dialog
-
Set conditions for the rule in Event Process[s] panel selecting the desired check boxes. You can specify multiple conditions for a single rule by selecting more than one check box.
-
To set the rule on the basis of Event Process GUID, select Where event process guid contains guid condition and select GUID hyperlink from "Rule Description panel", and select the required Event Processes from the Event Process selection dialog
-
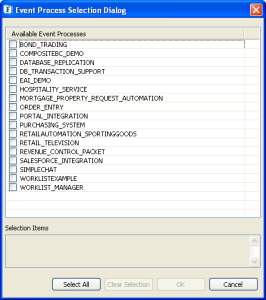
Figure 7: Event Process selection dialog
-
To set the rule on the basis of Event Process Version, select Where event process version matches version condition and select Version hyperlink from "Rule Description panel", and select the required Event Process Versions from the Event Process Version selection dialog
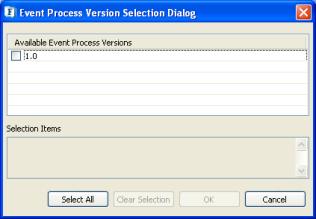
Figure 8: Event Process Version selection dialog
-
To set the rule on the basis of Event Process Label, select Where event process label matches label condition and select Label hyperlink from "Rule Description panel", and select the required Event process labels from the Event Process label selection dialog
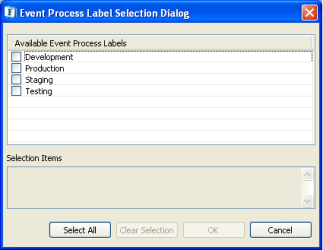
Figure 9: Event Process Label selection dialog
-
Set conditions for the rule in Peer Server[s] panel by selecting the desired check boxes. You can specify multiple conditions for a single rule by selecting more than one check box.
-
To set the rule on the basis of Peer Server name, select Where peer server name contains name condition and select name hyperlink from "Rule Description panel", and select the required peer servers from the Peer Server selection dialog
-
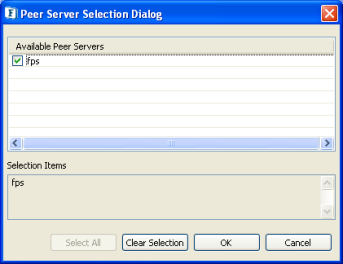
Figure 10: Peer Server selection dialog
-
To set the rule on the basis of Peer Server label, select where peer server label contains label condition and select label hyperlink from "Rule Description panel", and select the required peer servers from the Peer Server label selection dialog.
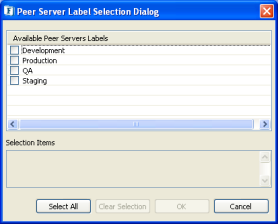
Figure 11: Peer Server label selection dialog
-
Enter the name of the rule and click Ok button to create a new rule.
Modifying a Rule
To modify a rule, perform the following steps:
-
Select a Rule in the Available Rules section.
-
Click on the Modify button. The Modify Rule dialog is opened.
-
Make the required changes and click on Ok button.
Creating a copy of a Rule
Although creating Rules using Deployment Manager is straight forward, creating variants of complex rules can be cumbersome and repetitive. To simplify the process, the tool allows you to create copies of a rule. In this way, you can create copies of complex rules and tweak them to create variants. To create a copy of a rule:
-
Select a Rule in the Available Rules section.
-
Click on the Copy button. A copy of the Rule will be created with all the set conditions.
-
Make the required changes to the Rule.
-
Enter the name of the new Rule and click Ok button.
Deleting a Rule
To delete a rule, perform the following steps:
-
Select a Rule in the Available Rules section.
-
Click on the Remove button.
Testing the Rule[s]
You can check the functionality of a Rule by testing it against the relevant parameters of a business component, event process or peer server. To test the Rule[s], perform the following steps:
-
Click on the Test button. The Test dialog box is opened.
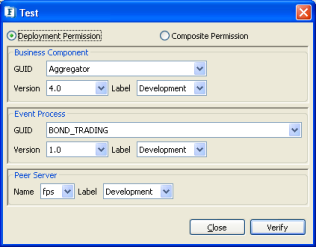
Figure 12: Test dialog
-
Select the Deployment Permission or Composition Permission option.
-
From the Business Component section, select the applicable GUID from the GUID drop-down.
-
Select Version and Label from their respective drop-down lists.
-
From the Event Process section, select applicable Event Process GUID, Version, and Label from their respective drop-down lists.
-
Next, select peer server name and label from the Peer Server section.
-
Click on Verify to test the Rule.
Refreshing the display of Rules
To refresh the display of Rules in the Available Rules section, click on the Refresh button.
Changing the precedence of Rules:
In the Available Rules section, all the Rules starting from the top-most one are arranged in decreasing order of priority in the Rules pane.
To change the precedence of Rules, select the Rule and click the Move Up or Move Down button.