Web Service Attachments
Objective
To describe the capability of the WSStub adapter to host a web service that can receive attachments and how a Web service consumer component can be used to invoke that web service and send attachments.
Prerequisites
- Start Fiorano Enterprise Server (FES) and Fiorano Peer Server (FPS)
- Login to eStudio application
- Understand the basic menus and perspectives (panels) in eStudio application
Scenario
Use a WSStub adapter to expose an Event Process (EP) or a part of the EP as a Web Service deployed in the Peer Server. Launch the EP having the WSStub adapter thus hosting the Web service.
Use a Web service consumer adapter to invoke the web service that is hosted. Launch the EP having the WSConsumer and send messages in XML format needed to access the web service successfully.
Components used
Setting up the Example
Hosting Web Service using WSStub component
Configuring WSStub component
To configure WSStub component, perform the following action in eStudio:
- Add a new Event Process with the name 'WSAttachments_Example'.
- Drag the WSStub component from WebService category in the Micro Service Palette to the WSAttachments _Example orchestrator.
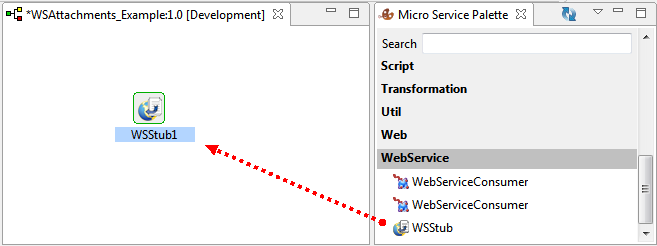
Figure 1: Adding WSStub component to Fiorano Orchestrator
- Double-click the WSStub component in the orchestrator to open Configuration Property Sheet (CPS).
- In the Configuration screen, click WSDL Configuration button.
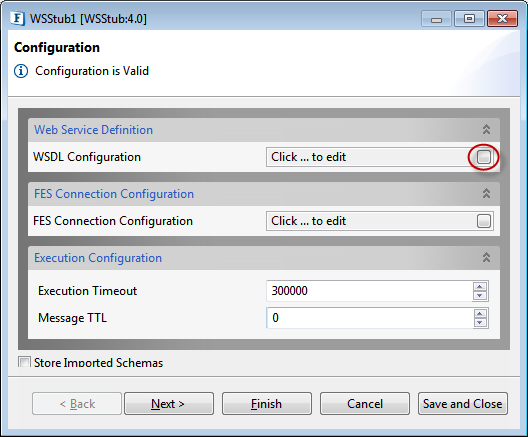
Figure 2: WSDL Configuration
- In the WSDL Configuration dialog box, select the Advanced checkbox in the left pane, and then select the 'Auto_created_OperationRequest' under Messages.
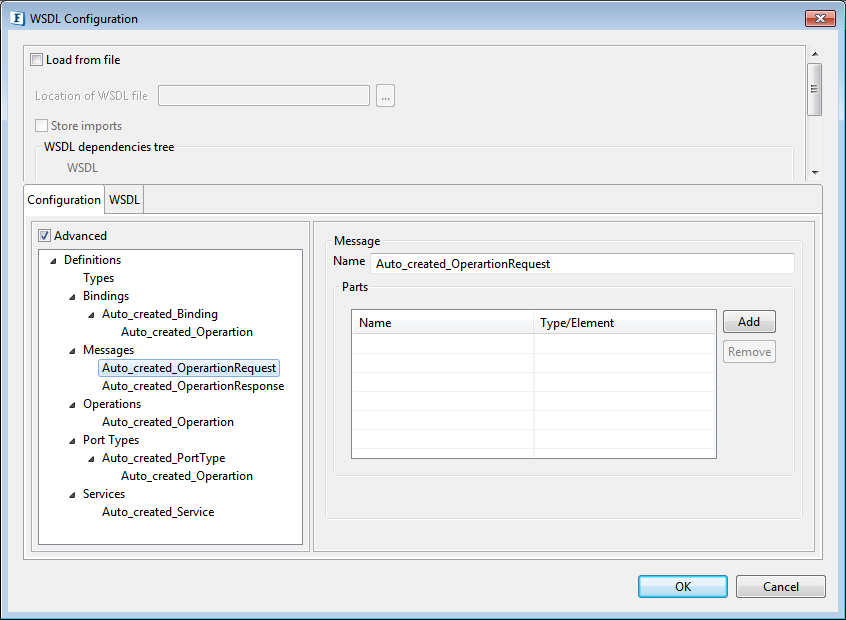
Figure 3: Selecting Auto_created_OperationRequest under Messages
- Under the Message section in the right pane, perform the below actions, and click OK to add elements that the application needs to send and invoke Web Service:
- Click Add button and rename 'PartName1' to 'Input' under Name.
Click the cell under Type/Element column, click the Ellipsis button and select string option in the Select Type/Element dialog box, and then click OK.
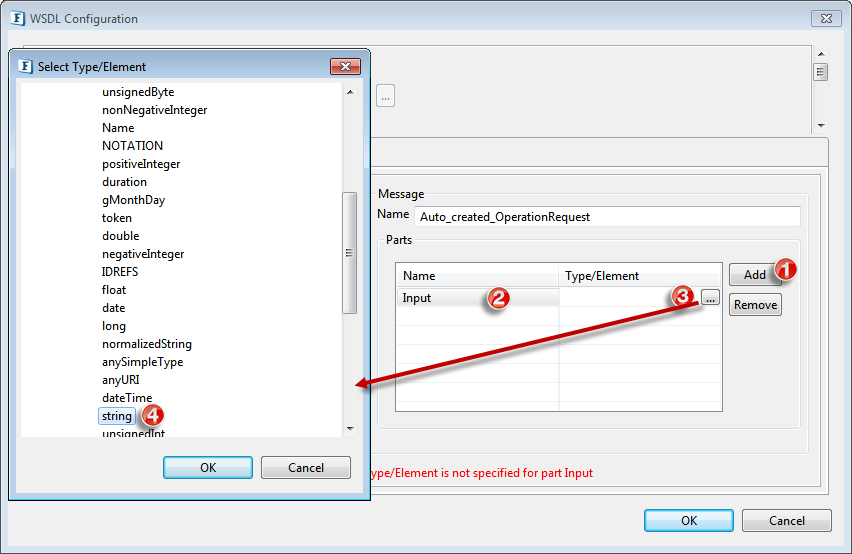
Figure 4: Adding Input attributes for Auto_created_OperationRequestSimilarly, to define the elements that the web service needs to send back as a response to the program, configuration can be applied to send attachments by clicking Auto_created_OperationResponse under Messages section in the left pane, and add Name 'Output' and Type/Element 'string'.
Select Auto_created_Operation under the Bindings section in the left pane. Under the Binding Operation section in the right pane, select the Input tab and click the Binding Details button to configure a request element as MIME and receive attachments.
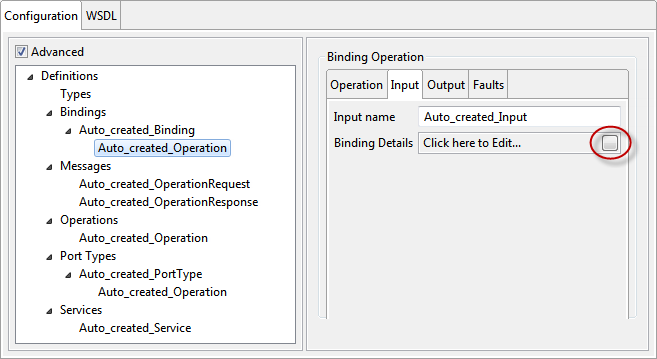
Figure 5: Navigating to Binding Details for Auto_created_Operation
- In the Binding Details dialog box, select MIME MultiPartRelated from the Binding type drop-down.
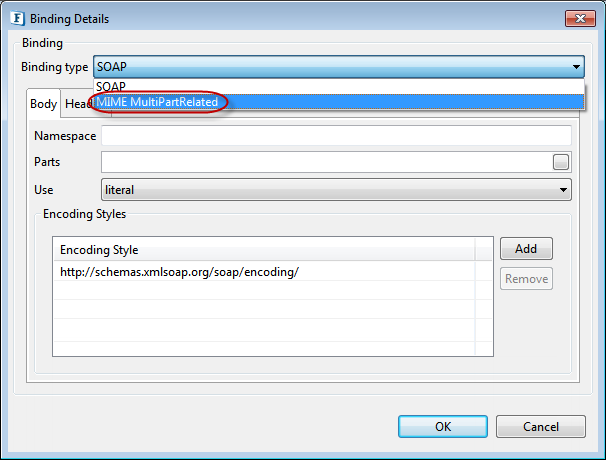
Figure 6: Selecting MIME MultiPartRelated as Binding type
- Click the Add button in the left pane to add the request elements configured in Input and select the MIMEPart that gets added just below the Add button.
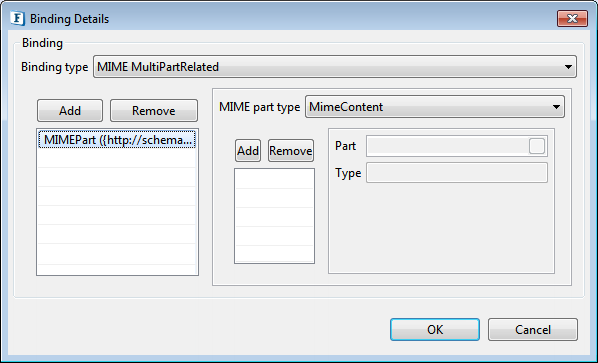
Figure 7: Selecting MIMEPart element
- Click the Add button in the right pane and select the MimeContent that gets added to bind it to one of the request elements/parts.
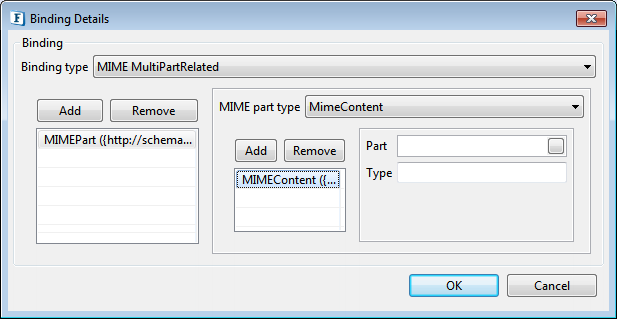
Figure 8: Selecting MIMEContent element
- Click the Part button and select Input that is populated in Select Part(s) dialog box, and then click OK to close the dialog box.
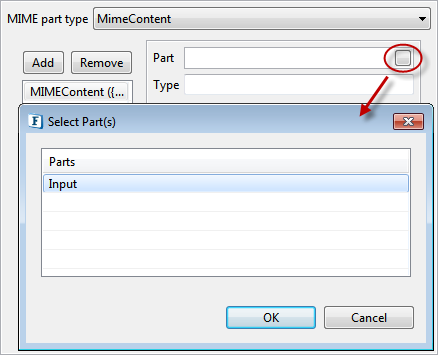
Figure 9: Selecting Part as 'Input'
- Click OK to close the Binding Details dialog box and save the binding details.
- In the WSDL Configuration window, click OK to save the WSDL Configuration changes made.
Press Next twice to go to the Miscellaneous Configuration page.
The default configuration present in these sections works for this example. To understand the capability of these options, pls refer to the WS Stub section.
Under the Attachments Configuration tab, select the Write Attachments to File checkbox to save the incoming attachments to a file.
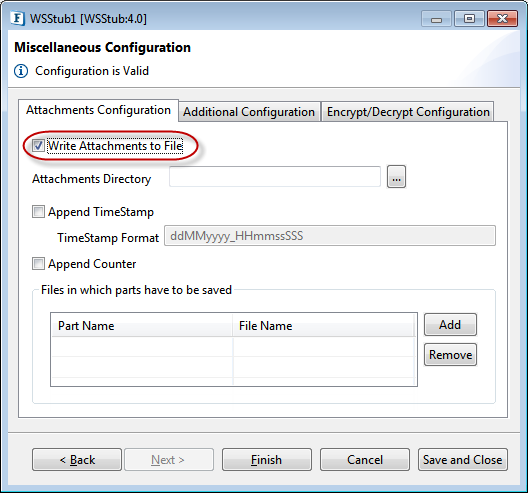
Figure 10: Enabling to Write Attachments to File
- Under 'Files in which parts have to be saved' section, click the Add button and add the following values:
- Rename Part Name from 'Name1' to 'SOAP11_Auto_created_Operation_Input'.
- In the FileName column, enter the file name to which the attachment needs to be saved.
Enter a unique name that denotes a part. Unique name is appended with "_"(double underscore) to the Part Name. For example, if the part Part1 in Operation Operation1 is a mime part, then the user should manually enter the key as SOAP11Operation1Part1 for SOAP1.1, SOAP12Operation2_Part2 for SOAP1.2.
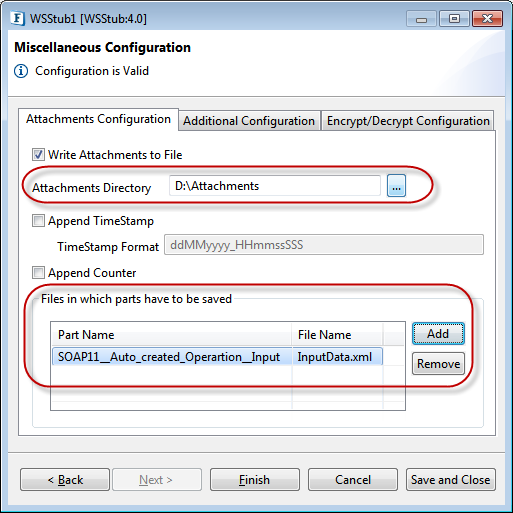
Figure 11: Setting Miscellaneous Configuration
- In the text field named Attachments Directory on top, enter the path of the directory in which we need to save the attachments.
- Click Finish to close the CPS and thereby save the WSStub configuration.
After the configuration, the WSSTub component will be set to host a web service that can receive attachments. - Three ports, that is, one output port and two input ports get generated as below:
- SOAP11_Auto_created_Operation_REQUEST: This output port passes request XML for operation Auto_ created_Operation.
- SOAP11_Auto_created_Operation_RESPONSE: This input port passes response XML for Auto_ created_Operation.
- SOAP11_Auto_created_Operation_FAILURE: This input port passes error response XML for Auto_ created_Operation.
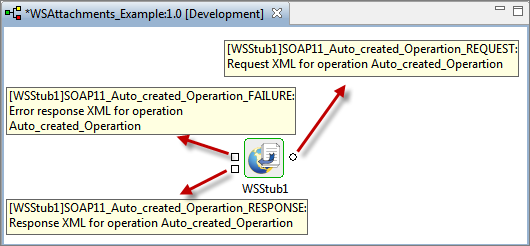
Figure 12: Input and Output ports generated after WSStub configuration
Launching Web Service
To launch the Web Service, perform the following actions:
- Click Check Resource and Connectivity icon (or press ALT+SHIFT+C) to check resource and connectivity.
- Click Run Event Process icon (ALT+SHIFT+R).
- Right-click WSStub component and click View WSDL option to open and view the WSDL in the Internet Browser.
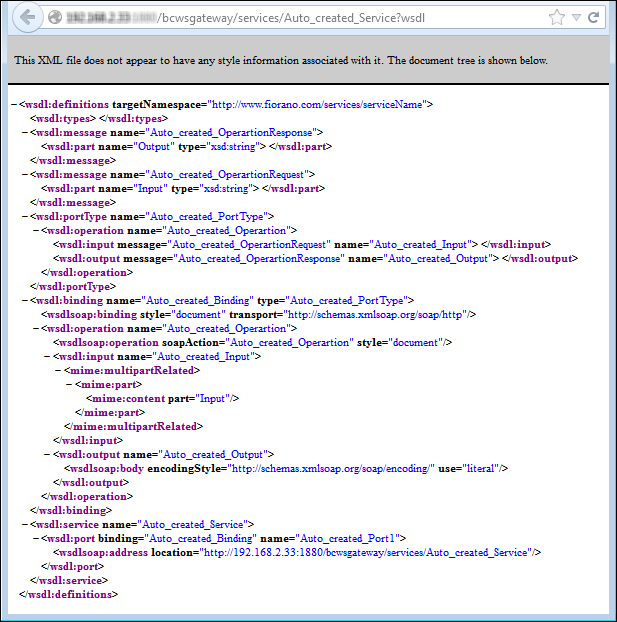
Figure 13: Viewing the hosted web service WSDL
In the WSAttachments_Example event process, double-click SOAP11_Auto_created_Operation_REQUEST port to view the XSD schema of that port, and then click Close.
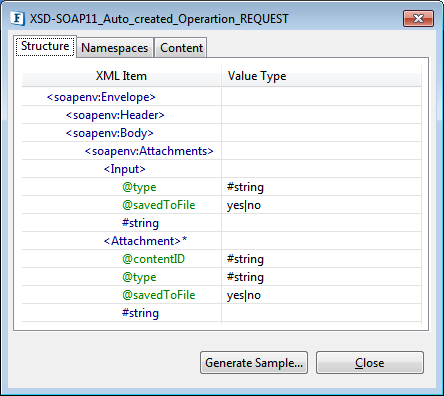
Figure 14: XSD schema of SOAP11_Auto_created_Operation_REQUEST portAny program trying to invoke this web service needs to send an XML message conforming to the XSD of this port.
Right-click WSStub component and click Copy WSDL URL to copy the URL to the clipboard, which is used in the next section.
Invoking the Web Service using the Web Service Consumer component
Configuring WebServiceConsumer component
Configuring WebServiceConsumer component is essential to invoke the Web Service from RESTStub. To configure the component, perform the following actions:
- Drag the WebserviceConsumer component from the WebService category in the Micro Service Palette to the Fiorano Orchestrator.
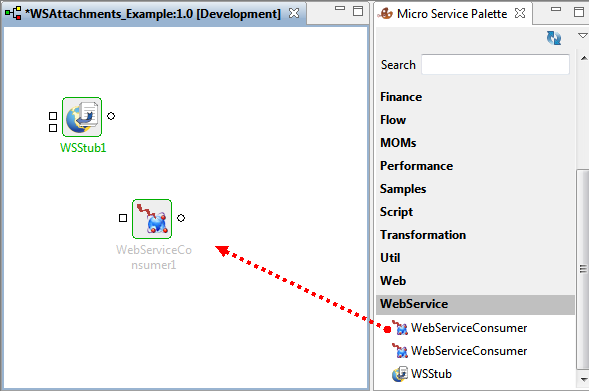
Figure 15: Adding WebServiceConsumer component to WSAttachments_Example EP
- Double-click the WebserviceConsumer component in the orchestrator to open Configuration Property Sheet (CPS). In the Managed Connection Factory, click WSDL Ellipsis button.

Figure 16: Navigating to add WSStub WSDL to WebServiceConsumer
- In Wsdl dialog box, paste the copied WSDL URL in the URL text field and click OK.
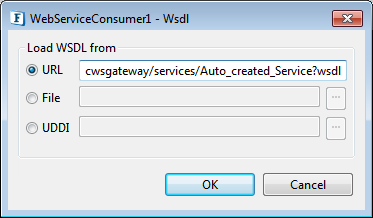
Figure 17: Pasting the WSDL copied from WSStub
- Click the Test button present at the bottom-right part of the CPS. Test Connection Configuration pop-up appears, which shows the WSDL file of the web service to be invoked and hence confirming successful connection to the Web Service. Click Close.
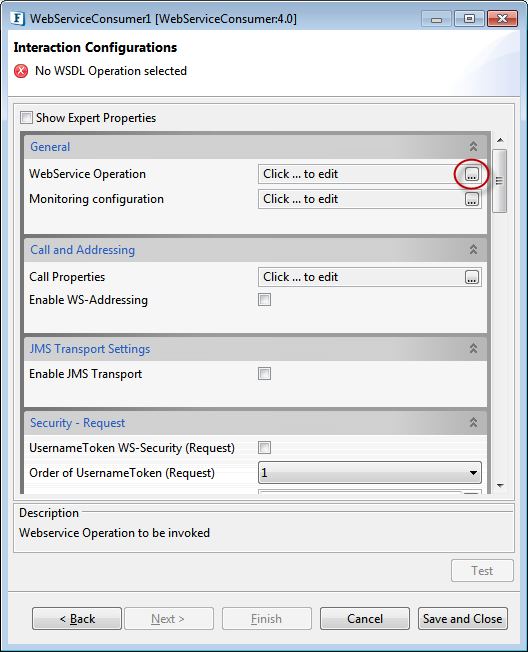
Figure 18: Navigating to add Web Service operation
- Click Next. In the Interaction Configurations page, click WebService Operation ellipsis button to choose which web service operation in the invoking web service we need to call.
- In the OperationName dialog box, select the operation with the prefix 'Auto_created_Operation' to set the XSD schema of the input port of the web service consumer with elements needed to invoke the selected web service operation, and click OK.
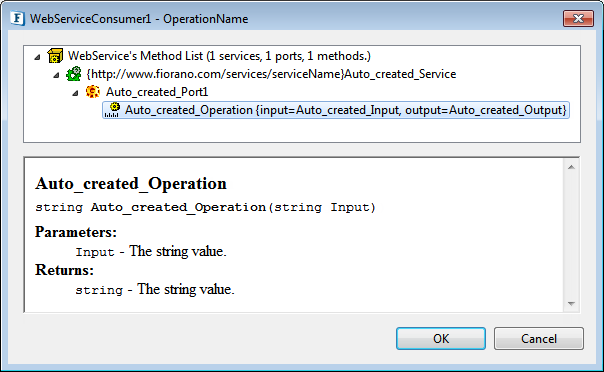
Figure 19: Adding Auto_created_Operation
- Click Finish to save WebServiceConsumer component configuration.
Configuring Feeder component
To send an input conforming to the XSD Schema set in the input port of the WebServiceConsumer adapter, use a Feeder component, and use a Display component to view it.
To add Feeder and Display components, and to configure Feeder component, perform the following actions:
- Drag a Feeder component and Display component from the Util category in the ServicePalette to the Fiorano orchestrator.
- Connect the components in the following manner:
- The output port of the Feeder component to the input port of the WebServiceConsumer component.
- The output port of the WSStub component to the input port of the Display adapter.
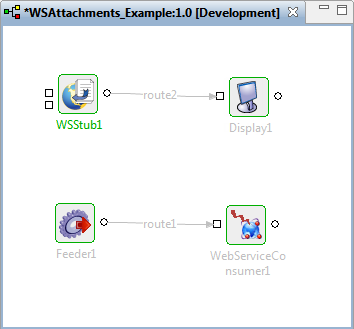
Figure 20: Adding and connecting Feeder and Display components
- Double-click Feeder component and perform the following actions to configure it:
- In the Message Type Configuration page, retain Output Message Format option as 'XML' and click the Connected Port Schemas button.
- In the Connected ports dialog box, select IN_PORT to enable connection between the output port of Feeder and input port of WebServiceConsumer component. Click OK and then click Next.
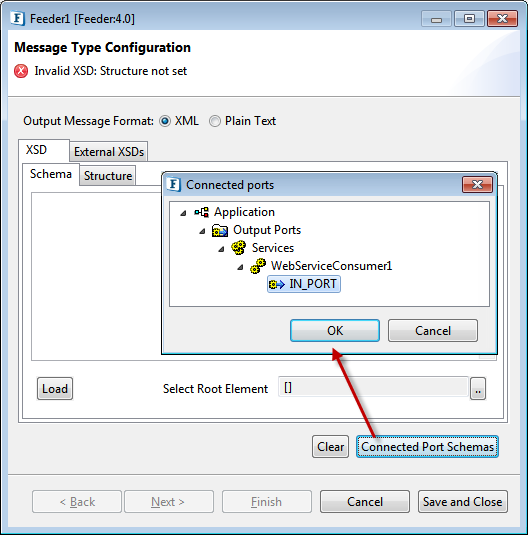
Figure 21: Connecting to WebServiceConsumer input port
- In the Message Details Configuration page, click the Generate Sample button to load sample input.
- Under No.of Repeatable elements to be generated section in the XSD Sample Generation Dialog window, replace max value '3' with '1' so that only one output is generated, and click OK.

Figure 22: Reducing the No.of Repeatable elements to be generated to '1'
- Sample message gets populated. The attachment will be sent via the Input tag present in it.
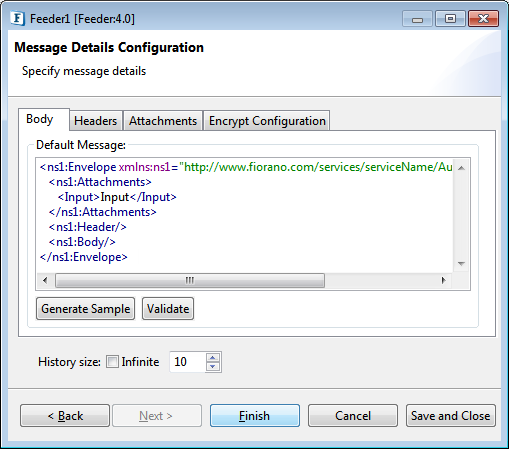
Figure 23: Sample generated in Message Details Configuration panel
The data in each of the XML tags can be changed to valid data. Within the Input tag, replace the text 'Input' with a valid (pertaining to the scenario) XSD Schema.
Add the following in the opening Input tag:
isUrl="false" type="text/xml"To pass the attachment's path to the WSInvoker component while passing attachments, add the attribute 'isUrl' manually to the attachment element in the XML message and set it to true. Type can be specified by an attribute 'type'.
As the attachment is directly passed in the message instead of its path, we need to add the attribute 'isUrl' manually to the attachment element in the XML message and set it to 'false'.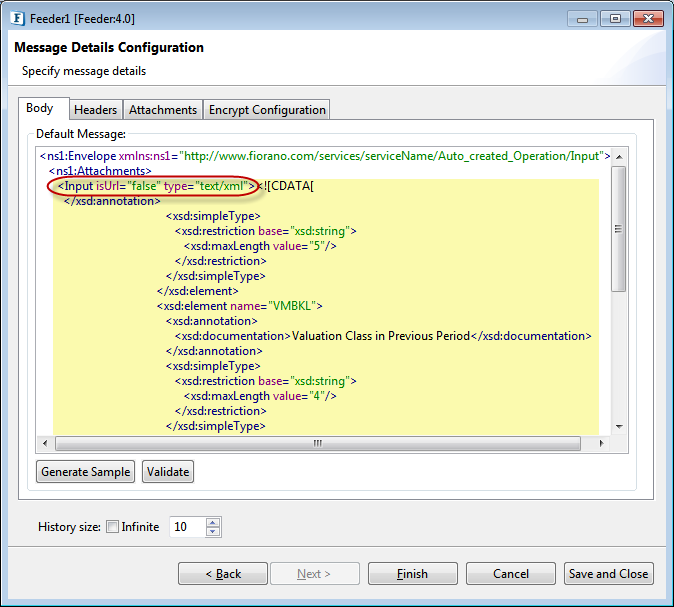
Figure 24: Sample message with the Schema and other (isUrl and type) attributes
Click Finish to save the Feeder configuration set to send messages in the format accepted by the WebServiceConsumer adapter.
Running the Example
To run the example, perform the following actions in the WSAttachments _Example event process:
- Click Synchronize Event Process icon to apply the modifications made to the event process that is already running. Two windows get opened for Feeder and Display components.
- In the Feeder, where the sample message configured in the Feeder CPS appears, click Send to send this message to the WebSServiceConsumer component which then processes the request and sends it to the WSStub component.
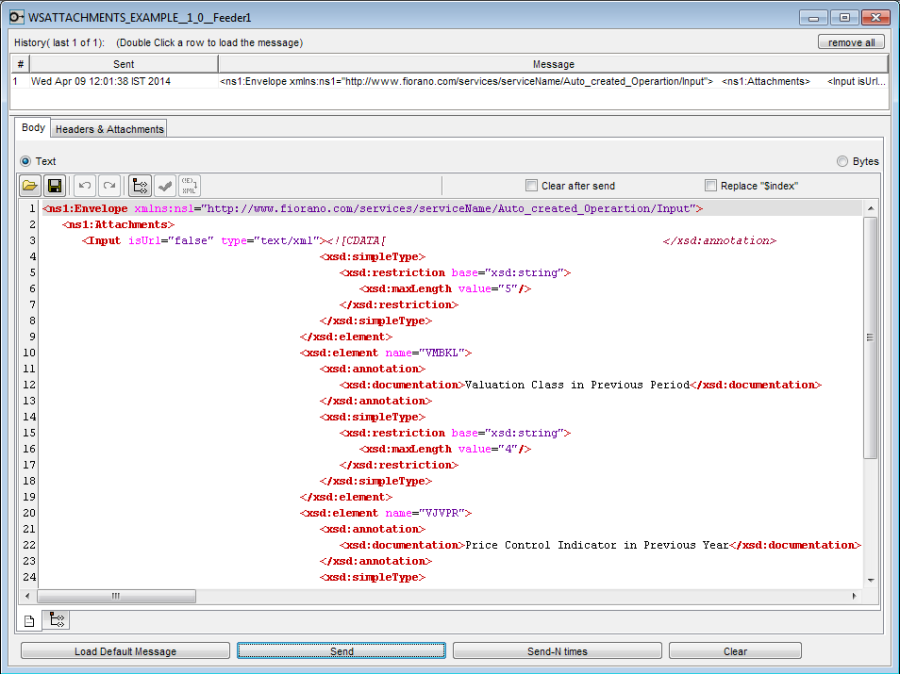
Figure 25: Feeder with the message as configured in Feeder CPS - The attachment appears in attachments directory as configured in WSStub component.
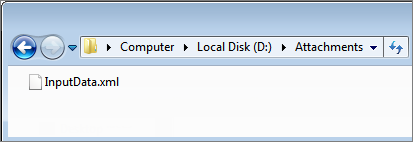
Figure 26: File Browser showing the received attachment
- Open the file to view the content sent from the Feeder window.
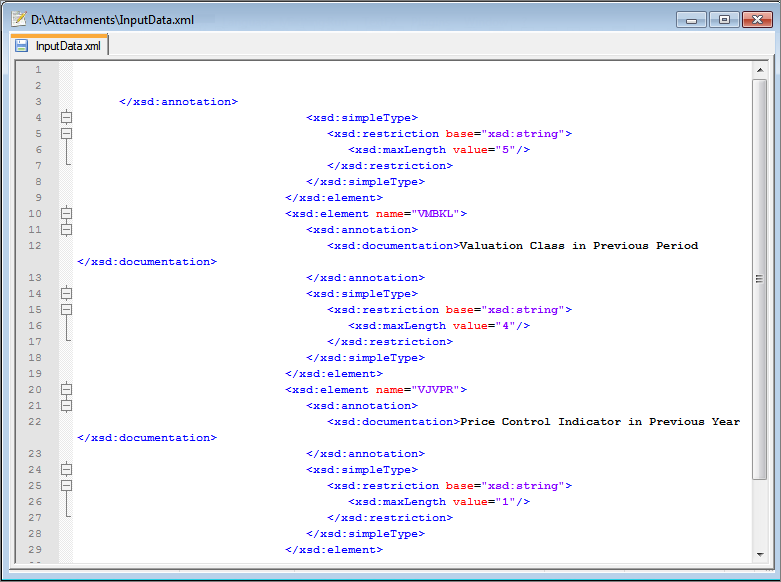
Figure 27: File content reflecting the data fed-in
- In the Display window, click the second tab at the bottom of the screen. It shows the details of the message saved, which is the request XML for operation Auto_ created_Operation created at the WSStub output port.
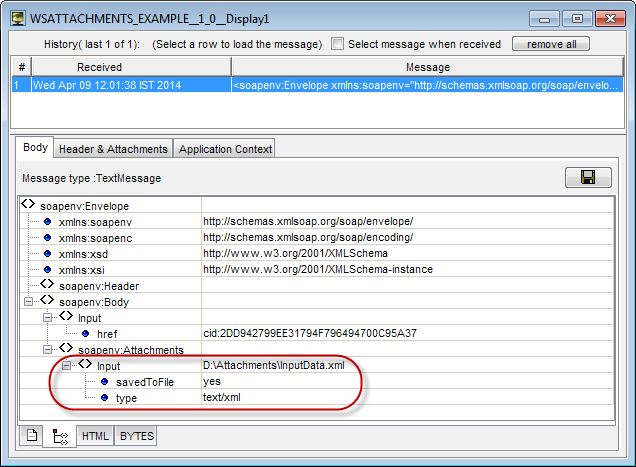
Figure 28: Display window showing the details of message received
This indicates successful hosting of a web service that can receive attachments, and send them to a web service by invoking Web Service resulting in saving the attachment.
Reference
Please note that the component options used in this example are minimal, which helps you to get an overview of the application. To explore the other options present in the WSStub and WebServiceConsumer, Feeder and Display components, refer to the WSStub, WebServiceConsumer4.0, Feeder and Display sections.
