EDI2XML
The EDI2XML component is used for transforming information from EDI format to XML format. This business component accepts data in EDI format and transforms it to the required XML format.
- The component takes EFL file as input in the CPS, which describes the conversion rules.
- EFL files can be created or modified using the Fiorano eStudio tool.
Configuration and Testing
Managed Connection Factory
The EDI2XML component can be configured using its Configuration Property Sheet (CPS).
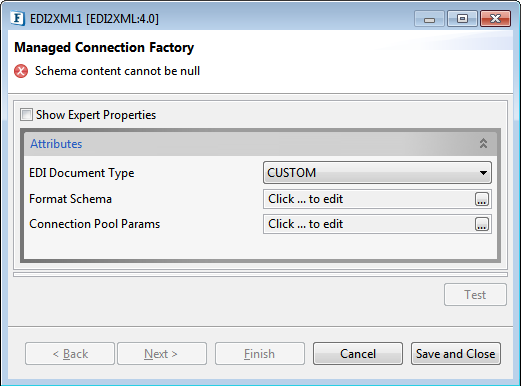
Figure 1: Managed Connection Factory panel in the EDI2XML CPS
Attributes
EDI Document Type
Specify the EDI type of the document to be converted; choose from the options - Custom and UN/EDIFACT.
Custom
Format Schema
Click the Format Schema ellipses button and provide the EDI format schema to be used in the editor.
UN/EDIFACT
United Nations/Electronic Data Interchange for Administration, Commerce and Transport is the international standard that was developed by the United Nations.
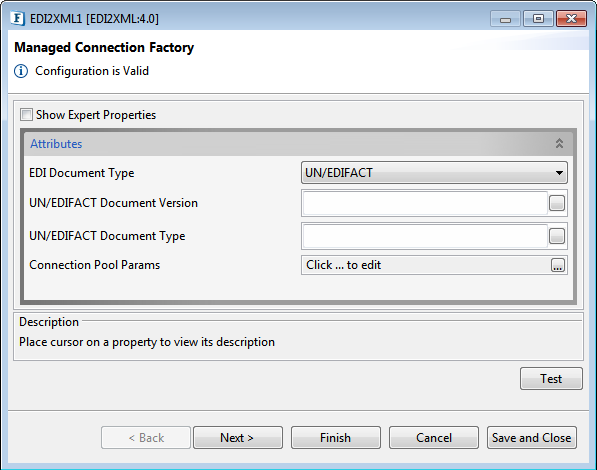
Figure 2: Managed Connection Factory panel with the EDI Document Type "UN/EDIFACT"
UN/EDIFACT Document Version
Specify the UN/EDIFACT document version. Based on the document version, the corresponding jar has to be added as resource to the component. The jar can be downloaded at https://mvnrepository.com/artifact/org.milyn.edi.unedifact.
UN/EDIFACT Document Type
Specify the UN/EDIFACT document type. Refer to the possible document types at https://www.edibasics.com/edi-resources/document-standards/edifact/.
Connection Pool Params
Please refer to the respective section in the Common Configurations page.
Interaction Configuration
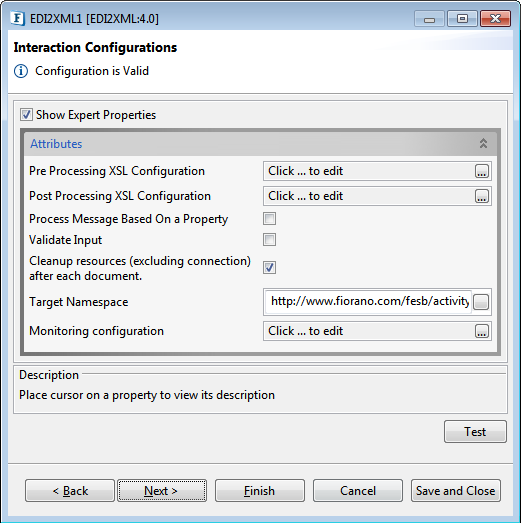
Figure 3: Interaction Configurations panel
Configuration can be tested from within the CPS by clicking the Test button in the Interaction Configuration panel in the CPS.
Attributes
For descriptions of Expert properties given below and Monitoring Configuration, please refer to the Interaction Configurations section in Common Configurations page:
- Pre Processing XSL Configuration
- Post Processing XSL Configuration
- Process Message Based On a Property
- Validate Input
- Cleanup Resources (excluding connection) after each input document
- TargetNamespace
Testing
Sample Schema
Provide the following sample EDI format schema in the Format Schema editor in the Managed Connection Factory, move to Interaction Configurations panel, and click the Test button:
Sample EDI format schema to be used
<?xml version="1.0" encoding="UTF-8"?>
<!DOCTYPE Message
PUBLIC "-//mendelson.de//DTD for m-e-c eagle//EN" "http://www.fiorano.com/dtds/m-e-c.dtd">
<Message
 standard="EDIFACT" version="93" release="A" enableMissValue="0"
name="Empty" minRepeat="0" maxRepeat="1" hideElement="0">
<Segment id="ABC" delimiter="~" name="segment" description="" minRepeat="0" maxRepeat="1" hideElement="0">
<DataElement
 type="AN" default="ABC" minLength="3" maxLength="3" name="ABC"
description="" minRepeat="0" maxRepeat="1" hideElement="0"/>
</Segment>
</Message>
Input Message
Type "ABC~" (~ is the delimiter) in the Input Message editor and click Execute to generate output.
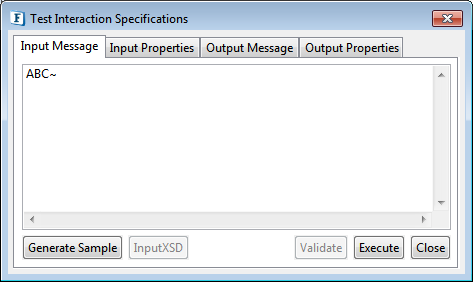
Figure 4: Sample EDI2XML input message
Output Message
Output Message section displays the result as below.
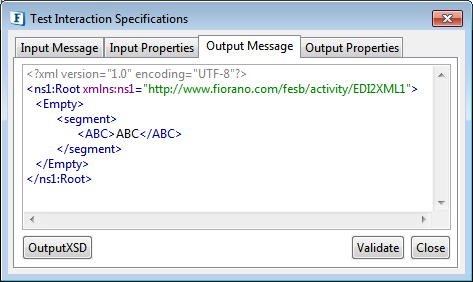
Figure 5: EDI2XML output message
Scheduler Configuration
To schedule the component to execute a specific request at configured intervals of time.
Please refer to the Scheduler Configurations section in the Common Configurations page.
Error Handling
To define the actions that have to be taken when an error occurs.
Please refer to the Error Handling section in the Common Configurations page.
Functional Demonstration
Scenario 1
Send a message in EDI format as defined in the Testing section above and display the output XML message.
Configure the EDI2XML component as described in the Testing section above; use Feeder and Display component to send sample input and check the response respectively.

Figure 6: Demonstrating Scenario 1 with sample input and output
Sample Input
After running the event process, type text "ABC" in the Feeder window and click the Send button.
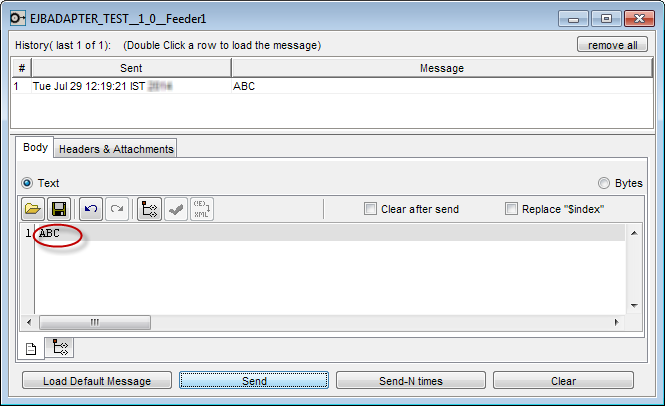
Figure 7: Providing input text "ABC" in the Feeder
Output
Check the result generated in the Display window.
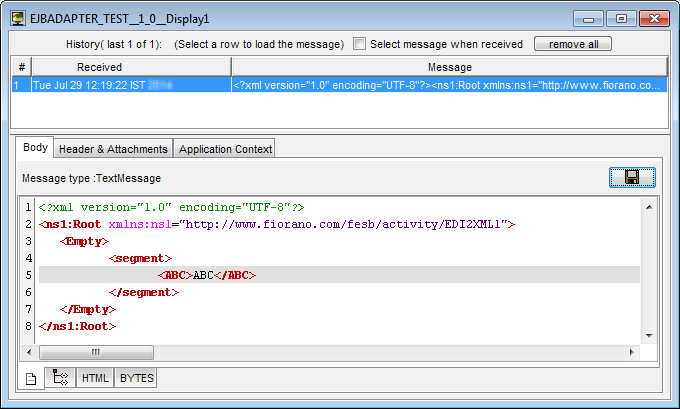
Figure 8: Result generated in the Display window
