LdapAuthenticator
The LdapAuthenticator is used to authenticate an LDAP server. It Is a light-weight component which does authentication alone and does not do lookup or bind.
The source code for this component is available with the installer.
Configuration
Component Configuration
Drag the LDAPAuthenticator adapter from the Micro Service Palette and double-click the LDAPAuthenticator icon to launch the Configuration Property Sheet (CPS).
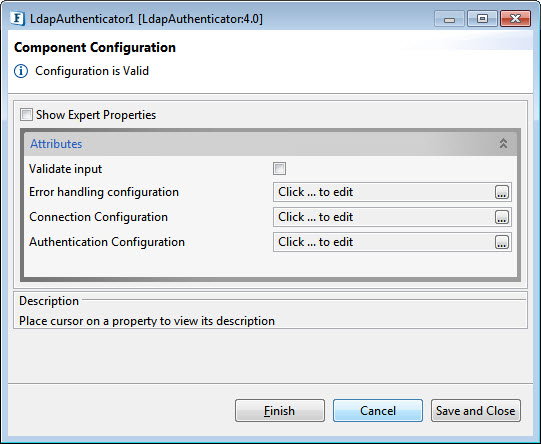
Figure 1: LdapAuthenticator Configuration properties
Validate Input
If this attribute is enabled, the service tries to validate the input received. If disabled, service will not validate the input. For more details, refer Validate Input section under Interaction Configurations in the Common Configurations page.
Performance increases when Validate Input option is disabled, but it may cause undesired results in case the input XML is not valid.
Error Handling Configuration
Refer Error Handling Configuration section in Common Configurations page (ignore Connection Error section and refer JMS Error, Response Generation Error, Request Processing Error and Invalid Request Error).
Connection Configuration
Click the ellipsis button to manage connection configuration properties.
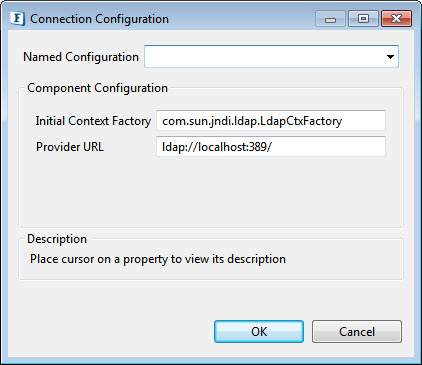
Initial Context Factory
The JNDI framework allows different initial context implementations. Default context is set by providing the respective value for Initial Context Factory.
Provider URL
URL of the LDAP Server
Authentication Configuration
Click the ellipsis button to manage connection configuration properties.
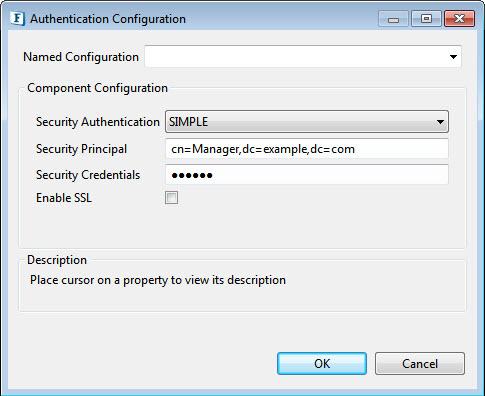
Security Authentication
Type of security authentication required. Apart from the default value—'SIMPLE', other options available are explained in the sections below.
NONE
Does not use a default Authentication.
SIMPLE
Security Principal: The distinguished name of the entry that is to be authenticated.
Authentication ID has to be specified in the case of SASL mechanisms.
- Security Credentials: Password of the entry represented by 'Default Principal'.
CRAM-MD5
It has the same options as that of SIMPLE.
DIGEST-MD5
Below are the options apart from the ones present in SIMPLE:
- Authorization Id: The authorization Id for SASL mechanisms. If this property is not selected, ID will be derived from the client's authentication credentials.
- SASL Realm: The realm information required by SASL mechanisms. On selecting this, a mechanism-specific default is used.
GSSAPI
- Authorization Id: The authorization Id for SASL mechanisms. If this property is not selected, ID will be derived from the client's authentication credentials.
- krb5.conf Location: Path of the kerberos configuration file which contains the kerberos configuration information. If this property is not set, the default location is used.
- krb5 KDC: Kerberos KDC (Key Distribution Centre) used for the kerberos tickets.
- krb5 Realm: The default realm for kerberos.
- Login config file: The JAAS Login Configuration file.
EXTERNAL
The options Key Store Location, Key Store Type and Key Store Password gets added to the Attributes section.
Enable SSL
SSL Support Mode
The two support modes available in the drop-down are:
- SSL Ports
- Start TLS Request
Specifies whether you like to enable SSL through the use of SSL Ports or via the use of Start TLS extension in LDAP.
The two options below appear after selecting Enable SSL checkbox.
- True Store Location: Location of Trust Store
- True Store Type: Type of Trust Store
Security Principle
Specify the identity of the principal for authenticating the caller of the service.
- Authentication id has to be specified in the case of SASL mechanisms
- Security Principle and Credentials have to be provided only for the Authentication types - Simple, CRAM-MD5 and DIGEST-MD5.
Security Credentials
Specifies the credentials of the principal for authenticating the caller of the service.
Validate Input
If this check box is selected, the service validates the input received.
If the Input validation is disabled, it does not validate the input and thereby increases the performance. However, it may cause undesired results if the input XML is not valid.
Expert Properties
Enable the Expert Properties view to configure these properties.
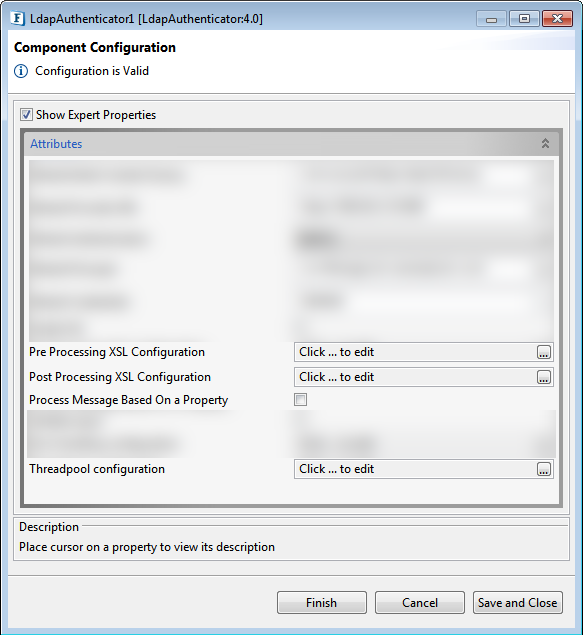
Figure 2: LdapAuthenticator CPS with the Expert Properties enabled and highlighted
Expert properties are meant for advanced users.
Pre Processing XSL Configuration
Pre Processing XSL configuration can be used to transform request message before processing it. Click the ellipses button against the property to configure the properties.
Refer to the Pre/Post Processing XSL Configuration section under the Common Configurations page for details regarding Pre Processing XSL configuration and Post Processing XSL configuration (below).
Post Processing XSL Configuration
Post Processing XSL configuration can be used to transform the response message before sending it to the output port.
Process Message Based on Property
The property helps components to skip certain messages from processing.
Refer to the Process Message Based On a Property section under the Common Configurations page.
Threadpool Configuration
This property is used when there is a need to process messages in parallel within the component, still maintaining the sequence from the external perspective.
Refer to the Threadpool Configuration section under the Common Configurations page.
Functional Demonstration
Scenario 1
Configure LdapAuthenticator with default configuration as in Figure 1. Connect Feeder and Display microservices to send a message to LDAPAuthenticator and display the output respectively.

Figure 3: Sample Event Process
Sample Input
Provide the following sample in the Feeder microservice and run the sample event process.
<ns1:AuthenticationRequest xmlns:ns1="http://www.fiorano.com">
   <INITIAL_CONTEXT_FACTORY>com.sun.jndi.ldap.LdapCtxFactory</INITIAL_CONTEXT_FACTORY>
   <PROVIDER_URL>ldap://192.168.2.251:389</PROVIDER_URL>
   <SECURITY_AUTHENTICATION>SIMPLE</SECURITY_AUTHENTICATION>
   <SECURITY_PRINCIPAL>CN=Administrator,CN=Users,DC=fiohydtest,DC=com</SECURITY_PRINCIPAL>
   <SECURITY_CREDENTIALS>fiorano@222</SECURITY_CREDENTIALS>
</ns1:AuthenticationRequest>
The LdapAuthenticator takes the above input and authenticates user details internally using libraries.
Output
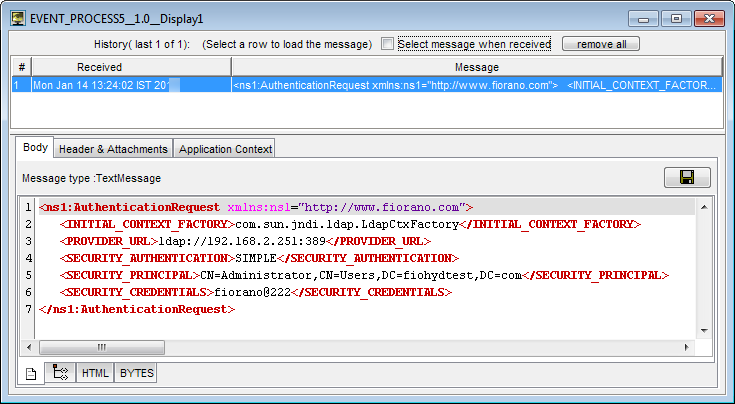
Figure 4: Output showed in the Display window
If the authentication is successful, output reflects the same as input, else it throws authentication failed error in the component error logs.
