Encryption
The Encryption component is used for encrypting data, based on a key (that is entered by the user) and an algorithm.
This component also can handle digest data. If the message is signed/digested by the sender, the recipient can verify if the message is from the correct sender and if the message didn't change during transmission.
The supported algorithms are DES, PGP, PGP_RFC4880, Base64, TripleDES, AES256, AES128, RC2-40, RC2-64, and RC2-128.
Configuration and Testing
Interaction Configuration
The component has the attributes mentioned below which can be configured from its Configuration Property sheet (CPS). Figure 1 displays the CPS with Binary Output Required property disabled, and Read input from file and Read output to file properties enabled.
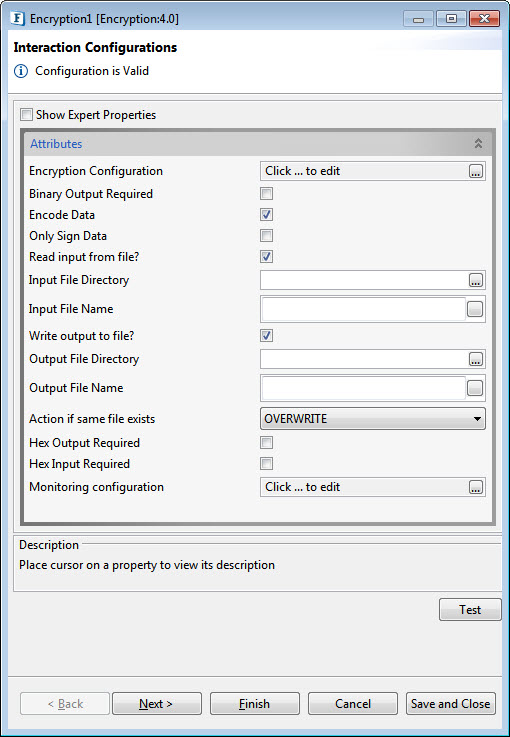
Figure 1: Configurable properties for Encryption component
Encryption Configuration
Encryption Details consist of Data Encryption Information and Signing Information.
Data Encryption Details
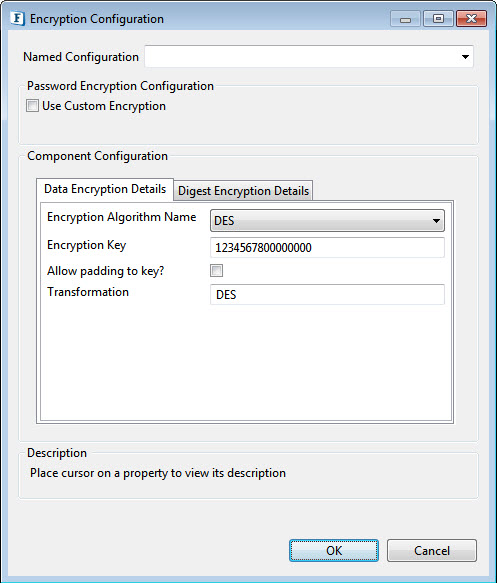
Figure 2: Encryption Algorithm Details
Encryption Algorithm Name
Select the algorithm to be used for encryption. The supported algorithms are DES, PGP, PGP_RFC4880, Base64, TripleDES, AES256, AES128, RC2-40, RC2-64, and RC2-128.
The configuration for each algorithm is mentioned in the sections below.
DES Encryption Algorithm Configuration
For DES, the configuration panel is as shown in Figure 2. Set the following fields accordingly.
- Encryption Key: Specify key which is used to encrypt the incoming data. Specify 32 digit key for AES256, 16 digit key for AES128, 16 digit key for DES, 24 digit key for TripleDES, 5 digit key for RC2_40, 8 digit key for RC2_64 and 16 digit key for RC2_128
- Allow Padding to key: Enable this property to allow padding to the key to make exactly the value required for the mentioned algorithm. It has to be chosen only when the encrypted data key is also padded.
- Transformation: Transformation always includes the name of a cryptographic algorithm (e.g., AES), and may be followed by a feedback mode and padding scheme.
AES256, AES192, AES128, TripleDES Encryption Algorithm
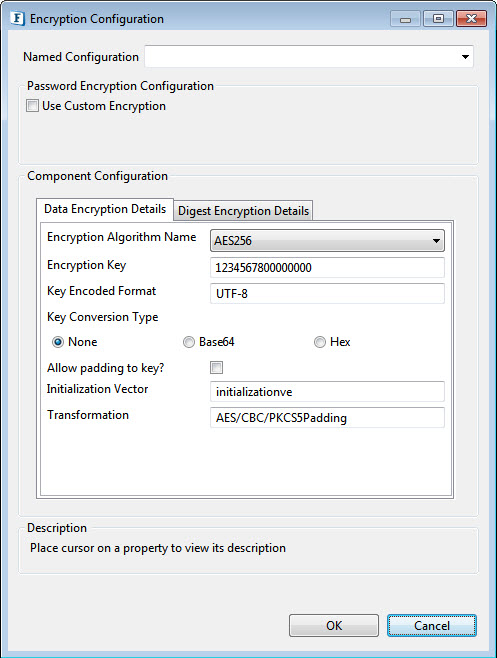
Figure 3: AES256, AE192, AE128, TripleDES algorithm encryption
Set the Encryption key and the Padding key details similar to the DES algorithm.
- Key Encoded Format: Specify appropriate encoding format for the key. Examples: (UTF-8), (ISO-8859-1).
- Key Conversion Type: Select Key Conversion Type in the following ways :
None: Select if the Encryption key is simple string.
Base64: Select if the Encryption key is Base64 Encoded.
Hex: Select if the Encryption key is Hexadecimal Encoded.
Allow padding to key: Enable this property to allow padding to the key to make exactly the value required for the mentioned algorithm. It has to be chosen only when the encrypted data key is also padded.
This button will be disabled in case of Base64 and Hex.
- InitializationVector: Mention the unique 64 bit input used in the encryption.
RC2_40, RC2_64,RC2_128 Encription Algorithm Configurations
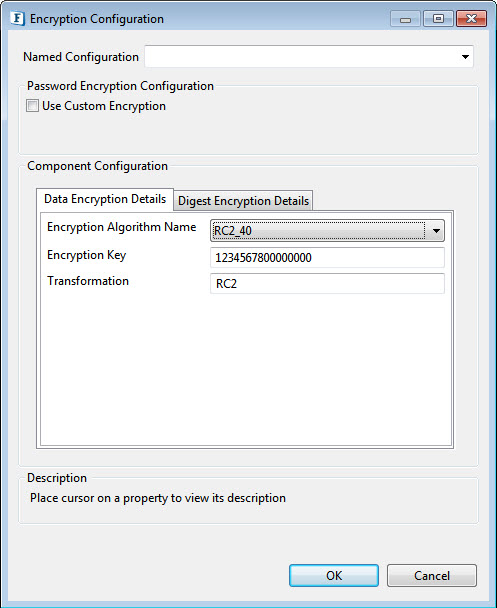
Figure 4: RC2_40, RC2_64,RC2_128 Algorithm Encryption
Provide the encryption in the same way as for the DES algorithm.
PGP Encryption Configuration
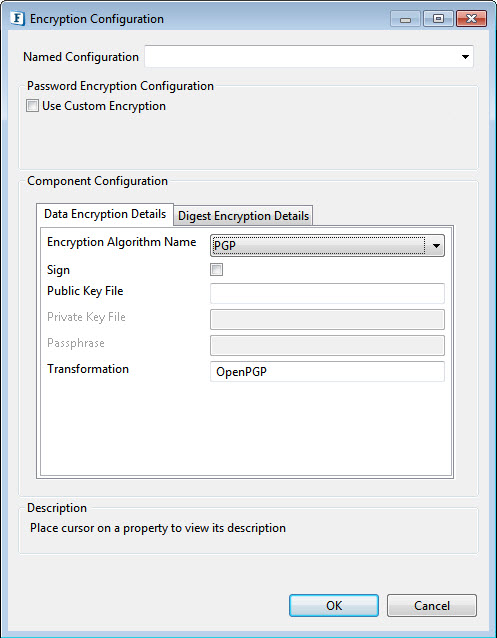
Figure 5: PGP, PGP_RFC4880 Algorithm Encryption
- Sign: Select this option to sign the message when the algorithm used is "PGP".
- Public Key File: Specify public key file used in case of PGP Algorithm
- Private Key File: Specify private key file used in case of PGP Algorithm
- Passphrase: Required for signing in case of a PGP algorithm.
RSA Encryption Configuration
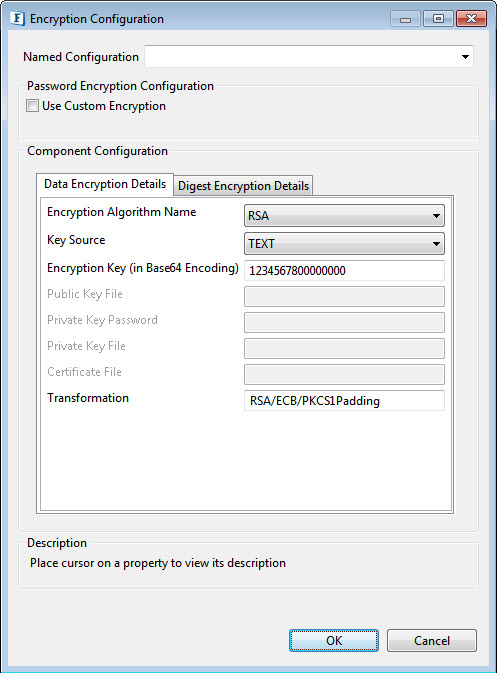
Figure 6: RSA algorithm encryption
Key Source: There are four options under Key Source :
- Text: This requires the Encryption Key details
- Encryption Key: Specify the appropriate Encryption Key for the selected algorithm to be used to decrypt the incoming data..
- PublicKeyFile: The public Key File field has to be filled for this.
- Public Key File: Provide the file containing the public key.
- PrivateKeyFile: The Private Key Password and the Private Key File are the active fields under this.
- Private Key password: Provide the private key password.
- Private Key File: Provide the file containing the Private Key
- Certificate: Certificate File is the active field when the key source is Certificate.
- Certificate File: provide the path of the X509 Certificate.
Digest Encryption Details
Click the tab next to the Data Encryption Details tab to set the values.
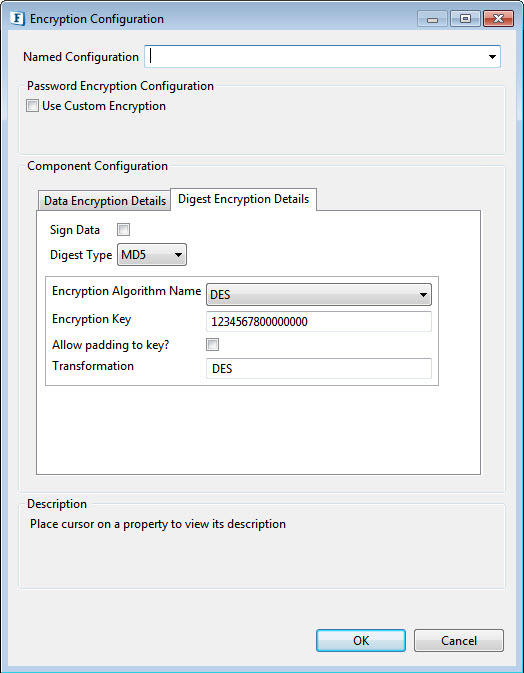
Figure 7: Digest type used for verifying digested data can be provided as given above
- SignData: Select to verify only when you know that encrypted data has been signed.
- DigestType: The supported algorithms for signing/digesting data are are MD5, SHA-1, SHA-256, SHA-384, and SHA-512.
Encryption Algorithm Name
Specify the encryption details which are used to encrypt the signed data. It is done in the same way as shown in Data Encryption Details. The algorithm for data encryption and digest data encryption need not be the same.
The following Encryption Algorithms are available:
- DES
- AES256
- AES128
- AES192
- RC2_40
- RC2_64
- RC2_128
- TripleDES
- PGP
- Base64Encoding
- RSA
The individual configurations are similar to that of Data Encryption Details.
Binary Output Required
Enable this property if Binary Output is needed. Else encrypted data will be in XML format.
When this property is enabled, properties other than Only Sign Data and Read input from file mentioned below are not applicable.
Encode Data
Encode Data after encrypting using the Base64 encoding scheme, This option will help in avoiding characters of encrypted data included in the output XML generated if the Binary Output option is not selected.
Only Sign Data
Check this option if the data has to be only signed without Encrypting.
Input to Encryption component can be in XML format. The XML format is shown in Figure 4. The values of Encryption Algorithm Parameters and Digest Parameters can be mentioned or else these values are taken from cps.
Read Input From File?
Choose this option to read input from a file instead of the component input port.
Input File Directory
The absolute path of the directory where the input file is located.
Input File Name
Name of the Input File.
Write output to File?
Select this option if the output is to be written into a file.
Output File Directory
The absolute path of the directory where the output file needs to be stored.
Output File Name
Name of the output file.
Action if same file exist
If the file with same name exists in the target folder, choose the action to be taken from the below options:
- Overwrite: Overwrites the existing file and hence the old file gets replaced with the new one.
- Rename: Renames the file with "filename + MMddyyHHmmss + counter(optional)".
Hex Output Required
Enable if a Hex string output is required.
Delimiter
Messages get encoded based on the delimiter configured.
The Hex string delimiter can be chosen from ("", " ", "0x", "0X", "\0x", "\0X", "\x", "\X").
Hex Input Required
Enable if a Hex string input is required.
Monitoring Configuration
Please refer to the Monitoring Configuration section in Common Configurations page.
Expert Properties
Enable the Expert Properties view to configure these properties.
Expert properties are meant for advanced users; use with caution.
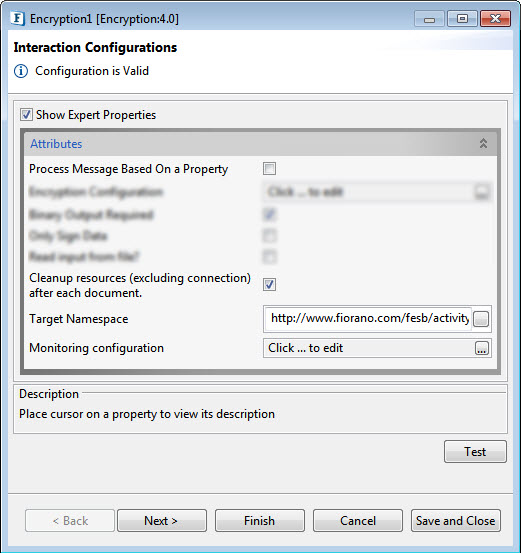
Figure 8: Encryption CPS with the Expert properties highlighted
Process Message Based on Property
The property helps components to skip certain messages from processing.
Refer to the Process Message Based On a Property section under the Common Configurations page.
Cleanup resources (excluding connection) after each document
This closes all the resources except for the connection after every request. If the less processing time is more important the less memory usage, then it is recommended to disable this property and vice versa.
For more details, refer to the respective section under the Common Configurations page.
Target Namespace
Refer to the Target Namespace section under the Common Configurations page.
Testing
Sample input
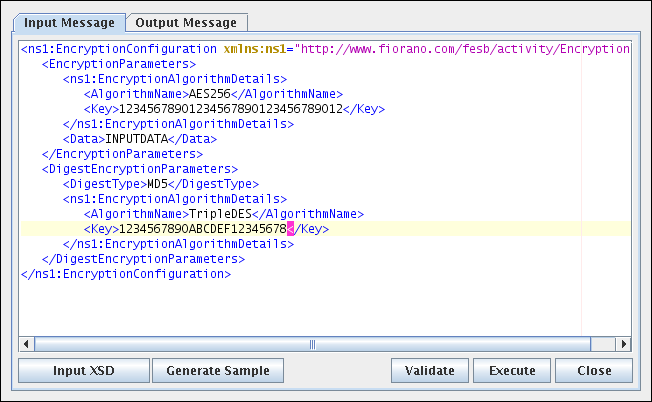
Figure 9: Sample Input
Sample output
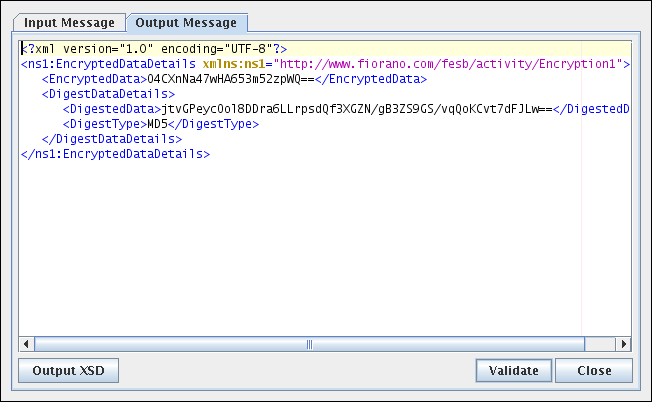
Figure 10: Output for the Sample Input
Functional Demonstration
Scenario 1
Encryption of data received from the input.
Configure the Encryption component as described in the Configuration and Testing section and use the feeder and display component to send sample input and check the response respectively.
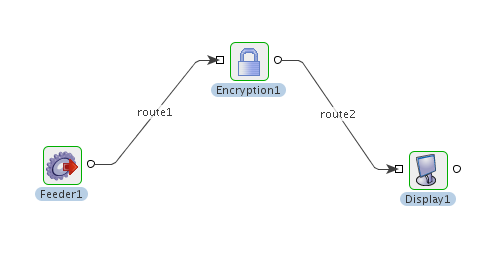
Figure 11: Event Process flow for Scenario 1
Sample Input

Figure 12: Sample Input
Sample Output

Figure 13: Sample Output in binary format

Figure 14: Sample Output in XML format
Use Case Scenario
In a bond trading scenario, request for quotes (RFQ) is sent in encrypted form to the appropriate exchanges and the received encrypted responses are decrypted at the user end.
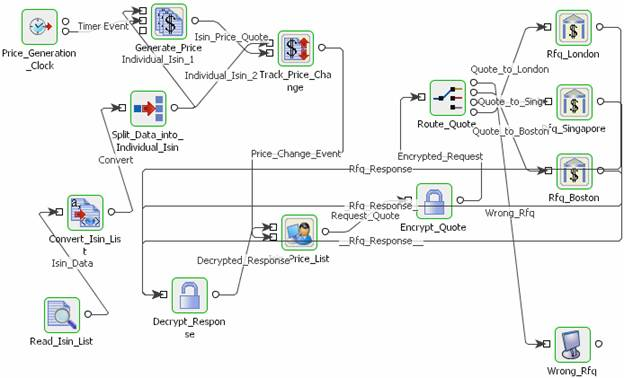
Figure 15: Event Process for Bond Trading Scenario
The event process that demonstrates this scenario is bundled with the installer. Note encryption and decryption components may not be present.
Documentation of the scenario and instructions to run the flow can be found in the Help tab of the flow present in eStudio.
