
Creating an Extended Service
To create a new Extended Service Project,
Log on to eStudio and open the Server Explorer panel in the Online Event Process Development perspective.
-
Navigate to Window > Show View > Other > Fiorano > Server Explorer.
-
Log on to the Enterprise Server by providing the corresponding credentials.
-
Right-click the Extended Services Repository node and click the Add Extended Service option.
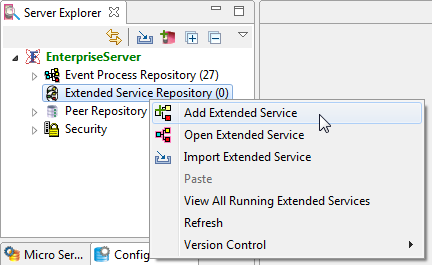
Adding an Extended Service -
In the Create Extended Service dialog box, provide an appropriate name and version number. Choose the category (under which the Extended Service falls) from the Category drop-down and click Finish.
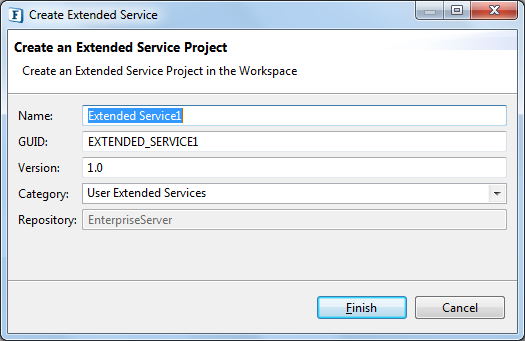
Editable attributes while adding an Extended Service project
To create a new category under Extended Service Repository, enter a new name in the Category drop-down field.
Assigning peer server groups
Adding a server group to an Extended Service enables the deployment of the components on multiple peer servers. Multiple server groups can be assigned to an Extended Service with each server group mapped to various peers.
Creating server groups
-
Open the Peer repository node under the Enterprise server.
-
Right-click Peer Groups, and then click Configure Peer Server Groups.
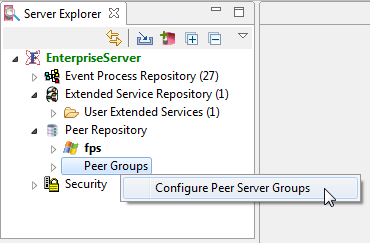
Option to add Server Group -
Click the Add group button, enter the server group name in the Add group dialog box and click OK.
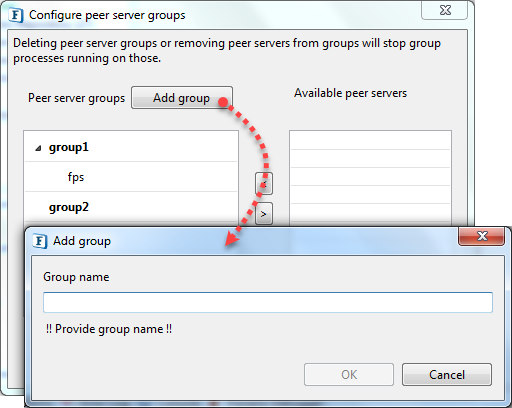
Adding Server Group
The newly added server-group will be successfully created.
Assigning peer to server groups
Open the Peer repository of the Enterprise server.
Right-click Peer Groups, and then click Configure Peer Server Groups.
Adding Peer Server Group Configurations
The Peer Server Group Configuration allows the unification of several server groups which can be used for the deployment of extended service.
-
Right-click the Resource node and click Add Configuration.
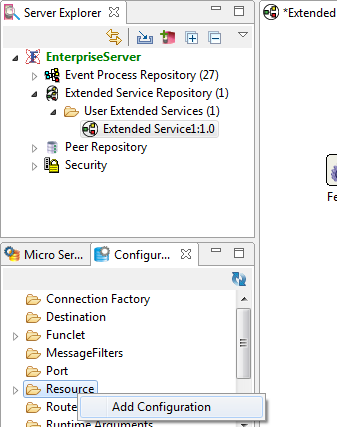
Adding a Peer Server Group configuration -
In the pop-up window that appears, select Peer Server Group Configuration and provide the configuration and the environment values. Click Next.
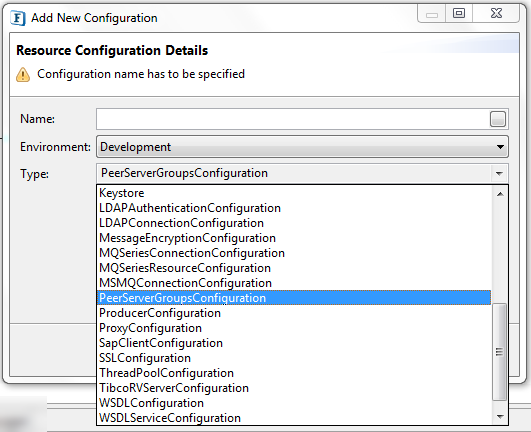
Peer Server Group Configuration -
In the Peer Server Group Configuration window that appears, enter the name of the server groups to be added to the configuration separated by commas, and click Finish.
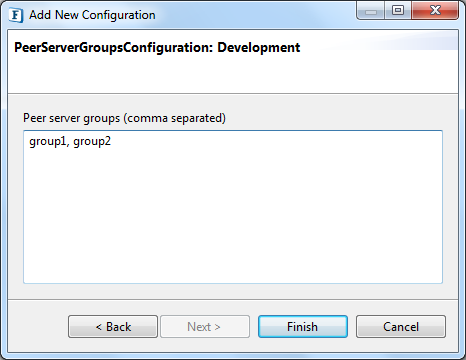
Peer Server Configuration window
Assigning server groups to an Extended Service
-
Click the Orchestrator.
-
Under the Properties panel, click the Deployment tab.
-
Click the Peer Server Group button.
-
In the Select peer server group(s) dialog box, select the server groups to be added to the Extended Service from the Available Groups and click the > button to add one at a time to the Extended Service.
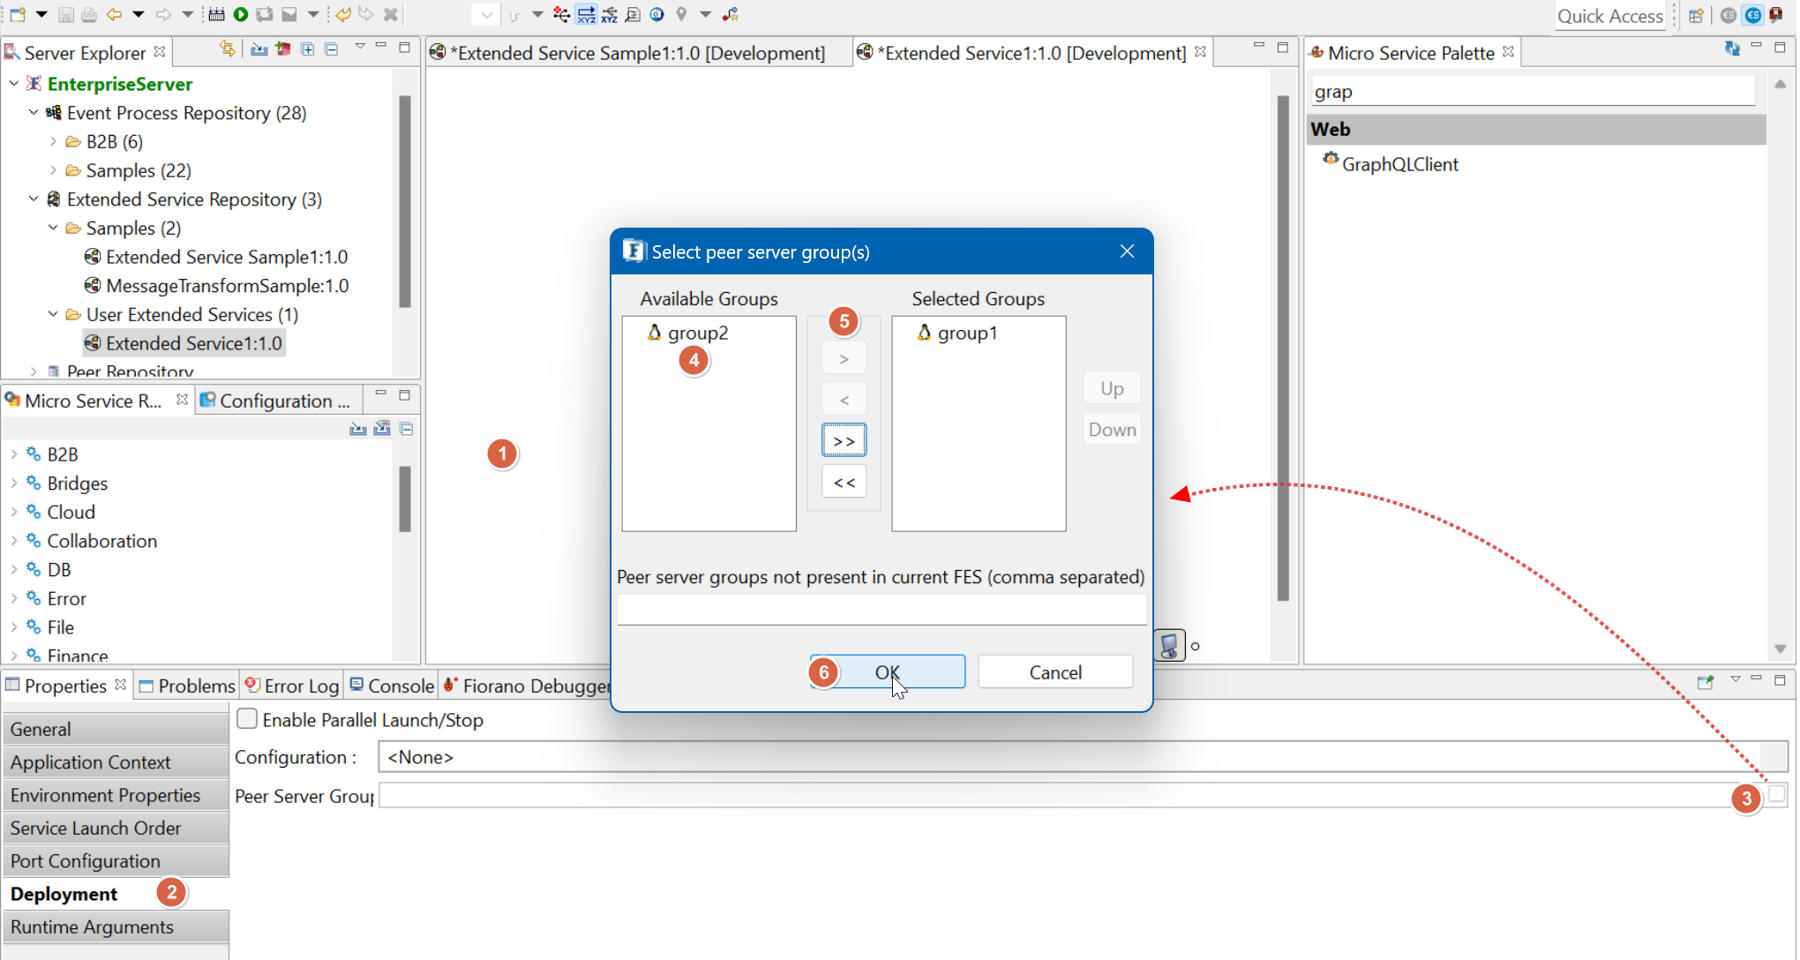
To use the Peer Server Group Configuration created in the repository select the Configuration drop-down.
Enabling parallel launch and stop of group processes
Extended services present in different peer servers within a group are generally launched and stopped one after the other unless a launch order is set.
Launching and stopping these extended services simultaneously helps multithreading. To enable this, select the Enable Parallel Launch/Stop option under Deployment (see the figure above).
Adding Connection Configurations
The connection configuration for a JMS server can be added to the configuration repository. Right-click on the Resource > Add Configuration.
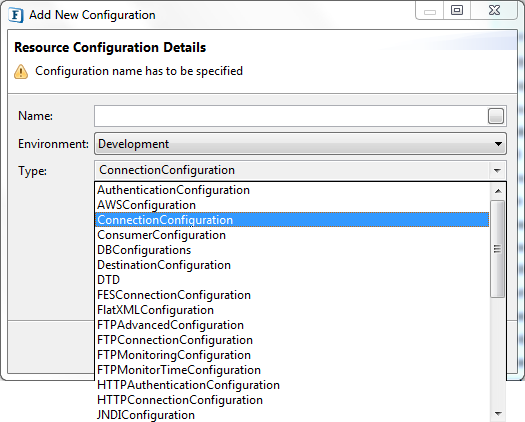
In the pop-up window that appears, select Connection Configuration and provide the configuration and the environment values. Click on Next.
In the Connection Configuration window that appears, provide the details needed to connect to the required server.
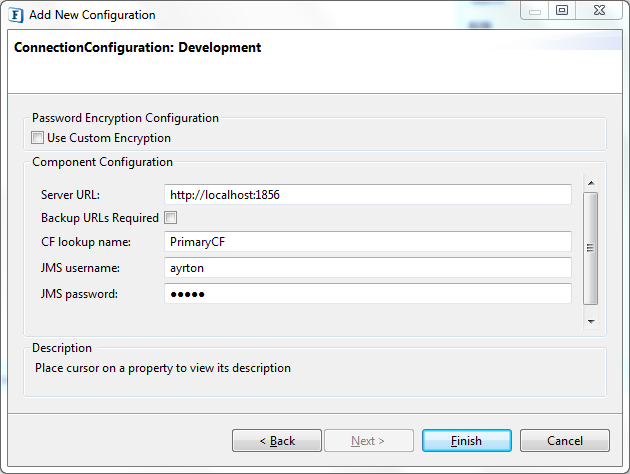
|
Option |
Description |
|---|---|
|
Server URL |
To add the document or documents with the relevant information from the location where it is saved. |
|
Backup URL |
Backup URL of the server. |
|
CF lookup name |
Connection Factory Name |
|
Username |
Username to establish a connection to the server |
|
Password |
Password for the server authenticity. |
Adding extended service ports
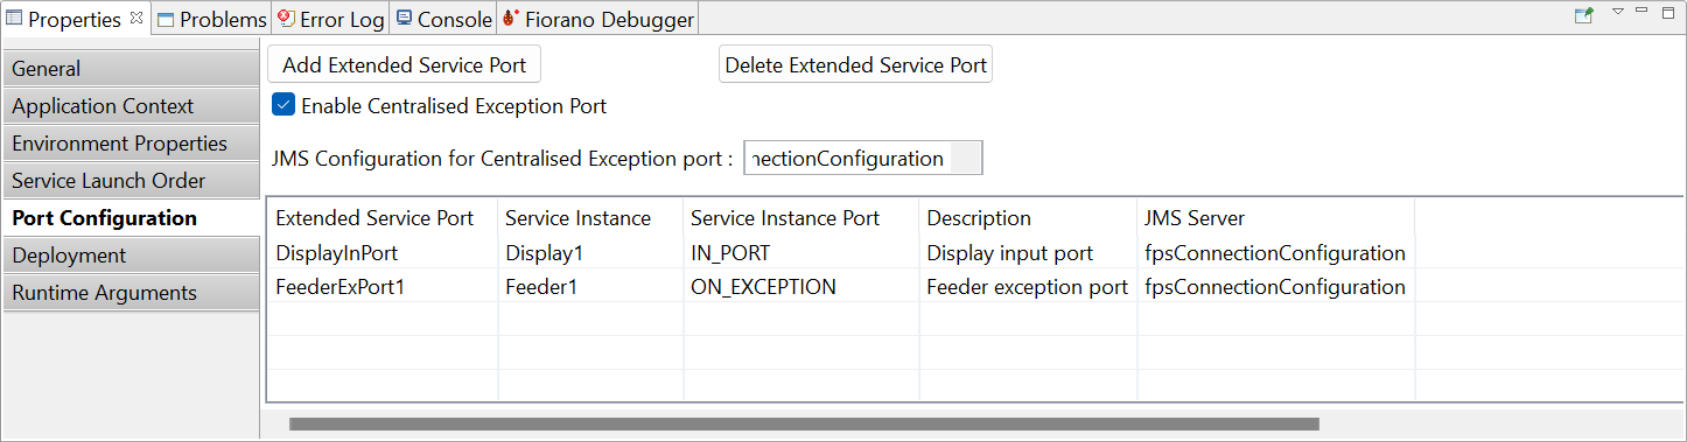
Extended service ports enable the service instances of an Extended Service to be clubbed as a group and also to configure input and output port details to read and write messages directly from and to the MQ layer of the selected peer server.
These ports can be used in the ExtendedServiceInvoker microservice present in the same event process or a different one as well.
-
Click the Orchestrator.
-
Under the Properties panel, click the Port Configuration tab.
-
Click the Add Group port button and enter the group port details and save the Extended Service
-
The connection configurations can be added for the port by selecting the drop-down displayed under the JMS Server.
Enabling centralised exception port
If this property is enabled, an option named "Enable Asynchronous Exception Port" will be available in the ExtendedServiceInvoker microservice. This message listener port is useful in listening to exception messages asynchronously.
This port acts as an error port where messages from the error port of each component hosted in the Extended Service get accumulated and hence able to fetch error data from a single destination.
Refer to the Enable Asynchronous Exception Port section in the ExtendedServiceInvoker help to read about this property.
Saving an Extended Service
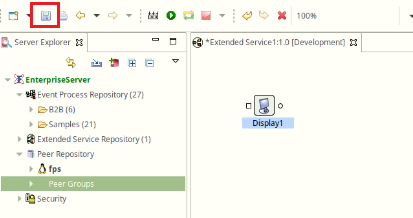
To save the Extended Service after checking resource connectivity, click the Save Extended Services button present in the toolbar or press CTRL+S. The Extended Service will be saved.
Checking Resource and Connectivity
Fiorano enables deployment of Extended Services on various server-groups (containing peer servers) at the click of a button. A developed Extended Service contains a set of configured components connected via routes. The configuration for these Extended Service also includes the names of the server-groups (containing Fiorano Peers) on which the components are to be deployed.
To perform a connectivity and resource check for the Extended Service, click the Check Resource Connectivity button present in the tool bar or press ALT+SHIFT+C. All the resources required by the component at run-time will be deployed to the Peer Servers of the specified server group.
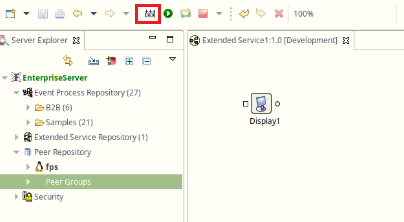
Launching an Extended Service
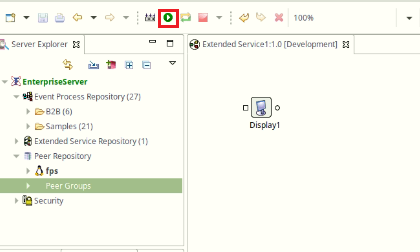
To run the Extended Service after checking resource connectivity, click the Launch Extended Service button present in the toolbar or press ALT+SHIFT+R. The Extended Service gets launched.
Deployment View
The deployment view of the Extended Service provides to view the running status of the components and to perform operations like starting, stopping on these components at run-time.
Before opening the Extended Service in the deployment view the configuration view of the Extended Service should be closed.
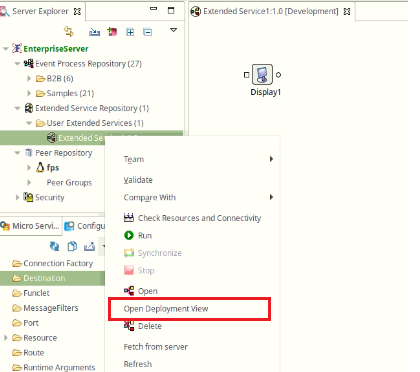
Right-click on the Extended Service and click on Open Deployment view
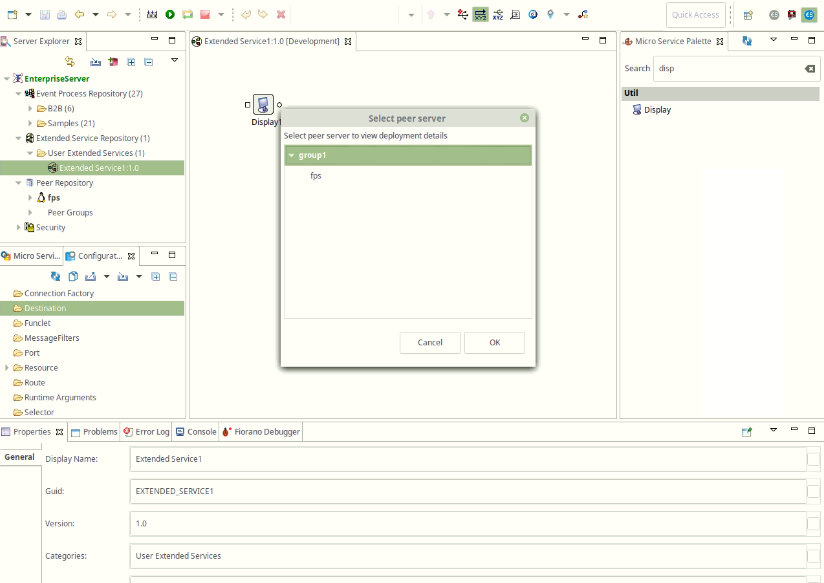
From the deployed peer server list, select the peer server whose deployment details needs to be viewed.
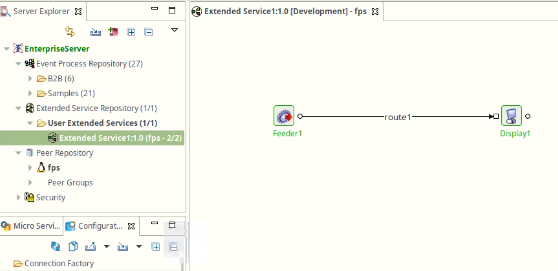
The service instances icon of the deployed Extended Service will be green in color.
Stopping the service instance in the Deployment view
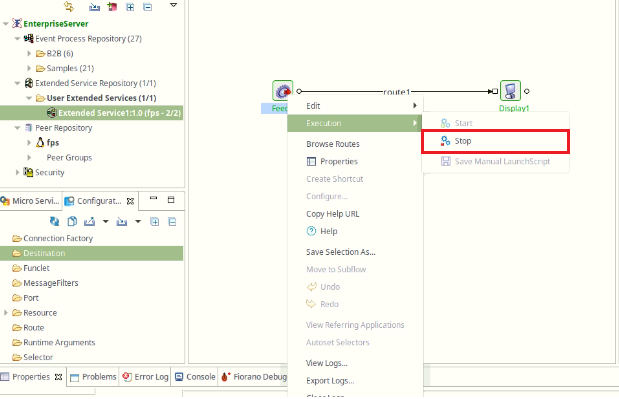
Right-click the service instance and select Execution > Stop. Once the component stops, the service instance icon of the stopped service instance will turn red.
Stopping an Extended Service
To stop the Extended Service, select the Extended Service and click the Stop Application button present in the toolbar or press ALT+SHIFT+K. All component instances running in the Extended Service are stopped and the Extended Service stops subsequently.
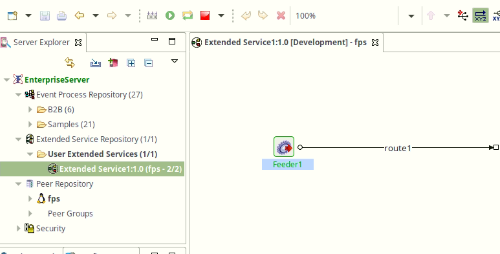
The drop-down menu attached to the Stop button allows stopping selected service instances or all service instances without stopping the Extended Service. When a component is stopped, its name turns red in the deployment view orchestration editor.