Services eStudio
Service Descriptor Editor
A service can be customized using the Service Descriptor Editor. To customize a service, perform the following steps:
- Right-click the service from the Micro Service Palette or in the Microservice Repository view and select the Edit option.
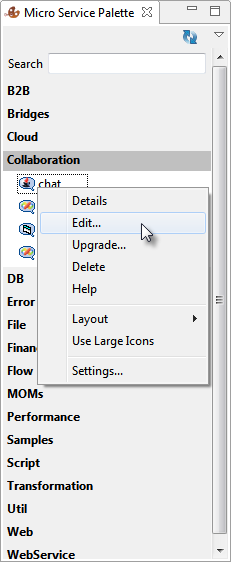
Figure 1: Edit option in Micro Service Palette
- The ServiceDescriptor.xml of the selected service is opened in the Service Descriptor Editor.
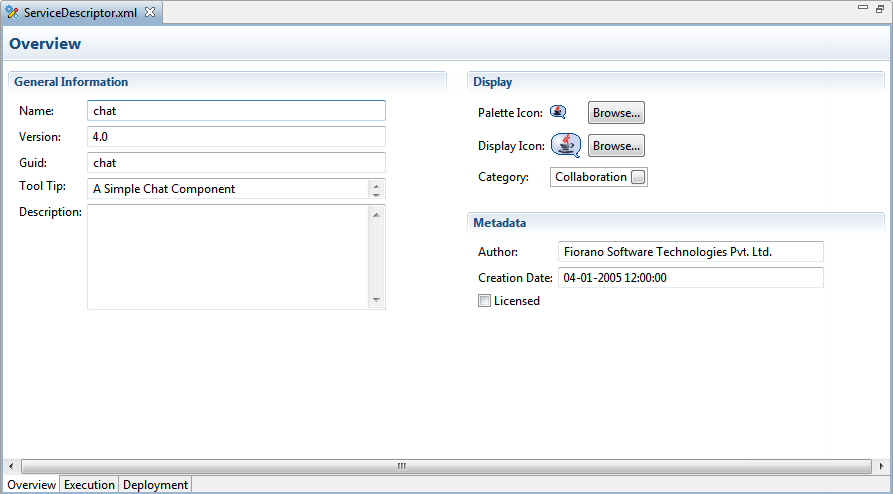
Figure 2: ServiceDescriptor.xml editor with Overview section displayed
The Service Descriptor Editor has three sections:
- Overview
- Execution
- Deployment
These sections are further divided into sub-sections. A brief explanation of these sections and subsections is provided below.
The sections can be accessed using the tabs provided at the lower-left corner of the editor.
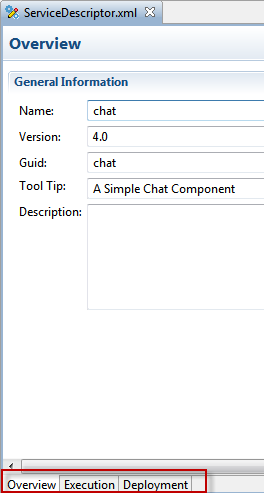
Figure 3: Three sections under Service Descriptor
Overview Section
The Overview section has three sub-sections – General Information, Display, and Metadata (see Figure 2).
The information used to identify the service is shown under the General Information section. The user can change the Name, Version, GUID, Tool Tip, and Description of the component in this section.
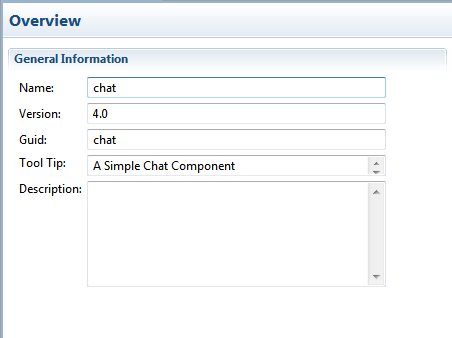
Figure 4: General Information section under Overview
In the Display section, icons used to represent the service and the categories under which the service are provided. Categories can be selected using the Category Selection dialog box, which is similar to the one used during Service Creation (see Figure 5).
In the Metadata section, the information about authors of the service, creation date and time of the service and licensing mode are provided.
The Creation Date field cannot be changed manually.
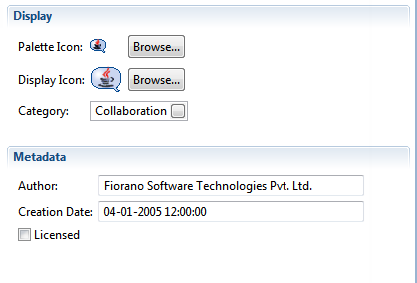
Figure 5: Display and Metadata sections under Overview
Execution Section
The Execution section has following subsections – Port Information, Support, Launch Configuration, Log Modules, and Runtime.
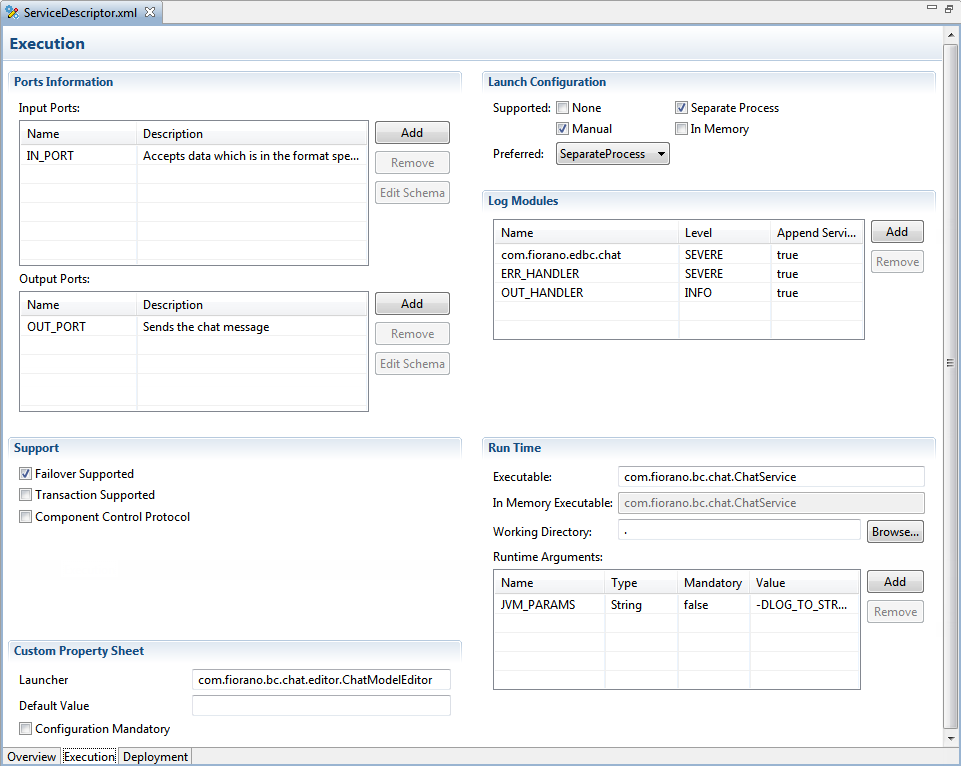
Figure 6: ServiceDescriptor.xml editor with Execution section displayed
A brief explanation of the subsections is provided below.
Port Information
Each Asynchronous Service Component (also referred as Event Driven Business Component) can have any number of inputs and outputs as determined by the developer of the component. The input and output ports can be added or removed in the Service Descriptor Editor as applicable to the component in the Port Information section.
The Add, Remove and Edit Schema buttons can be used to add, remove and/or edit the ports of services. Name and Description of any port can be modified from their respective columns in each table.
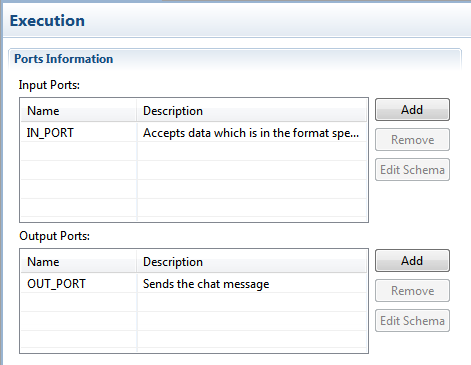
Figure 7: Ports Information section
Support
In the Support section, Failover Supported and Transaction Supported options are available.
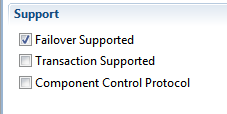
Figure 8: Support section
Failover Supported
If the Failover Supported option is selected, then during the component's runtime if the Peer Server on which component is running goes down, the component keeps running on the next available Peer Server. If this option is not selected at the component's runtime, if the Peer Server on which component is running goes down, the component stops.
Transaction Supported
Transaction Supported is used to specify whether the service allows transacted session or not.
Component Control Protocol
- Checked – Component listens, understands and responds to control events from Peer Server. Using this option allows components launched as separate process to cleanup when stopping
- Unchecked – Component does not handle control events from the Peer Server. The Peer Server will not send any control events to the component. Component launched in separate process is issued a destroy command to stop and the component process will be killed instantly without any cleanup.
Launch Configuration
In the Launch Configuration section, information about the type of component and the different launch type supports (None, Separate Process, In Memory, and Manual) are provided.
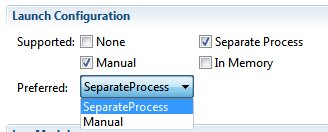
Figure 9: Launch Configuration section
Log Modules
In the Log Modules section, logging options of the service are provided. Loggers which are used to log messages during service runtime can be added or removed.
To add a new logger, click the Add button and specify log module name and the log level at which logging has to be performed. Messages logged at levels which are lower than the selected log level will not be written to the log files.
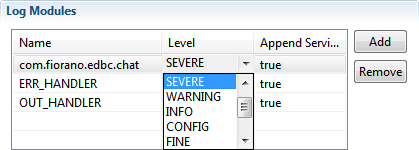
Figure 10: Log Modules section
Runtime
In the Runtime section, configurations required to launch services are provided. Executable specifies the Java class to be used to launch the service when it is launched in a Separate Process.
In Memory Executable specifies the Java class to be used when the service is launched in in-memory mode.
The Working Directory specifies the directory which will serve as the service's runtime directory when launched in a separate process.
A component while executing, might require parameters to execute different requests or details for handling different request. There are two ways of passing this information to the component: by configuring the details in the Configuration Property Sheet of the panel or by defining the command line arguments that can be passed to the component at the time the component is launched. These command line arguments are captured as runtime arguments in this panel.
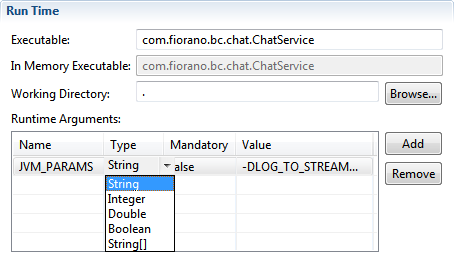
Figure 11: Runtime section
Deployment Section
The Deployment section contains subsections related to the deployment information of the component. The Resource/Service Dependencies required by the component can be configured in this section.
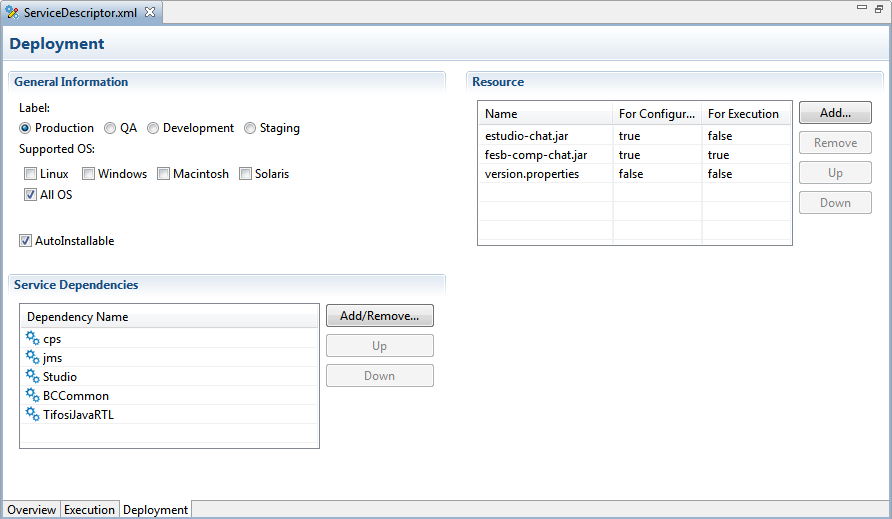
Figure 12: Deployment page
Resource
The resources required by the service (either during configuration time or runtime) can be added in this wizard. Resources can be any files which are used by the component. Typically resource files are – dll, zip, jar, so, and exe.
- To add a resource, click on Add and select required resource for the service.
- To remove a resource, select the resource and click Remove.
- To change the order of resources, select the resource and click the Up or Down button. The order is used to determine the classpath of the service.
Service Dependencies
Dependencies are predefined. Each component or system library registered can be added as a dependency. Click the Add/Remove button to open the Add Dependencies dialog box. This contains a list of all available dependencies.
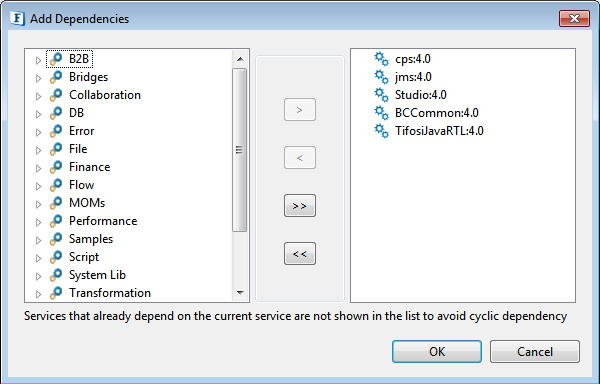
Figure 13: Service Dependencies section
- To Add: Select the dependency on the left side table and move it to the right side table.
- To Remove: Select the dependency on the right side table and move it to the left side table.
