
After the creation of Microservice component following actions can be taken:
|
Post Creation Action |
Description |
|
None |
Generate the source code and do nothing else |
|
Build |
Generate the source and build the sources |
|
Build and Deploy |
Generate the source, build the source and register with Fiorano Enterprise Server |
Building the Microservice
To build the component created, execute the command ant in the component directory. This compiles the source files, builds the required archives and creates a file export.zip containing all the files /details required for the components. export.zip can be imported using FSSM or Studio, for details regarding importing of a business component refer the Deploying in Enterprise Server section.
Deploying the Microservice
Deploying the component means registering the component on a Fiorano Enterprise Server. Any component created before it can be used in developing event process(s) has to be registered with the Fiorano Enterprise Server.
Deployment can be done in the command prompt or eStudio as explained in the following sections.
In the Offline perspective of Fiorano eStudio, deploying just brings the new service to the Micro Service Palette and the Microservice Repository.
Command Prompt
To deploy the developed component, perform any one of the following ways.
Interactive mode
Open command prompt from the new component directory and follow the below steps:
-
Execute the following command:
Windows
register.batBefore executing the above command, make sure that JAVA_HOME is set to JDK Home location at $Fiorano_Home$/fiorano_vars.bat.
Linux
register.sh -
Type "1" and press Enter.
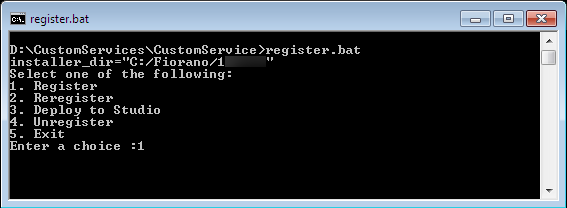
Figure 1: Interactive deployment mode optionsOther options are meant to perform the following:
Option
Description
2
To reregister
3
Deploy to eStudio in the Offline perspective
4
To unregister
Exit
Exit from the interactive mode
Non-interactive mode
Open command prompt from the new component directory and execute the following command:
ant register
A success message appears saying "BUILD SUCCESSFUL" after registering the required elements required for the build deployment.
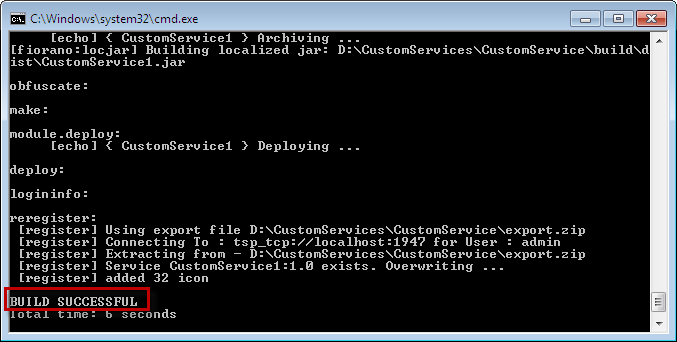
Figure 2: Build success message
In case it throws any error related to the library files, execute the following command:
ant -lib <Fiorao_HomePath>\antscripts\lib register
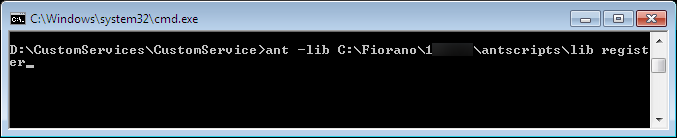
Figure 3: Deploying using ant -lib command
The details of the enterprise server on which the component should be deployed are specified in the build.properties file
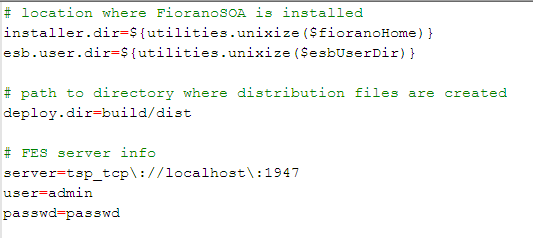
Figure 4: Build.properties file content showing details of the enterprise server on which the component has to be deployed
eStudio
Before starting with the below steps, ensure that you have imported the service(s)/project(s) to the workspace.
Prerequisite
To set Ant Home, perform the following actions in eStudio:
-
Navigate through Window > Preferences > Ant > Runtime and click the Ant Home button.
-
Click antscripts folder present in the Fiorano_Home directory
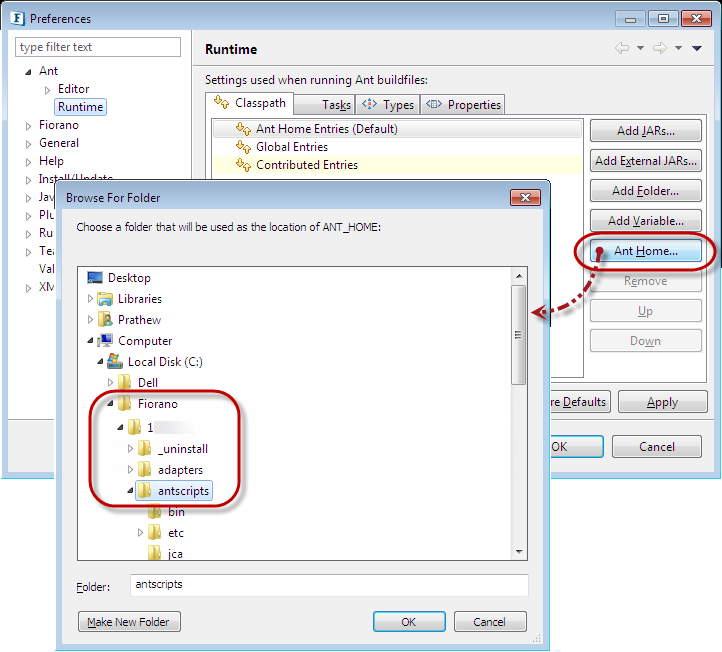
Figure 5: Setting Ant Home
Failing to perform this activity leads to Build failure; the error description gets displayed in the Console view that appears on failure.
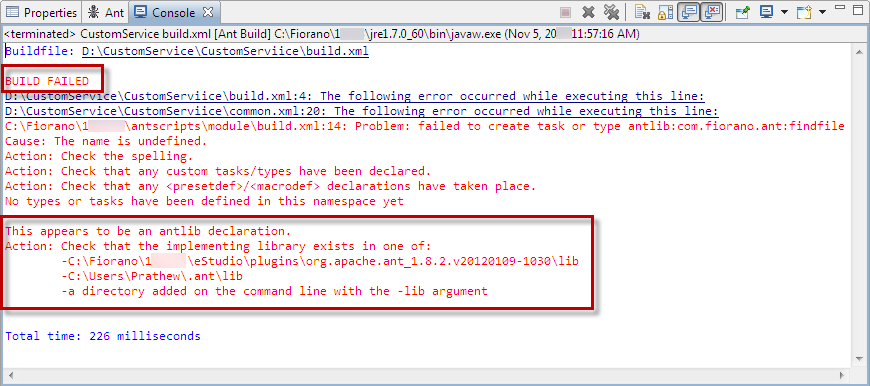
Figure 6: Error in Console view in case Ant home is not set before running the build
Steps
To deploy the developed component, perform the following actions:
-
Open Ant view using any one of the following ways:
-
Navigating through Window > Show View > Other > Ant > Ant
-
Click Show View as a Fast View

-
-
In the Ant view, right-click and select Add Buildfiles option.
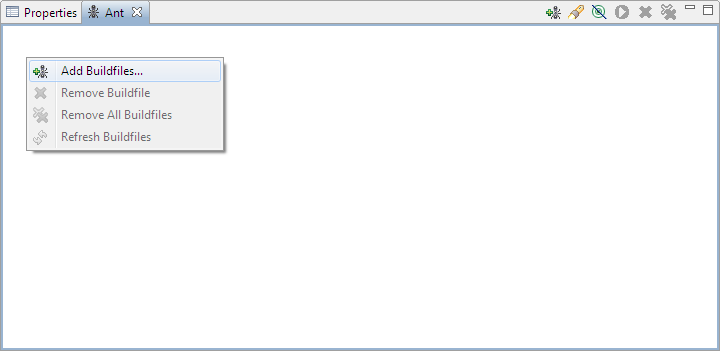
Figure 7: Adding Build files from Ant view
-
In the Buildfile Selection pop-up, select build.xml node and click OK to add the Build XML files to the Ant view
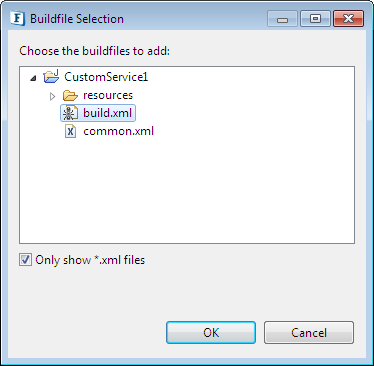
Figure 8: Selecting Build.xml node
-
Expand the node with the new service name that appears and do the following depending on the perspective given below:
-
-
Offline Event Process Development Perspective (perform any one action from the two below)
-
-
Double-click deployToStudio node
-
Click deployToStudio node and click the Run the Selected Target

-
-
Online Event Process Development Perspective (perform any one action from the two below)
-
-
Double-click register node
-
Click register node and click the Run the Selected Target

-
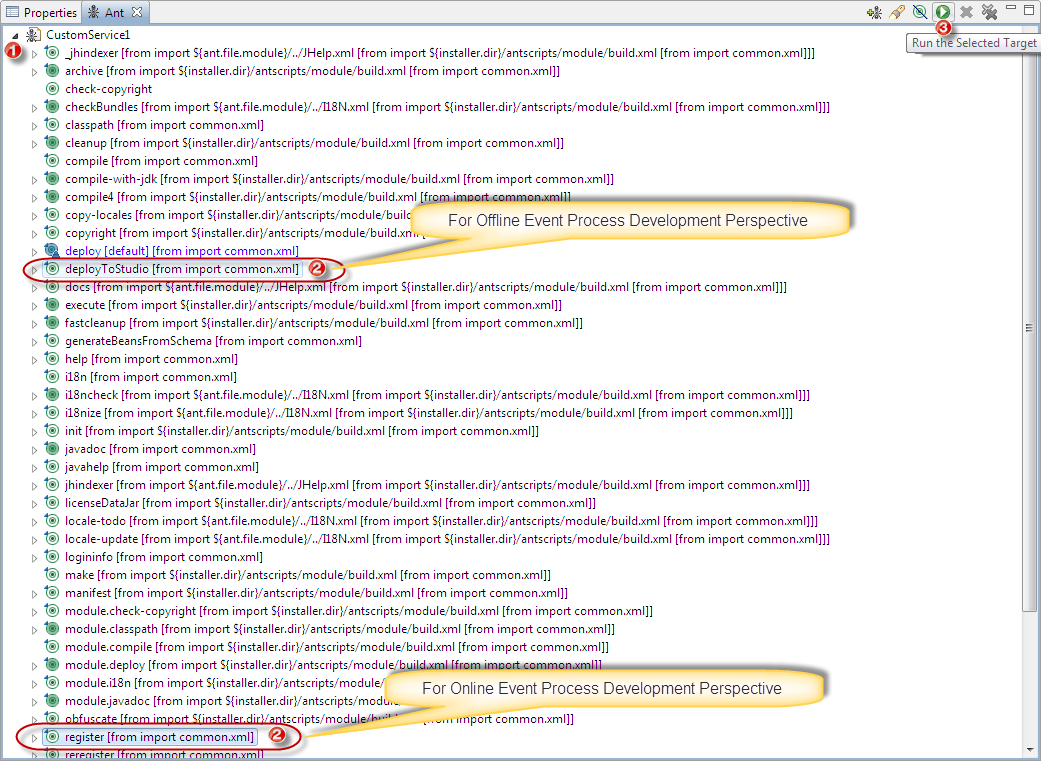
Figure 9: Options to Deploy and Register the new component for the Offline and Online perspectives respectively
A console panel appears, displaying a series of messages to indicate generation of various files. The message saying "BUILD SUCCESSFUL" confirms the deployment of the service.
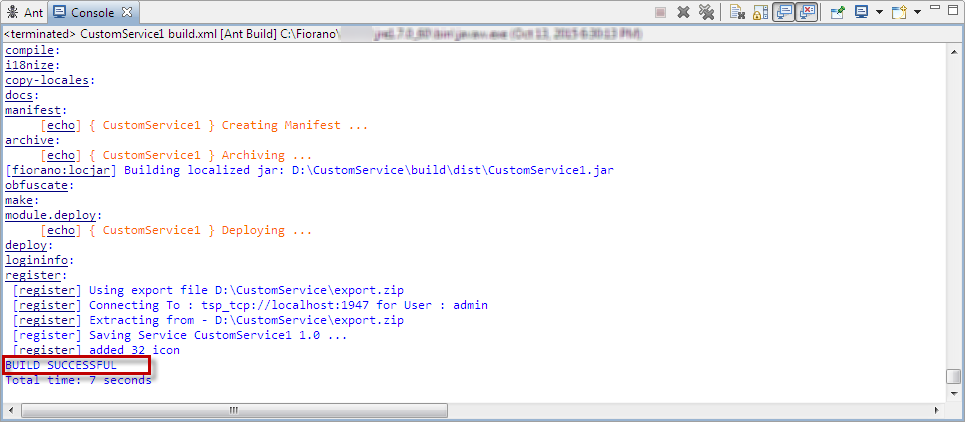
Figure 10: Messages including the "Build Successful" message appearing in the Console view -
Viewing the Microservice
Check the presence of new microservice in eStudio in the Microservice Repository panel and Micro Service Palette panel.
Reload the services by clicking the Refresh 
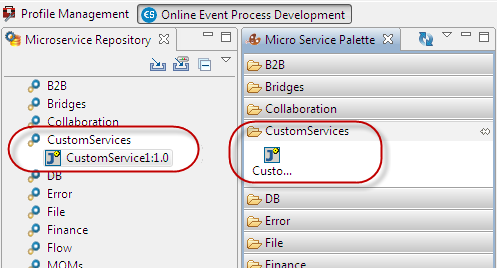
Figure 11: New microservice appearing under the Microservice Repository and Micro Service Palette
Unregister and Reregister
Command Prompt
Unregister
To unregister a custom component that is already registered with the enterprise server, execute the following command from the command line in the component directory.
Unregister
ant unregister
Reregister
To redeploy a component that is already registered with enterprise server in case any changes are made to the component, execute the following command from the command line in the component directory.
Reregister
ant reregister
The interactive mode as explained in the Command Prompt section above can also be used:
-
Use the number "4" to unregister
-
Use the number "2" to reregister
eStudio
Unregister
To unregister a custom component that is already registered with the enterprise server, perform any one of the following in Console view:
-
Double-click unregister node
-
Click unregister node and click the Run the Selected Target

Reregister
To redeploy a component that is already registered with enterprise server in case any changes are made to the component, perform any one of the following in Console view:
-
Double-click register node
-
Click register node and click the Run the Selected Target

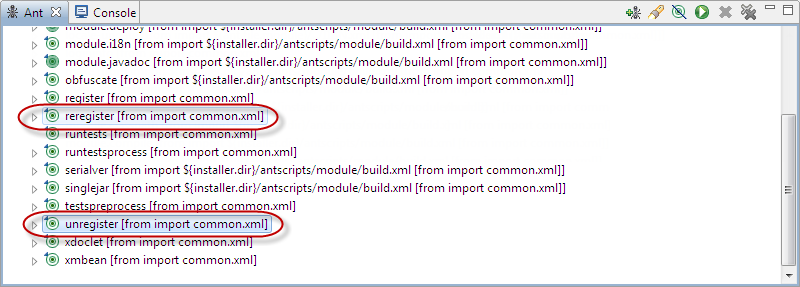
Figure 12: Unregister/Reregister options for a deployed component