Audit Management
Audit Management section allows for defining audit policies and searching for audit events as per requirement. This section has been divided into 3 sub-sections.
Policies
Events
Audit Policies
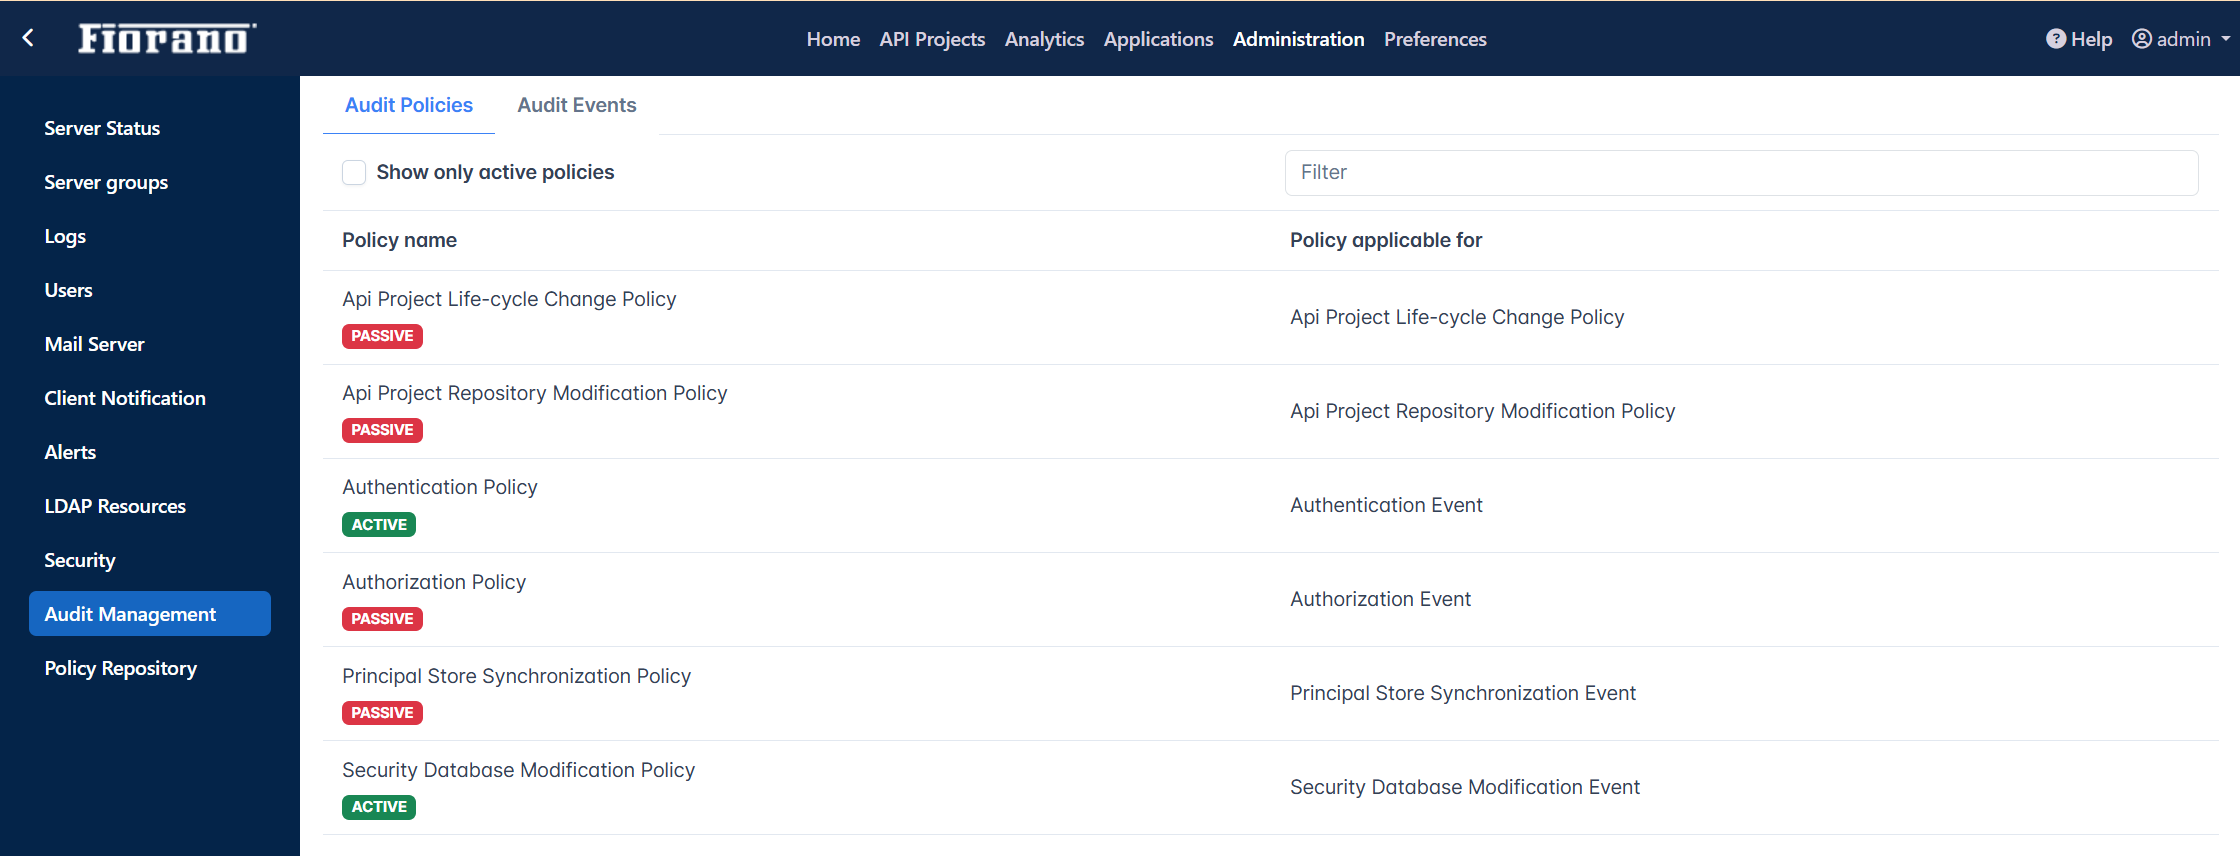
In this view, you can view/edit available audit policies. These policies define the actions that will be audited by the system. In a fresh installation, all policies are in passive state, meaning none of the action is audited. You can selectively enable the actions that needs to be audited.

The Show only active policy option helps to filter active policies.

Click a policy name to set the policy with status and category accordingly.
Event status
Success
Failure
Event category
Information
Error
Warning
Most of the policies will have their unique set of Audit Event IDs as well which may be enabled/disabled.

Audit Events
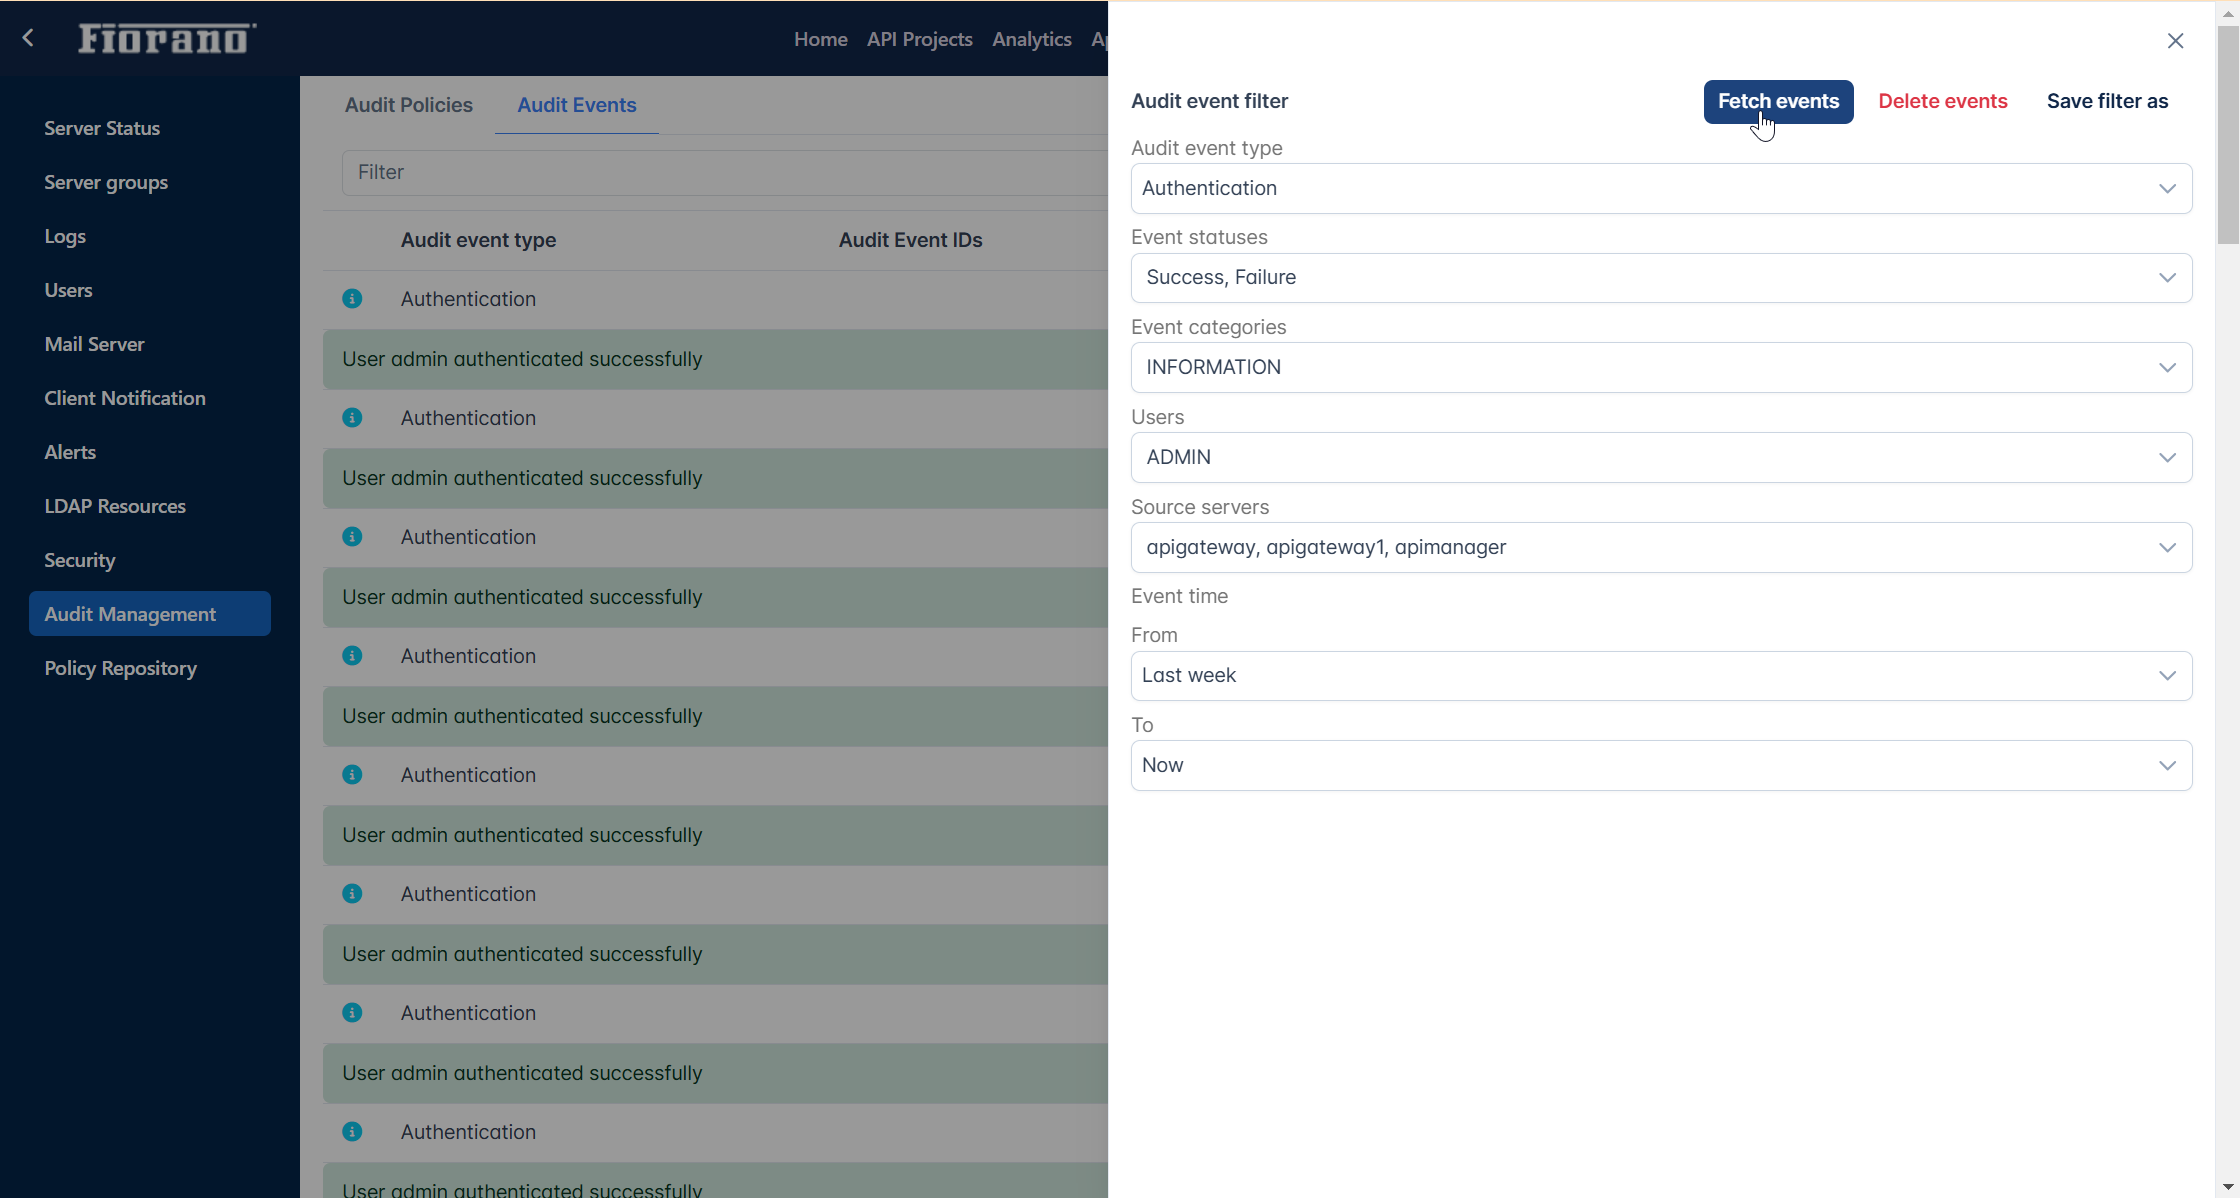
This view shows audit events based on the specified search criteria. A comprehensive list of audit event filters is available to refine the audit events as per requirement. This view also allows saving search preferences for later use, thus avoiding the painful task of creating audit filters each time you need to search.
Select the required events from the drop-down options and click the Fetch events button to generate the list of audit events. The Delete events button helps to clear the list.

Below is a snapshot of Audit Events page rendered after searching for certain audit events.

Saving a filter
For a pattern of audit events that need to be monitored frequently, the filtering specifications may be saved like a named configuration and can be used for future use. This avoids choosing the filters every time thus saving time and effort.
To save a filter for future use, perform the following actions:
Select the required filter criteria.
To save the filter that’s already running, click the Search button to switch it to the filtering panel.
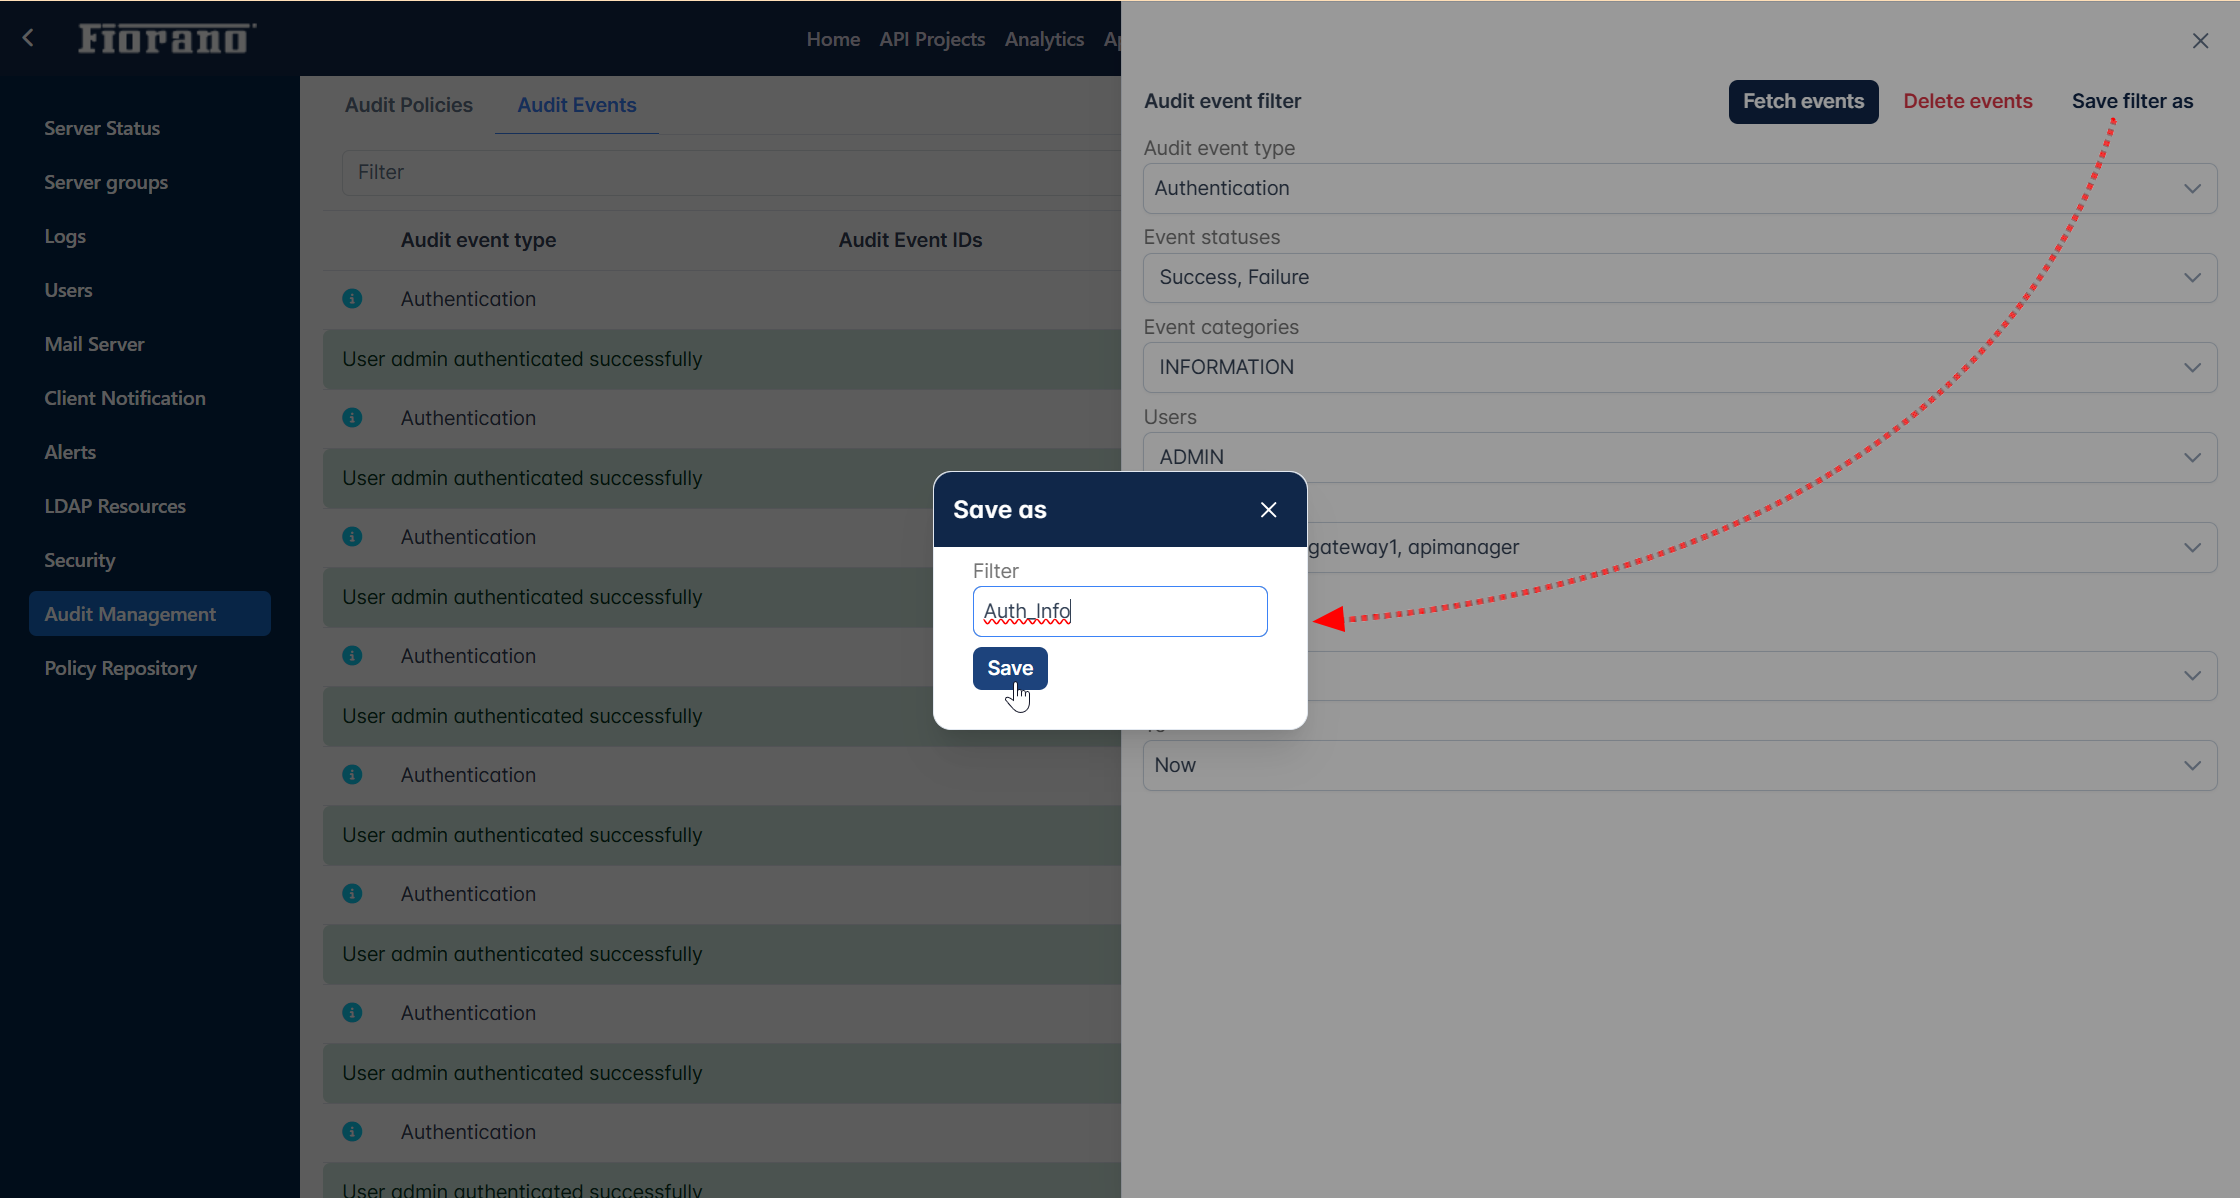
Click the Save filter as button.
Provide a name that refers to the particular audit event and click Save.

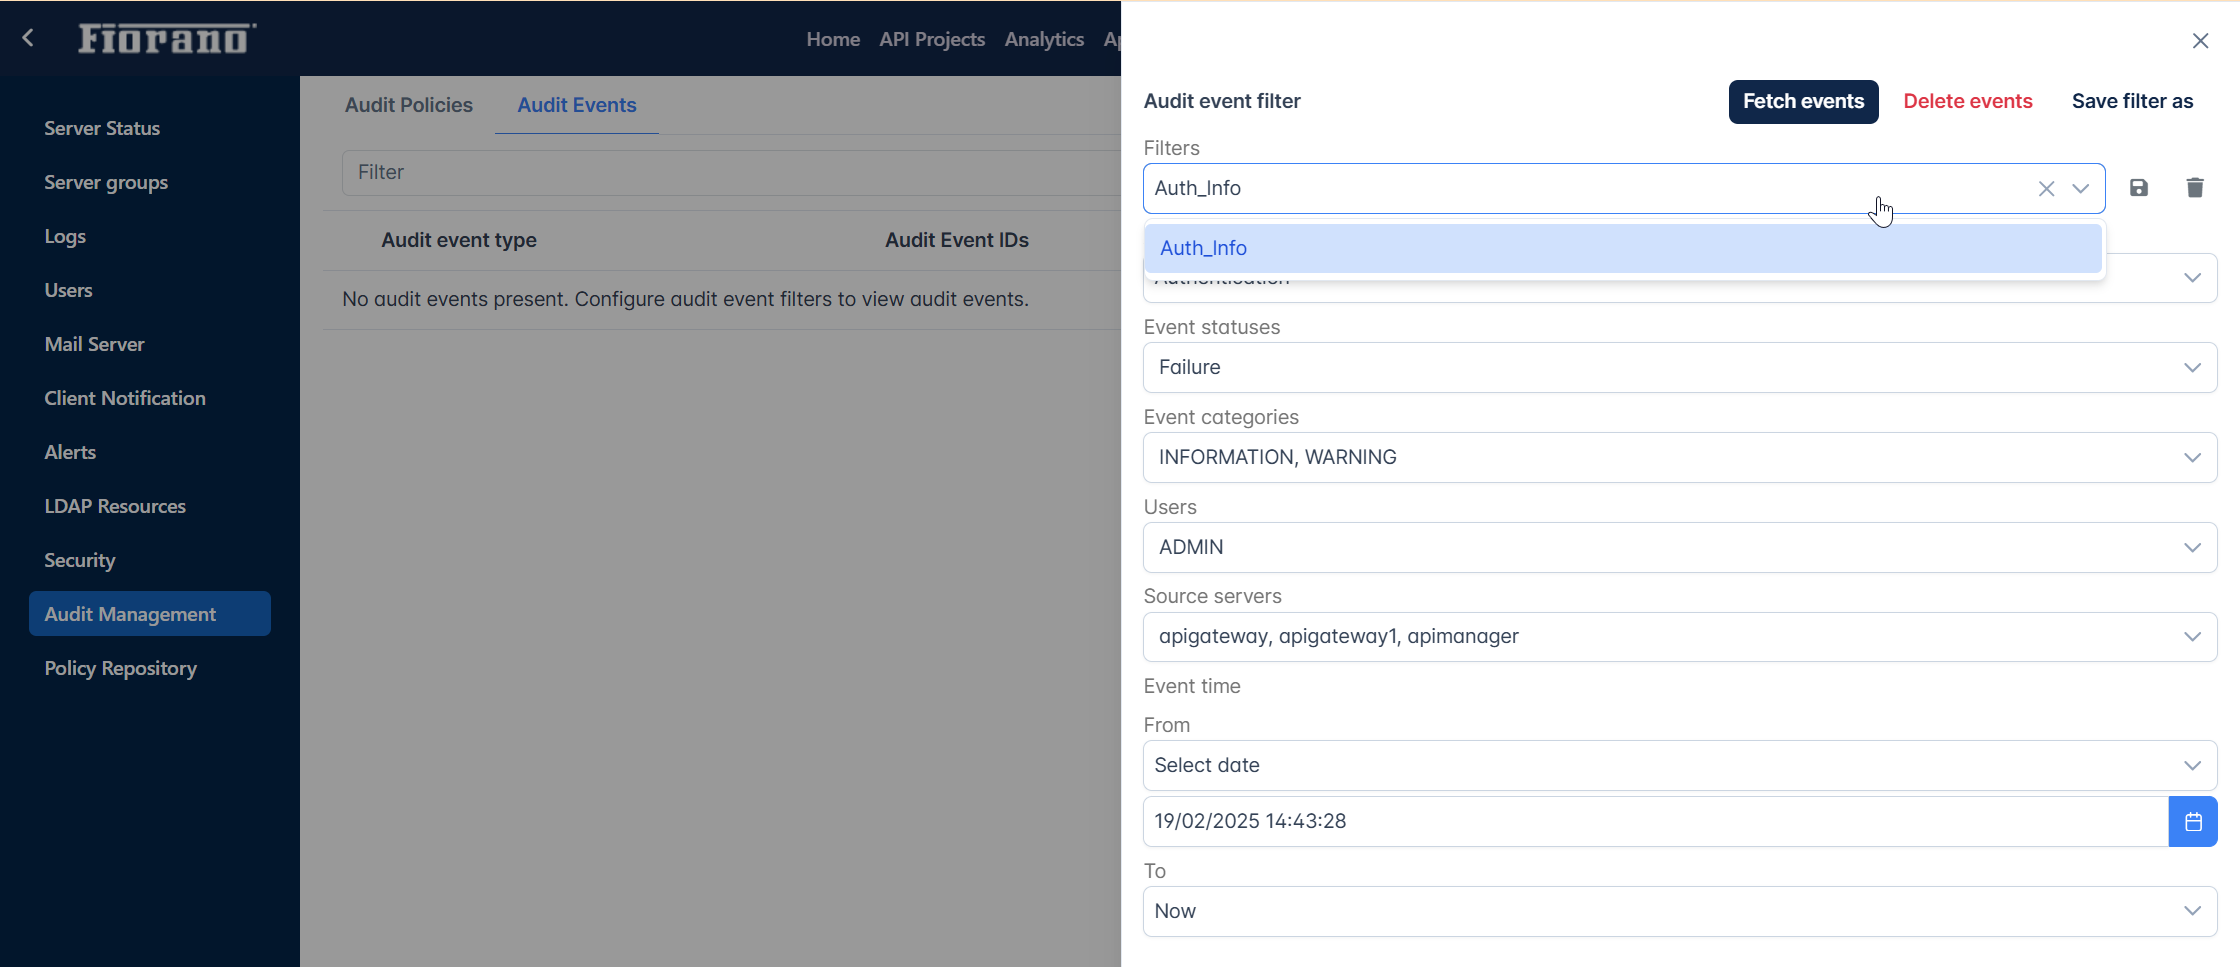
The saved filter name appears under the Filters drop-down.

Deleting an added filter
In case a filter is no more required, perform the following actions to remove the filter permanently:
Click the Delete button that is present next to the Filters drop-down.
Select the name of the filter that needs to be deleted.
Click the Delete button. Click Delete again in the Confirm dialog box.

