Configuring an HMAC policy
The HMAC functionality can be achieved by using the policies HMAC Code policy and Verify HMAC policy in conjunction, which ensures that encryption is done through HMAC.
This section illustrates how to use and test an HMAC policy using the Debug option.
Configuring the policies
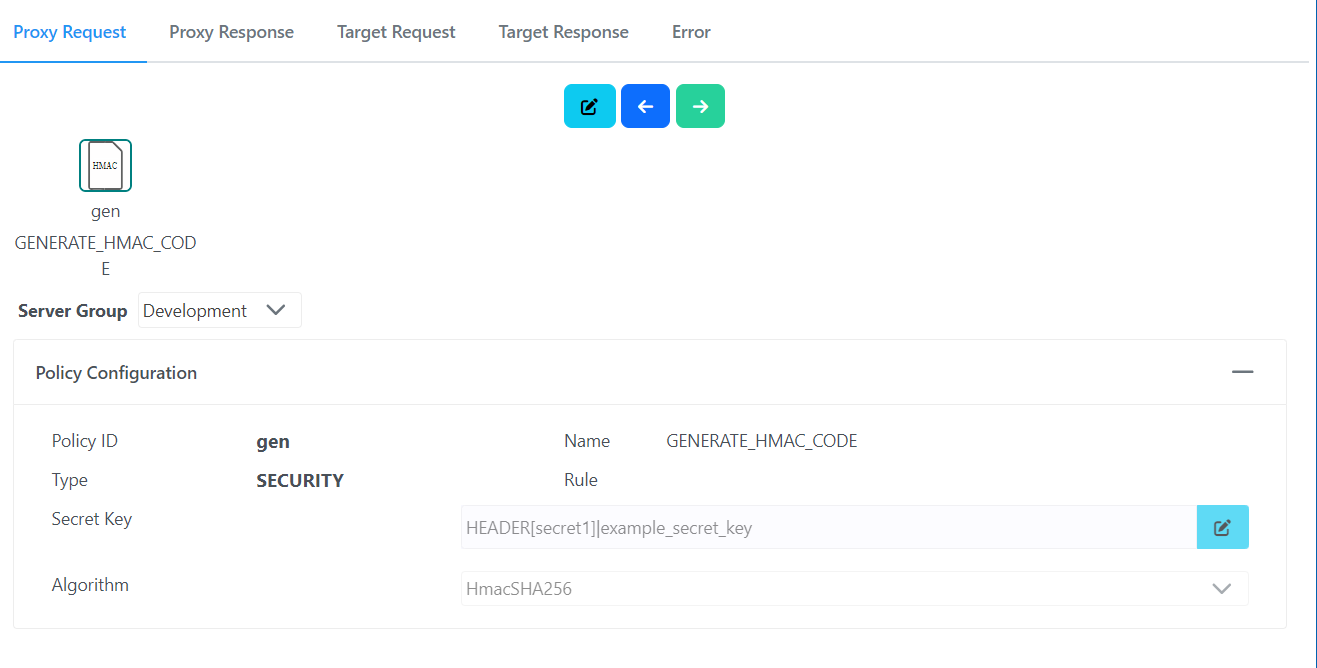
Open a project and add the policies referring to the sections - HMAC Code and Verify HMAC Code
Use the values provided in the Example content of the above sections.
Remember to click the Save button after adding values in the above policies.
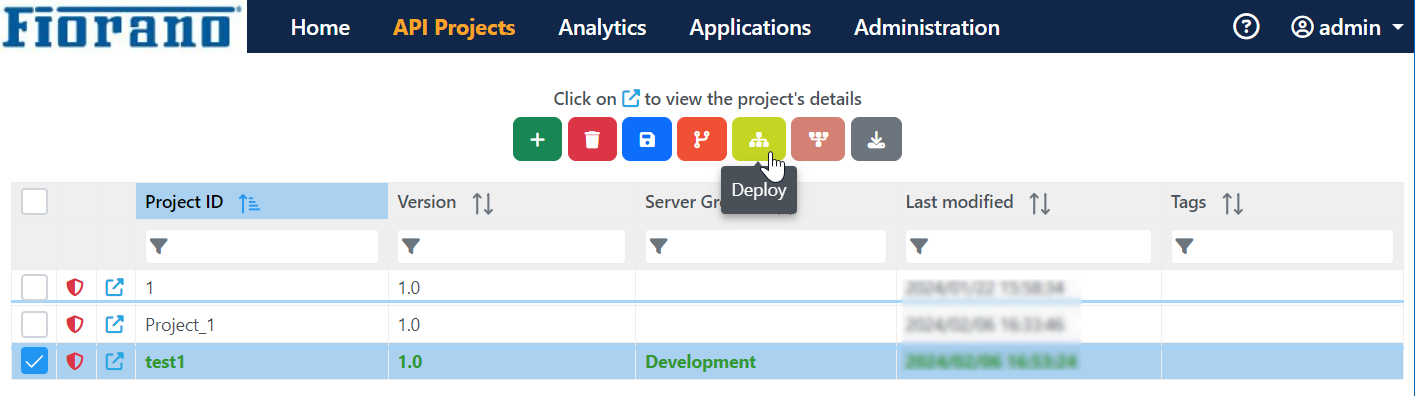
Deploying the project
Click the Deploy icon to deploy the project selecting the respecting environment on which it has to be deployed.
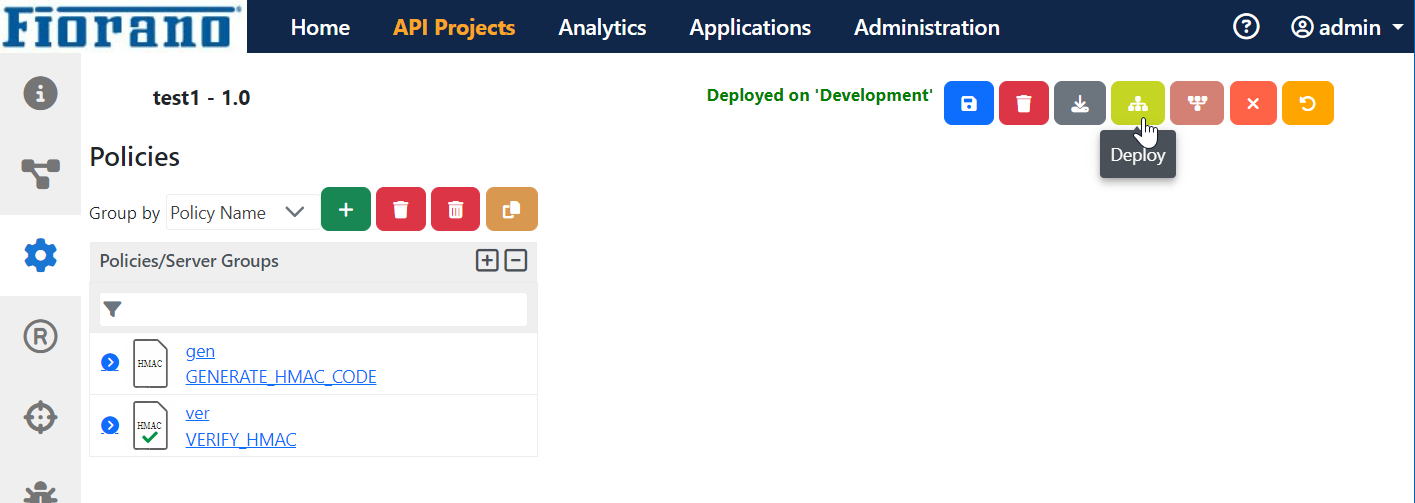
The project may be deployed from the API Projects home page as well.
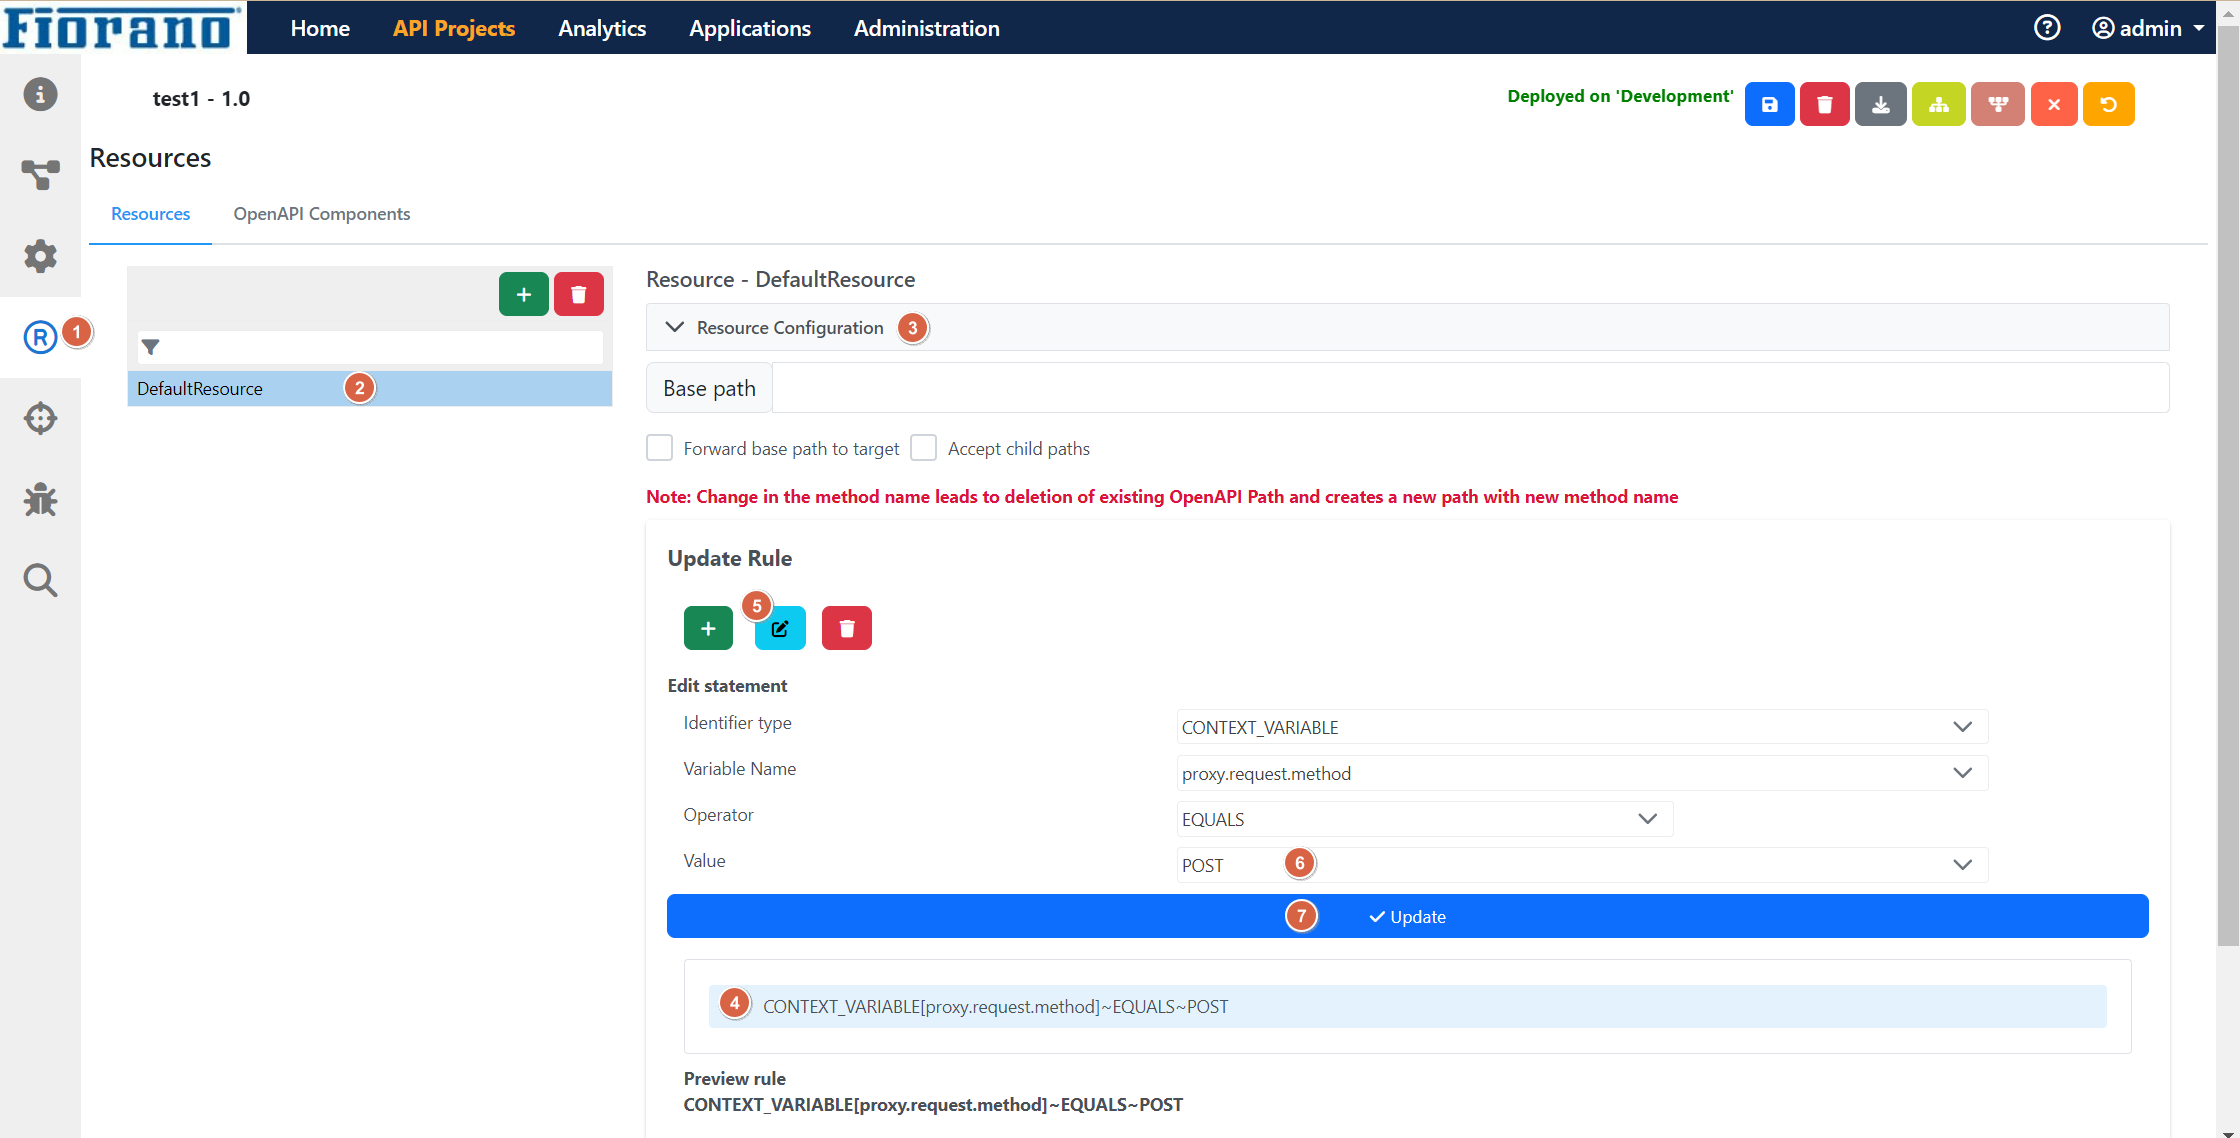
Configuring Rule in Resources
Go to the Resources tab.
Select the resource and expand the Resource Configuration section.
Click the statement under the Update Rule section, and click the Edit Statement button.
Select the value as “POST“.
Testing the policy configurations
Setting Project Level policies
Open the Project level policies tab.
In the Proxy Request tab, click the Edit button.
Select the HMAC Code policy.
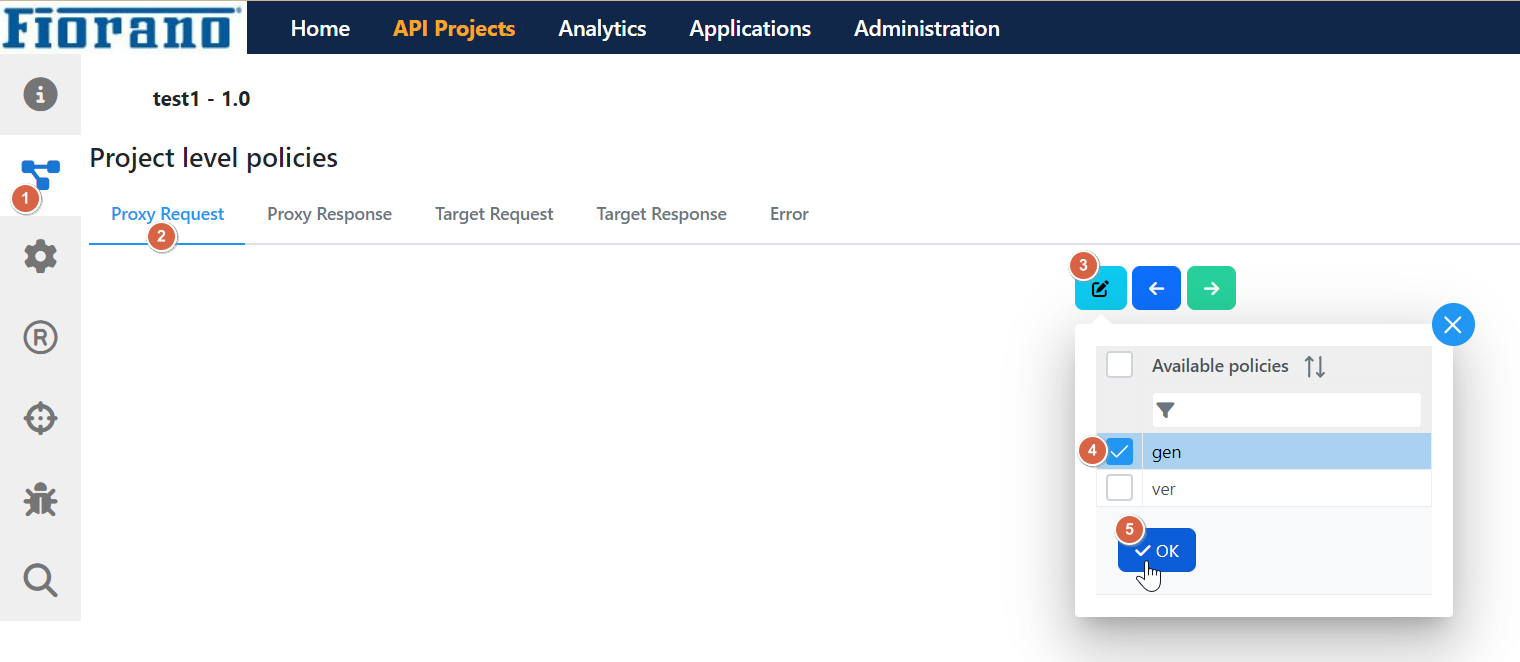
The policy gets added in the Proxy Request tab.
Similarly, add Verify HMAC policy under the Target Request tab.
Click the Save button.
Debugging the policy
Open the Debugger tab.
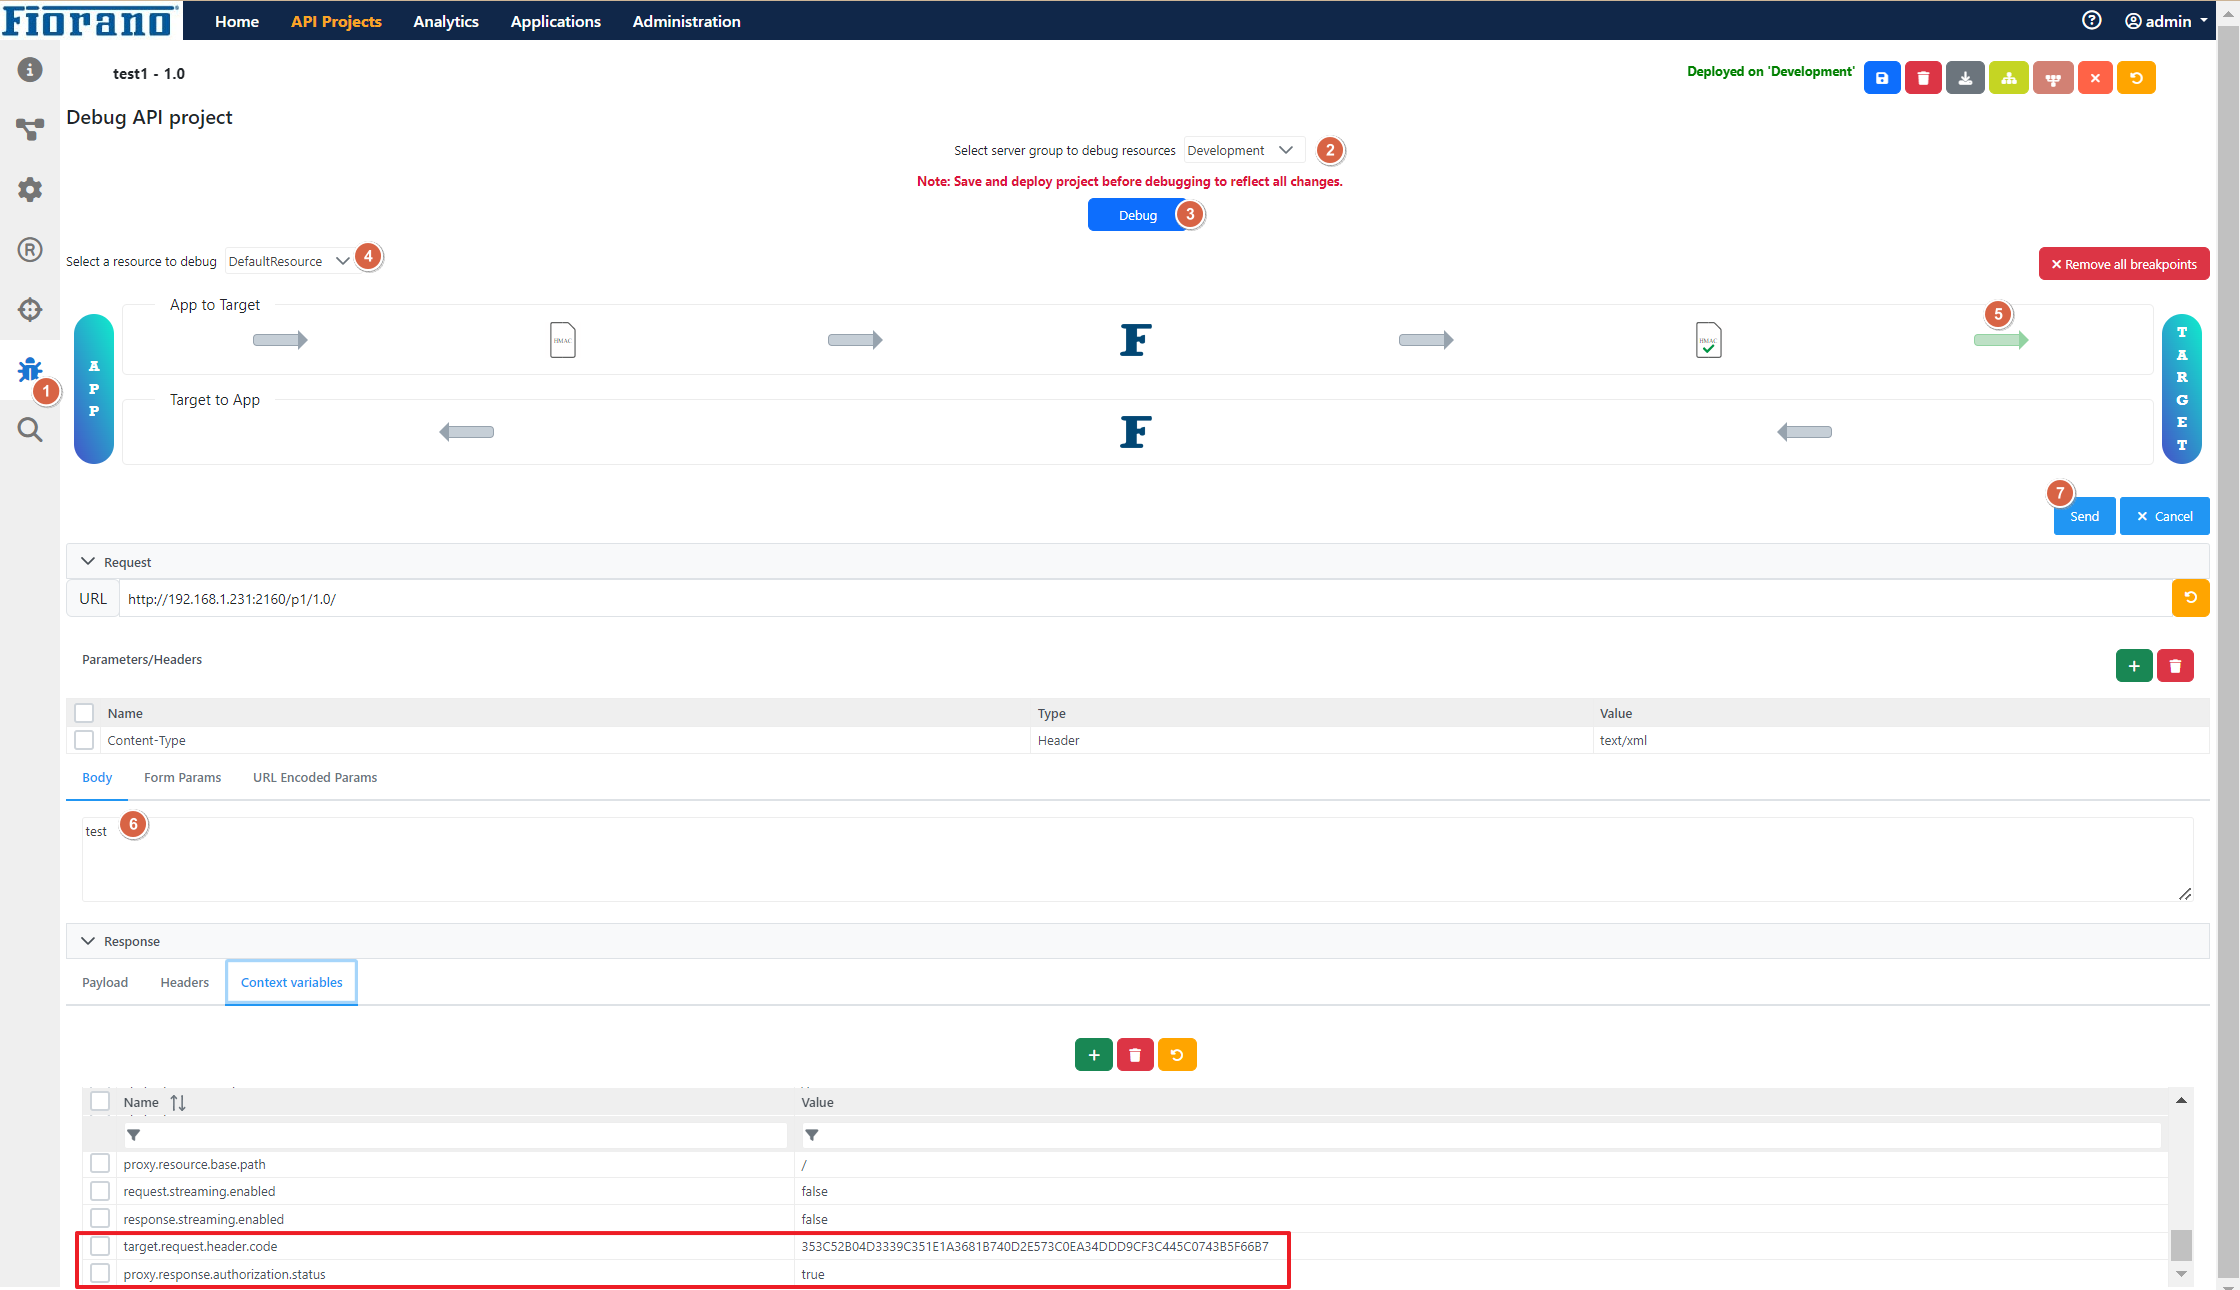
Select the environment under which the policies are configured, and click the Debug button.
Select the resource from the Select a resource to debug drop-down.
Add a breakpoint after the point where the Verify HMAC policy set.
Expand the Request section and provide the content in the body.
Click the Send new message button; the message reaches the target.
Validating the response
To validate that the message is encrypted and it is sent successfully,
Expand the Request section and open the Context Variable tab.
Check the following attributes:
target.request.header.code: represents the encrypted message.
proxy.response.authorization.status: “true“ indicates that the verification of the HMAC code is successful.
Refer to the bottom part of the image above where the two attributes above are highlighted.
The Message Flow explained
The client sends the request.
The Generate HMAC Code encrypts the payload in the request using a "secret key" and an algorithm.
The encrypted message gets transmitted further through the flow.
Before reaching the server, the encrypted message has to be verified using the Verify HMAC policy. The "secret key" which is passed in the message / set in policy will be used to recompute the HMAC code.
The recomputed HMAC gets verified with the HMAC code set for verification of the message.