Setting up Kubernetes Cluster on Google Cloud with Istio
Creating Kubernetes Cluster on Google Cloud
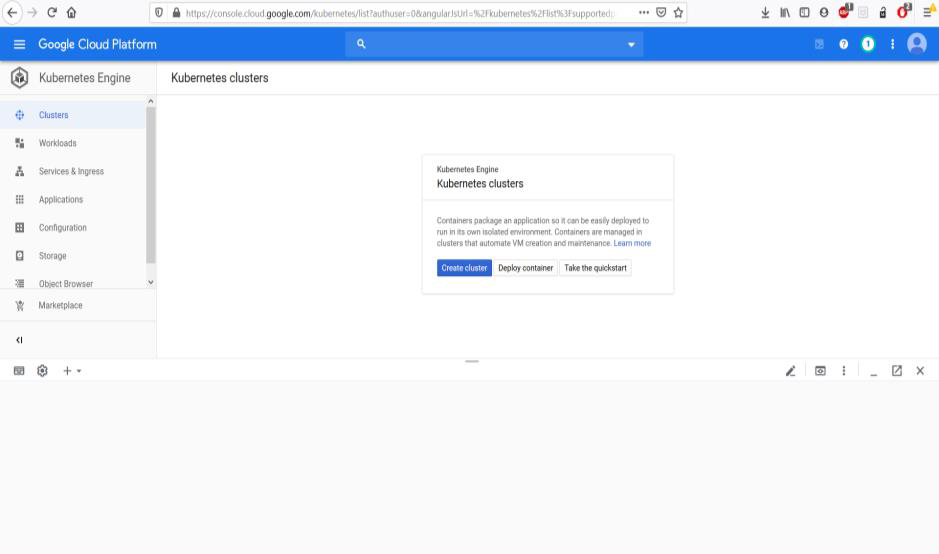
Login and Select Kubernetes Engine on Google Cloud Platform
Create a cluster by running the following command on cloud shell
$ gcloud container clusters create fiorano-api-cluster --cluster-version latest --machine-type=n1-standard-2 --num-nodes 4 --zone asia-south1-b --project esbtest-14082018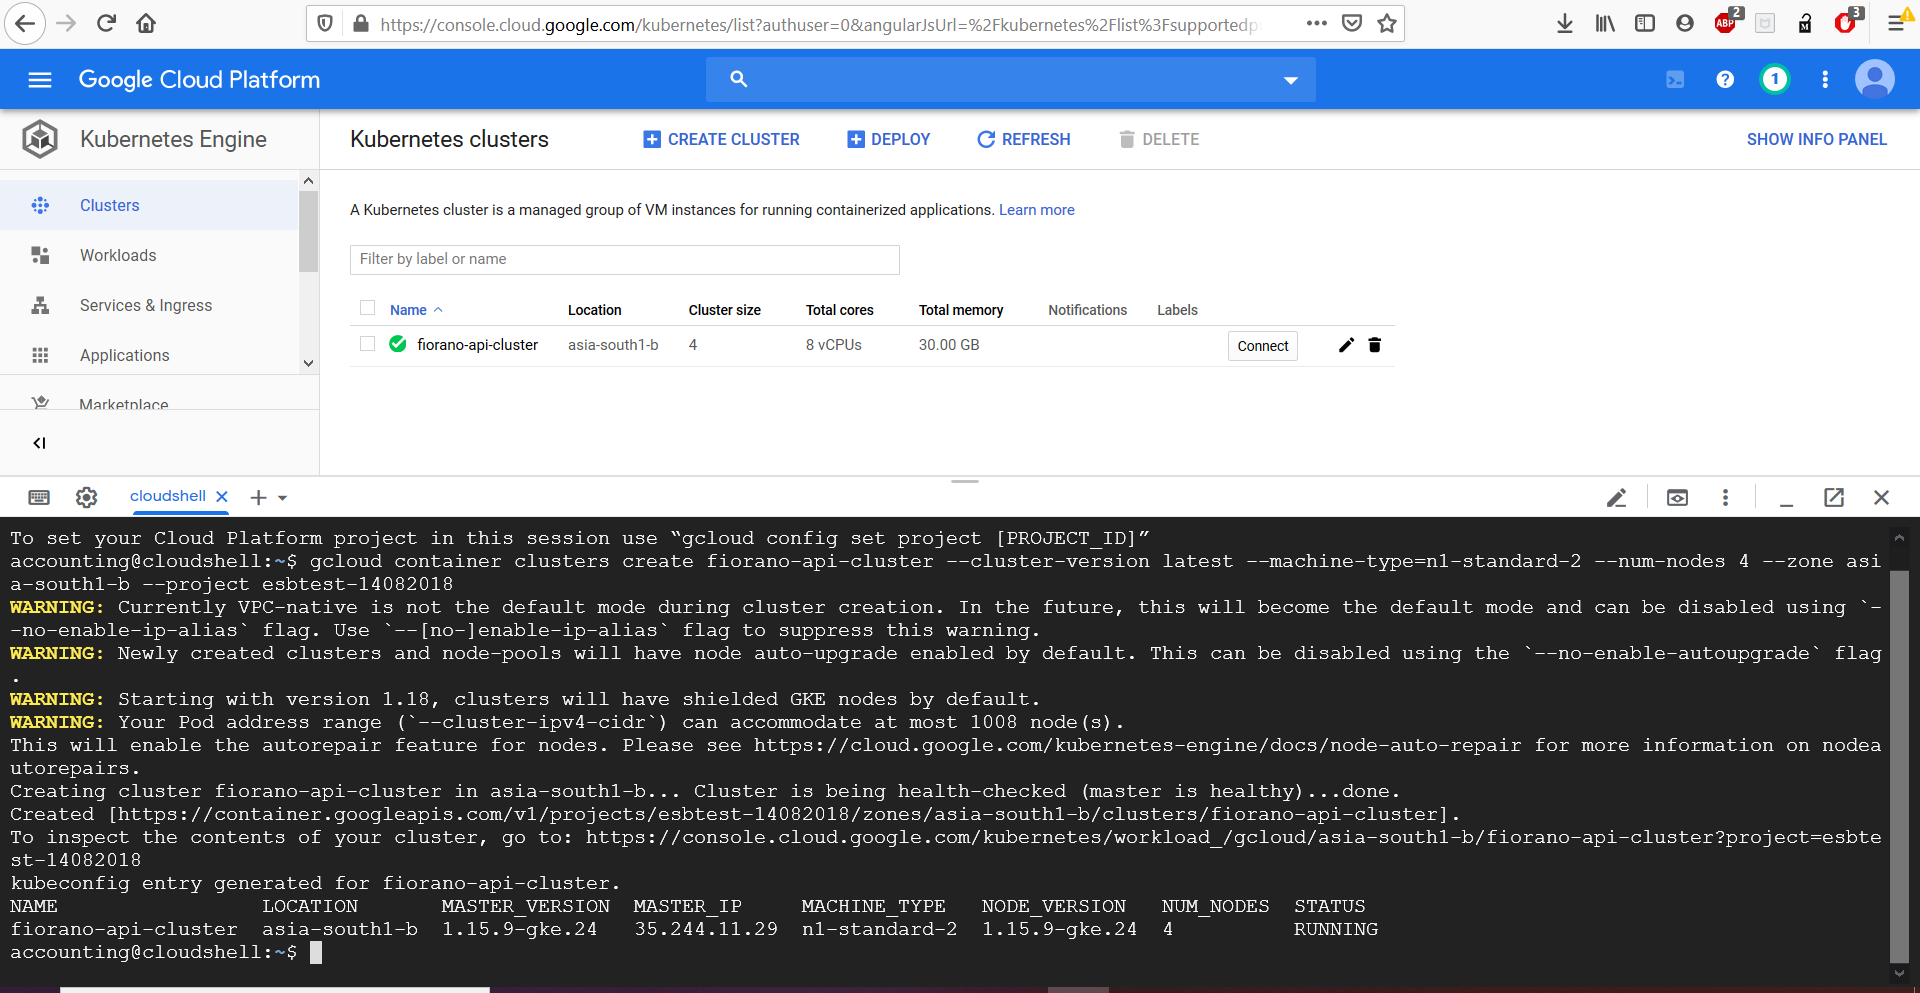
Retrieve credentials for kubectl
Example
$ gcloud container clusters get-credentials fiorano-api-cluster --zone asia-south1-b --project esbtest-14082018Grant cluster administrator (admin) permissions to the current user
To create the necessary RBAC rules for Istio, the current user requires admin permissions.
$ kubectl create clusterrolebinding cluster-admin-binding --clusterrole=cluster-admin --user=$(gcloud config get-value core/account)
Configuring Istio
Downloading Istio
Go to the Istio release page to download the installation file for your OS, or download and extract the latest release automatically (Linux or macOS) as mentioned in https://istio.io/docs/setup/getting-started/
Run the following in the cloud shell
$ curl -L https://istio.io/downloadIstio | sh -Adding istioctl client to your cloud system path
Please use the version of istio you downloaded and correct the paths below to suit your version
$ cd istio-1.5.0
$ export ISTIO_HOME="/path/to/istio/istio-1.5.0"
$ export PATH=$IedxzSTIO_HOME/bin:$PATH
Configuring Istio Profile
For this installation, we use the demo configuration profile. It’s selected to have a good set of defaults for testing along with dashboards like kiali, prometheus etc.
$ istioctl manifest apply --set profile=demo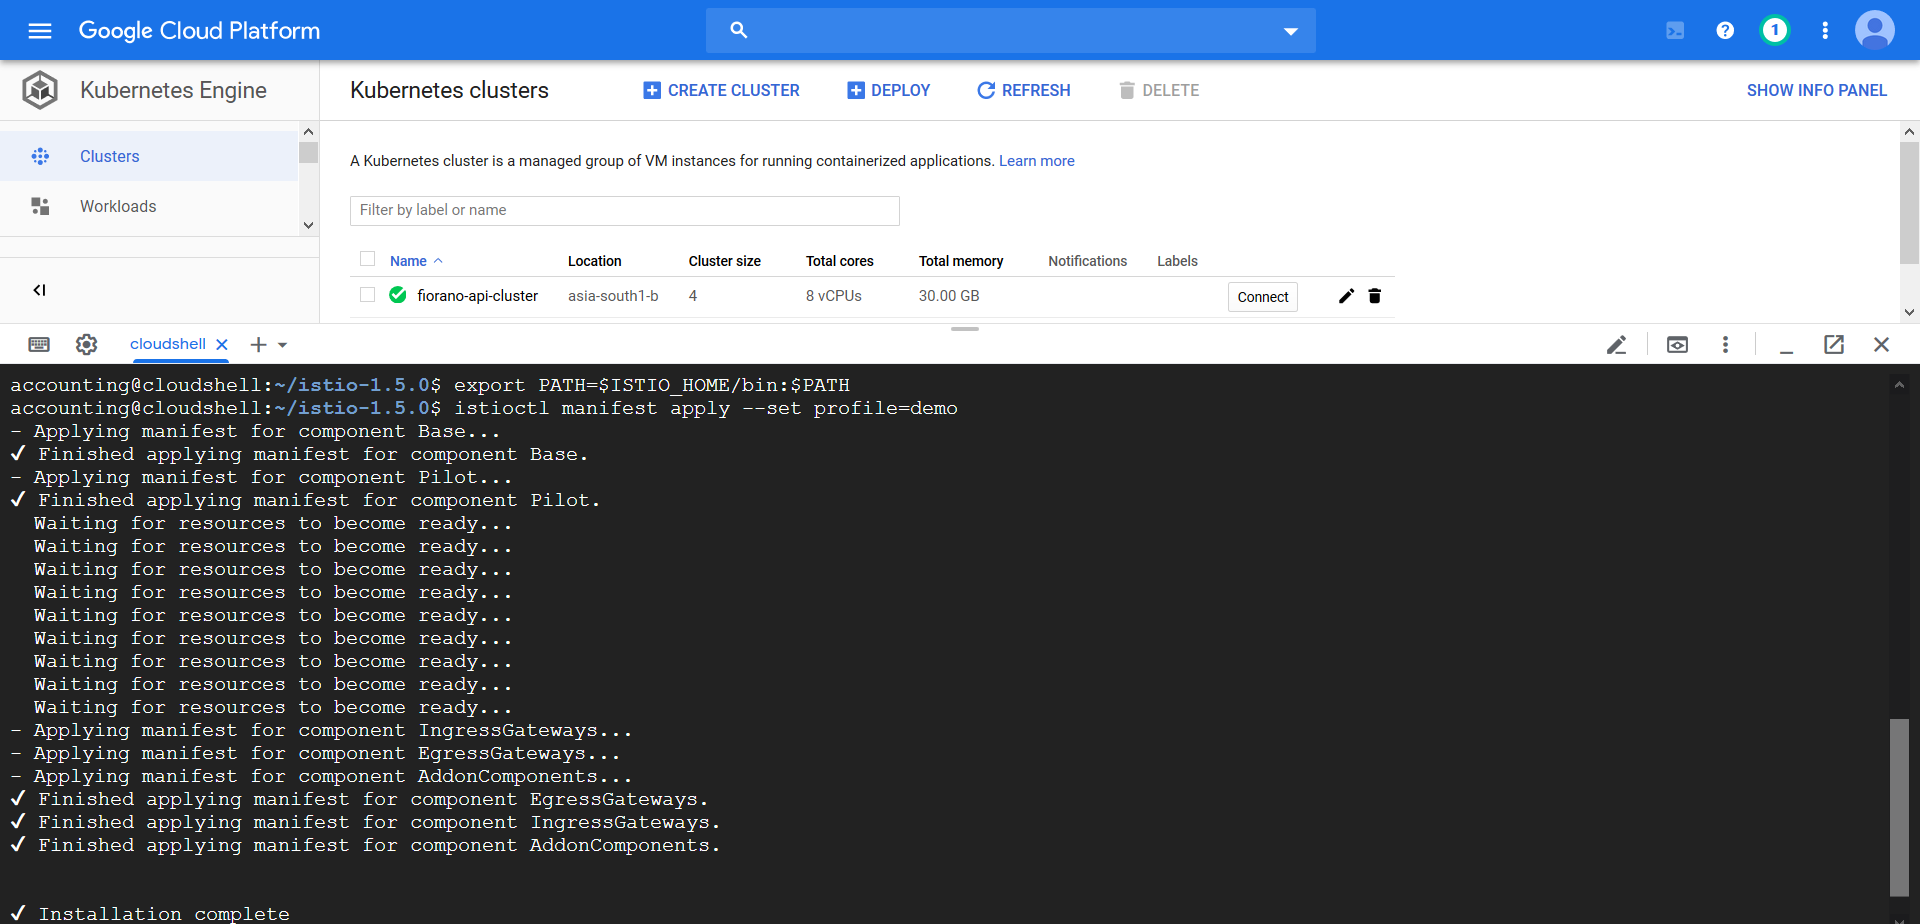
Configuring Istio Namespace to allow injection
Add a namespace label to instruct Istio to automatically inject Envoy sidecar proxies when you deploy your application later
$ kubectl label namespace default istio-injection=enabledConfiguration changes to Fiorano installer for cloud setup
In the Fiorano Latest installer, change the IP for Cassandra, Primary and Secondary URL as 10.35.240.20 (configured cluster IP for AMS) in config deployer in for server1 profile AGS.
Configuring the Docker image
- Upload the tar files created for AMS and AGS compressed as zip to the google cloud console, after upload extract the same.
- Change directory and go to the directory containing the docker images using cloud shell
Run the following code blocks to load docker images to the cloud docker
CODE$ docker load < FIORANO_DOCKER_IMAGEChange the FIORANO_DOCKER_IMAGE to the actual docker image file name for both AMS and AGS
Add Cred Helper
Add the Docker credHelper entry to Docker's configuration file, or creates the file if it doesn't exist. This will register gcloud as the credential helper for all Google-supported Docker registries. ( refer to https://cloud.google.com/container-registry/docs/pushing-and-pulling)CODE$ gcloud auth configure-docker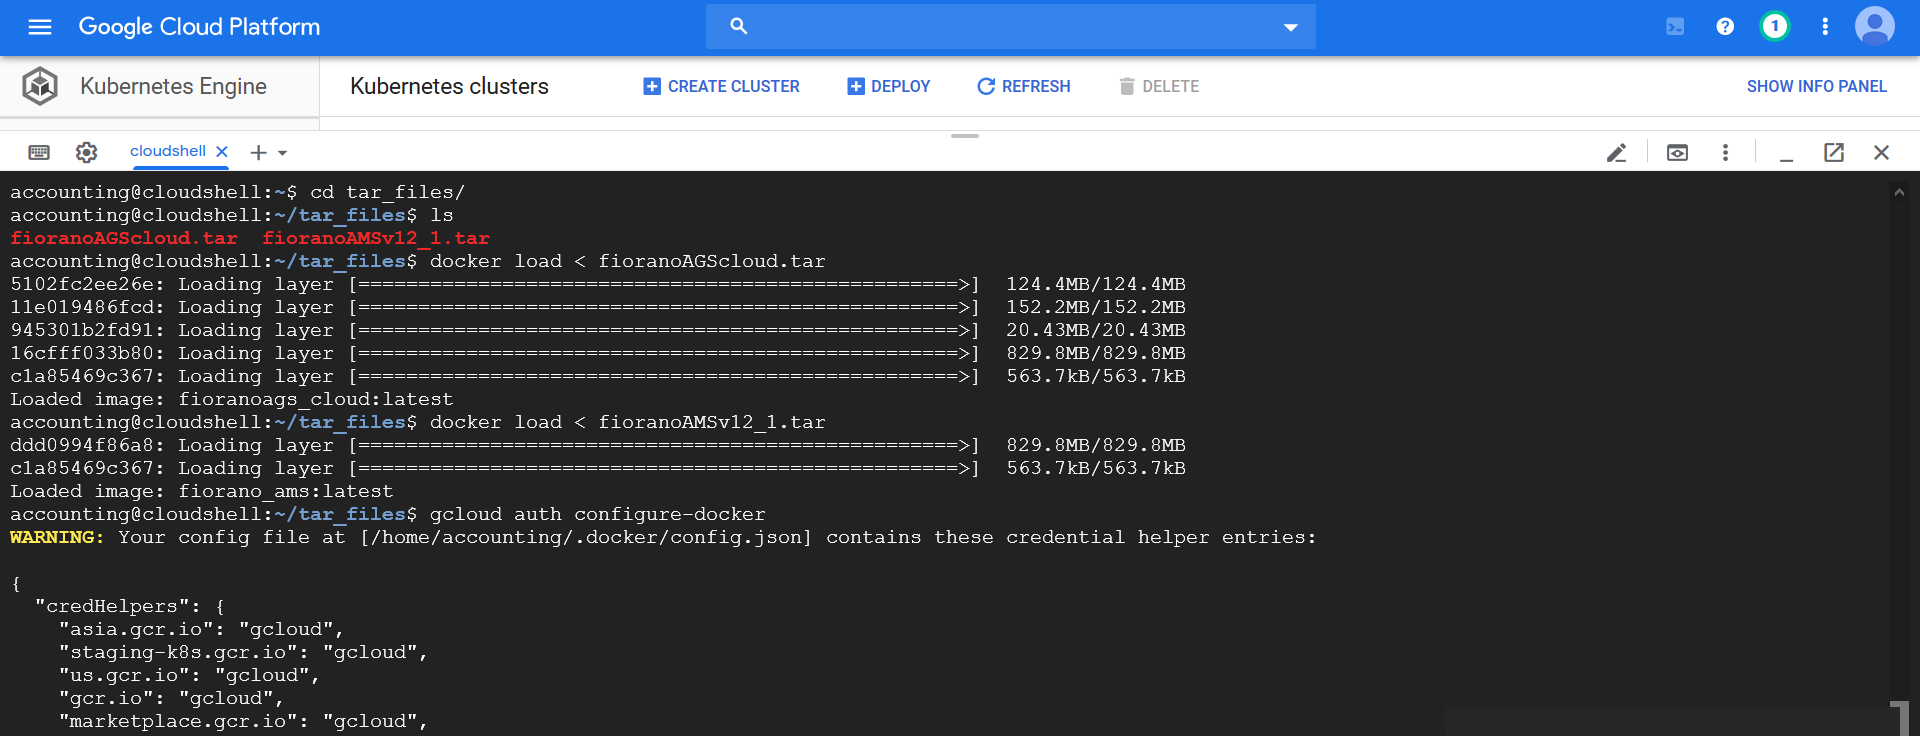
Create tags with registry name
Example
CODE$ docker tag fiorano_ams gcr.io/esbtest-14082019/fiorano_ams:latest $ docker tag fiorano_ags gcr.io/esbtest-14082019/fiorano_ags:latestPush the tagged images to container registry
Example
CODE$ docker push gcr.io/esbtest-14082018/fiorano_ams:latest $ docker push gcr.io/esbtest-14082018/fiorano_ags:latest
Create Persistent Volume Claims
Run the following command to execute the yaml files for persistent volume claim configuration, please navigate to the folder containing the yamls before executing
Click on the file name to download a sample template for the respective yaml.
- CODE
$ kubectl apply -f cassandra_pv_pvc.yaml - CODE
$ kubectl apply -f postgres_pv_pvc.yaml - CODE
$ kubectl apply -f fiorano_pv_pvc.yaml
Configure Postgres Login
Apply the postgres configuration file for login credentials
The template of the file can be found here.
$ kubectl apply -f postgres-config.yamlCreate the Load Balancer Services
Please update the Cluster IP field in services.yaml and ags-services.yaml based on your setup. For services.yaml use the same cluster IP that we had set in the Fiorano profile while creating the docker image for AGS.
Load Balancer Configuration for AMS
Sample services.yaml can be found here
$ kubectl apply -f services.yamlLoad Balancer Configuration for AGS
Sample ags-services.yaml can be found here
$ kubectl apply -f ags-services.yamlWait for a few minutes for the Loadbalancer endpoint to get assigned.
Configuring Ingress hosts and ports
$ export INGRESS_HOST=$(kubectl -n istio-system get service istio-ingressgateway -o jsonpath='{.status.loadBalancer.ingress[0].ip}')
$ export INGRESS_PORT=$(kubectl -n istio-system get service istio-ingressgateway -o jsonpath='{.spec.ports[?(@.name=="http2")].port}')
$ export SECURE_INGRESS_PORT=$(kubectl -n istio-system get service istio-ingressgateway -o jsonpath='{.spec.ports[?(@.name=="https")].port}')
Create AMS, Cassandra and postgres deployment
Check if the image name in yaml is the same as tagged in the gcloud registry otherwise pods may fail
Sample yaml file can be found here.
$ kubectl apply -f fiorano-cass-post-deployment.yamlWait for a few minutes to get the pods running
Create AGS Stateful set deployment
Check if the image name in yaml is the same as tagged in the gcloud registry otherwise pods may fail
Sample yaml file can be found here.
$ kubectl apply -f ags-stateful.yamlCreate the Kubernetes Gateway Service to access services outside a cluster
Check if hosts field is "*" or specify the Ingressgateway IP which is in INGRESS_HOST )
Sample yaml file can be found here.
$ kubectl apply -f gateway.yamlCreate the Kubernetes Virtual Services which would specify the Host URI
Check for /api in prefix and check if hosts field is the Ingressgateway IP which is in INGRESS_HOST
Click the file names to get sample virtual.yaml and resource.yaml files
$ kubectl apply -f virtual.yaml
$ kubectl apply -f resource.yaml
Now check if external access works by opening browser and giving URL as: http://$INGRESS_HOST:$INGRESS_PORT/apimgmt
To check INGRESS_HOST and PORT give the following command in cloud shell
echo $INGRESS_HOST:$INGRESS_PORT
Load Kiali Dashboard
$ istioctl dashboard kiali